I remember the first time I tried to make candy apples. It was a chaotic autumn afternoon, leaves swirling outside, and my kitchen, honestly, looked like a sugar bomb went off. I had this vision of creating these gorgeous, glossy treats, something that screamed “fall festival” but in my own cozy space. My first attempt? A sticky, lumpy mess that tasted okay but looked like a toddler’s art project. My husband still teases me about it! But that’s how I learned, right? Through trial and error, I stumbled upon the secret to these vibrant Sunset Glow Candy Apples, and now, they bring so much joy to our home, smelling of sweet caramel and crisp apples. They’re a little bit of magic, I swear.
One time, I was so excited to make a batch of Sunset Glow Candy Apples for a friend’s party, I completely forgot to properly wash and dry the apples. Rookie mistake! The candy coating just slid right off, pooling at the bottom like a sad, sugary puddle. I stood there, hands on my hips, just staring at the disaster. It taught me a valuable lesson, though: prep matters! Sometimes, the simplest steps are the most critical. Now, I double-check everything, even if my kitchen looks like a tornado just passed through.

Ingredients for Sunset Glow Candy Apples
- Medium Apples (Granny Smith or Fuji): These are the stars, obviously! I go for Granny Smiths for that tart bite against the sweet candy, or Fujis if I want something a little sweeter. Make sure they’re firm and blemish-free, hon.
- Granulated Sugar: This is the backbone of our candy coating. Don’t skimp, don’t try to use brown sugar (I tried that once, it just didn’t set right). It’s gotta be white granulated for that clear, crisp shell.
Light Corn Syrup: This little gem prevents crystallization, giving us that perfectly smooth, glossy finish. I didn’t expect it to make such a difference, but it truly does. You can find it in the baking aisle, usually.
Water: Just plain old tap water! It’s the solvent that helps dissolve the sugar and corn syrup into a beautiful, molten candy.
Red Food Coloring (Gel): Essential for that fiery sunset red. I prefer gel colors because they’re more concentrated and give a richer hue without adding too much liquid.
- Yellow Food Coloring (Gel): This is what gives us the “glow” in Sunset Glow Candy Apples, a touch of warmth to blend with the red. Just a few drops make a huge difference in creating that gradient effect.
- Vanilla Extract (Optional): A tiny splash at the end can add a lovely depth of flavor. Honestly, I sometimes forget it, but when I remember, it’s a nice little extra touch.
- Wooden Skewers or Candy Apple Sticks: You need something sturdy to hold onto! I’ve used flimsy sticks before, and let’s just say dipping became a high-stakes balancing act.
Instructions for Sunset Glow Candy Apples
- Prep Your Apples:
- First things first, get those apples ready. Wash them really, really well to remove any waxy coating. I usually give them a good scrub with warm water and a little vinegar, then dry them completely. And I mean bone-dry! Any moisture means your candy won’t stick, and trust me, I’ve had that happen. Then, carefully insert a wooden skewer or candy apple stick into the stem end of each apple. This is where you want to be firm but gentle, so you don’t split the apple. It’s the foundation for your beautiful Sunset Glow Candy Apples.
- Combine Candy Ingredients:
- In a heavy-bottomed saucepan, combine your granulated sugar, light corn syrup, and water. Give it a good stir over medium heat until the sugar dissolves. Don’t go crazy stirring once it starts boiling, though, that can cause crystallization, and we want that smooth, clear candy. I remember one time, I stirred too much, and my candy turned grainy. Oops! Just let it do its thing, watch it bubble and transform, that’s the magic happening for your Sunset Glow Candy Apples.
- Reach the Right Temperature:
- Now, this is the crucial part, honey! Attach a candy thermometer to the side of your saucepan, making sure it doesn’t touch the bottom. Bring the mixture to a rolling boil and cook it, without stirring, until it reaches precisely 300-310°F (149-154°C). This is the “hard crack” stage, where your candy will be perfectly brittle. If it doesn’t get hot enough, your candy will be sticky. If it goes too high, it’ll burn. I’ve ruined a few batches by not paying attention to the thermometer, so keep an eye on it!
- Add Your Colors and Flavor:
- Once your candy mixture hits that perfect temperature, remove it from the heat immediately. Stir in your red and yellow gel food coloring. I like to start with more red and just a few drops of yellow to get that gorgeous orange-red, like a real sunset. If you’re using vanilla extract, stir that in now too. Be careful, the mixture is super hot! This is where your Sunset Glow Candy Apples really start to come to life, visually. The aroma is pretty sweet too, honestly.
- Dip the Apples:
- Working quickly (because that candy cools fast!), tilt your saucepan slightly. Dip each prepared apple into the candy mixture, rotating it to fully coat the apple. Let any excess drip off back into the pan. I usually twirl it a bit to get a nice, even coating. Don’t let it get too thick, we want that crisp shell, not a clunky one. This step always feels a bit like an art project, trying to get that perfect, glossy finish on each of your Sunset Glow Candy Apples.
- Cool and Set:
- As soon as each apple is coated, place it on a sheet of parchment paper or a silicone baking mat that you’ve lightly greased (or not, if using silicone). Let them cool completely at room temperature until the candy is hard and shiny. This usually takes about 20-30 minutes. Resist the urge to touch them until they’re fully set, you don’t want fingerprints on your beautiful creations! When they’re done, they should look like little jewels, just like the sunset. These Sunset Glow Candy Apples are a triumph!
I remember one autumn evening, after a particularly rough week, I decided to make a batch of these Sunset Glow Candy Apples. The kitchen was a bit of a mess, as usual, but as I watched the sugar syrup bubble and then transform into that beautiful, glowing coating, I felt a calm I hadn’t expected. It was a simple act, but the focus, the colors, the sweet smell it was grounding. Sometimes, cooking isn’t just about the food, it’s about the little moments of peace you find in the process. And honestly, biting into that crisp, sweet apple after all that effort? Pure bliss.
Storage Tips for Sunset Glow Candy Apples
So, you’ve made these gorgeous Sunset Glow Candy Apples, and now you’re wondering how to keep them looking fabulous. Here’s what I’ve learned through a few sticky mishaps! Don’t, I repeat, do not put them in the refrigerator. The humidity in the fridge is the enemy of candy apples, it’ll make them sticky and soft. I microwaved one once to “fix” it, and the coating just melted into a sad puddle so don’t do that lol. The best way to store them is at room temperature, individually wrapped in cellophane or a small treat bag. Keep them away from direct sunlight and any moisture. They’ll generally stay good and crunchy for about 3-5 days. After that, the candy might start to soften a bit, but they’ll still be tasty, just not as perfectly crisp. They hold up pretty well if you treat them right!

Ingredient Substitutions for Sunset Glow Candy Apples
I’m all about experimenting in the kitchen, even if it sometimes leads to hilarious failures! For these Sunset Glow Candy Apples, some ingredients are pretty non-negotiable. For instance, the granulated sugar and light corn syrup are key for that hard, glossy shell. I tried using honey instead of corn syrup once, thinking it would be a “healthier” swap, but it got super sticky and didn’t set properly. It was edible, kinda, but definitely not the crisp candy apple experience. As for the apples, while Granny Smiths are my go-to for that tart contrast, you can absolutely use other firm varieties like Honeycrisp or Gala. Just make sure they’re not too soft, or they’ll get mushy under the candy. And for coloring, gel food colors are truly the best for vibrant hues without diluting the candy. Liquid colors just don’t give the same punch for your beautiful Sunset Glow Candy Apples.
Serving Suggestions for Sunset Glow Candy Apples
These Sunset Glow Candy Apples are already a showstopper on their own, but a little presentation goes a long way! I love serving them upright in a cute jar or a rustic wooden crate for a fall-themed party. For a more intimate setting, pairing them with a warm mug of spiced cider or a creamy vanilla bean ice cream (if you don’t mind the clash of hot and cold!) is just divine. Honestly, biting into that crisp candy and tart apple, perhaps while watching a spooky movie or curled up with a good book, is my idea of a perfect autumn evening. They’re also fantastic as a vibrant treat at a picnic or a family gathering. Just make sure to have plenty of napkins handy, because they can be a bit messy in the best way!
The Sweet Backstory of Sunset Glow Candy Apples
Candy apples, in general, have this wonderfully nostalgic feel, don’t they? They take me right back to childhood fairs and festivals, the air thick with the smell of popcorn and sweet treats. The idea for these particular Sunset Glow Candy Apples came to me one evening as I watched a truly breathtaking autumn sunset from my kitchen window. The sky was ablaze with reds, oranges, and yellows, and I thought, “Wouldn’t it be incredible to capture that vibrancy in a candy apple?” It felt like a small, personal challenge, a way to bottle up that fleeting beauty. While classic candy apples have a long history, dating back to 1908 in New Jersey, my “sunset glow” version is my own little homage to those vibrant fall evenings and the simple joy of creating something beautiful with my hands. It’s a taste of autumn, made with a whole lot of heart.
Honestly, making these Sunset Glow Candy Apples has become a true autumn ritual for me. They’re a little bit of work, a little bit of magic, and a whole lot of joy. Seeing those vibrant colors gleaming under the light, knowing the effort and love that went into each one, it’s just so satisfying. They really do capture the essence of a crisp, colorful fall day. I hope you give them a try and find as much happiness in making (and eating!) them as I do. Don’t forget to share your own sunset creations with me!

Frequently Asked Questions About Sunset Glow Candy Apples
- → Why do my Sunset Glow Candy Apples get sticky?
Usually, it’s because the candy mixture didn’t reach the “hard crack” stage (300-310°F). Or, sometimes, too much humidity in the air can make them sticky. I’ve had both happen, honestly!
- → Can I use any kind of apple for Sunset Glow Candy Apples?
Not just any! You want firm, crisp apples like Granny Smith, Fuji, or Honeycrisp. Softer apples can get mushy, and you won’t get that satisfying crunch. I prefer Granny Smiths for their tartness.
- → How do I get the candy coating so smooth on my Sunset Glow Candy Apples?
The secret is light corn syrup, which prevents sugar crystallization. Also, avoid stirring too much once it boils, and make sure your apples are completely wax-free and dry. Those little details make a big difference!
- → How long do Sunset Glow Candy Apples last?
If stored properly at room temperature, individually wrapped, they’ll stay crisp and delicious for about 3-5 days. My family usually devours them before then, so storage isn’t often an issue, lol.
- → Can I change the colors of my Sunset Glow Candy Apples?
Absolutely! That’s the fun part. You can use any gel food coloring you like. I’ve done deep blues for a “midnight sky” theme, and even green for a “witch’s brew” apple. Get creative!

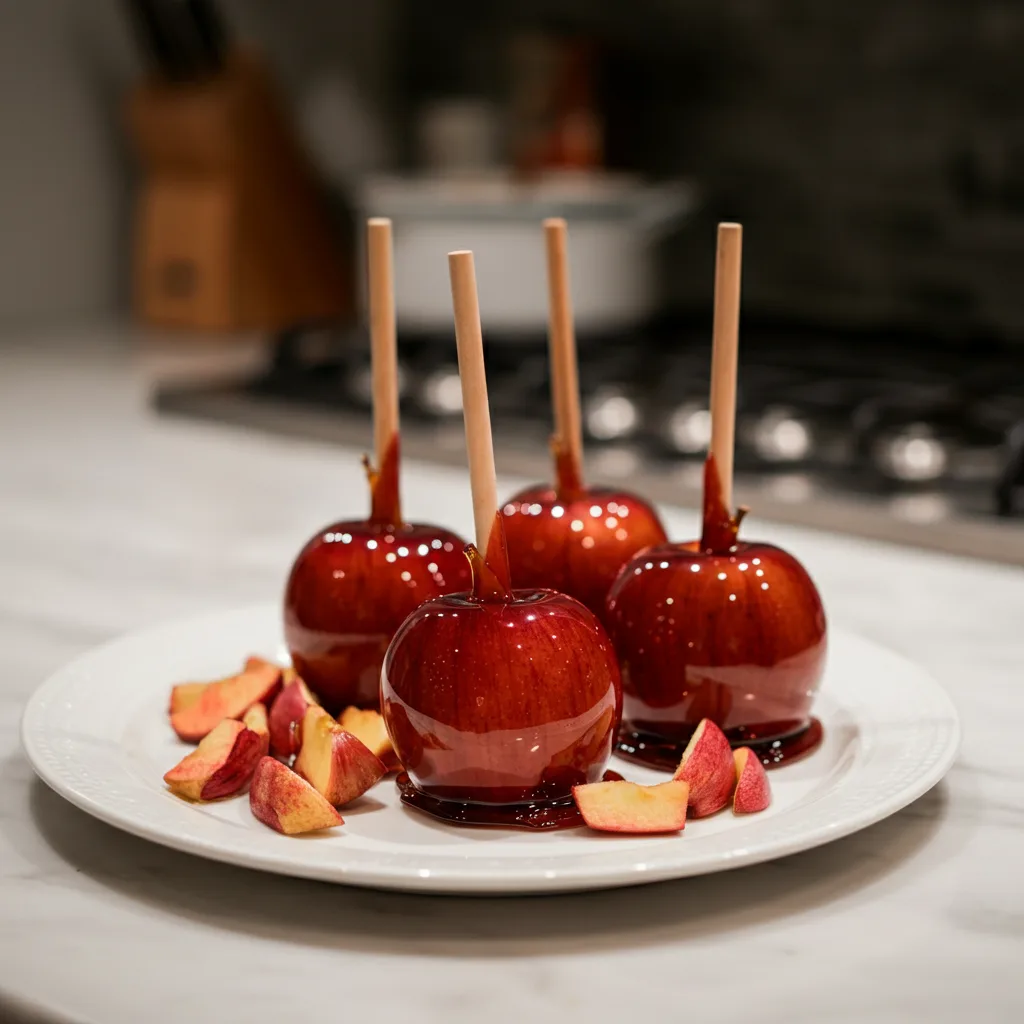
Sunset Glow Candy Apples: Vibrant Autumn Treat
- Prep Time: 30 Minutes
- Cook Time: 20 Minutes
- Total Time: 50 Minutes
- Yield: 8 Servings 1x
- Category: Breakfast
Description
Sunset Glow Candy Apples bring a vibrant, sweet crunch to any day. Learn my easy, tried-and-true method for this nostalgic, colorful autumn treat.
Ingredients
- Apple Base:
- 8 medium firm apples (Granny Smith or Fuji)
- 1 tbsp lemon juice (optional, for apple prep)
- Candy Coating:
- 2 cups granulated sugar
- 1 cup light corn syrup
- 1/2 cup water
- 1/2 tsp gel red food coloring
- 1/4 tsp gel yellow food coloring
- Flavor Boosters (Optional):
- 1/2 tsp vanilla extract
- Equipment & Prep:
- 8 wooden skewers or candy apple sticks
- Parchment paper or silicone baking mat
- Cooking spray (optional, for parchment)
Instructions
- Prep Your Apples:: First things first, get those apples ready. Wash them really, really well to remove any waxy coating. I usually give them a good scrub with warm water and a little vinegar, then dry them completely. And I mean bone-dry! Any moisture means your candy won’t stick, and trust me, I’ve had that happen. Then, carefully insert a wooden skewer or candy apple stick into the stem end of each apple. This is where you want to be firm but gentle, so you don’t split the apple. It’s the foundation for your beautiful Sunset Glow Candy Apples.
- Combine Candy Ingredients:: In a heavy-bottomed saucepan, combine your granulated sugar, light corn syrup, and water. Give it a good stir over medium heat until the sugar dissolves. Don’t go crazy stirring once it starts boiling, though; that can cause crystallization, and we want that smooth, clear candy. I remember one time, I stirred too much, and my candy turned grainy. Oops! Just let it do its thing, watch it bubble and transform, that’s the magic happening for your Sunset Glow Candy Apples.
- Reach the Right Temperature:: Now, this is the crucial part, honey! Attach a candy thermometer to the side of your saucepan, making sure it doesn’t touch the bottom. Bring the mixture to a rolling boil and cook it, without stirring, until it reaches precisely 300-310°F (149-154°C). This is the “hard crack” stage, where your candy will be perfectly brittle. If it doesn’t get hot enough, your candy will be sticky. If it goes too high, it’ll burn. I’ve ruined a few batches by not paying attention to the thermometer, so keep an eye on it!
- Add Your Colors and Flavor:: Once your candy mixture hits that perfect temperature, remove it from the heat immediately. Stir in your red and yellow gel food coloring. I like to start with more red and just a few drops of yellow to get that gorgeous orange-red, like a real sunset. If you’re using vanilla extract, stir that in now too. Be careful, the mixture is super hot! This is where your Sunset Glow Candy Apples really start to come to life, visually. The aroma is pretty sweet too, honestly.
- Dip the Apples:: Working quickly (because that candy cools fast!), tilt your saucepan slightly. Dip each prepared apple into the candy mixture, rotating it to fully coat the apple. Let any excess drip off back into the pan. I usually twirl it a bit to get a nice, even coating. Don’t let it get too thick, we want that crisp shell, not a clunky one. This step always feels a bit like an art project, trying to get that perfect, glossy finish on each of your Sunset Glow Candy Apples.
- Cool and Set:: As soon as each apple is coated, place it on a sheet of parchment paper or a silicone baking mat that you’ve lightly greased (or not, if using silicone). Let them cool completely at room temperature until the candy is hard and shiny. This usually takes about 20-30 minutes. Resist the urge to touch them until they’re fully set; you don’t want fingerprints on your beautiful creations! When they’re done, they should look like little jewels, just like the sunset. These Sunset Glow Candy Apples are a triumph!


