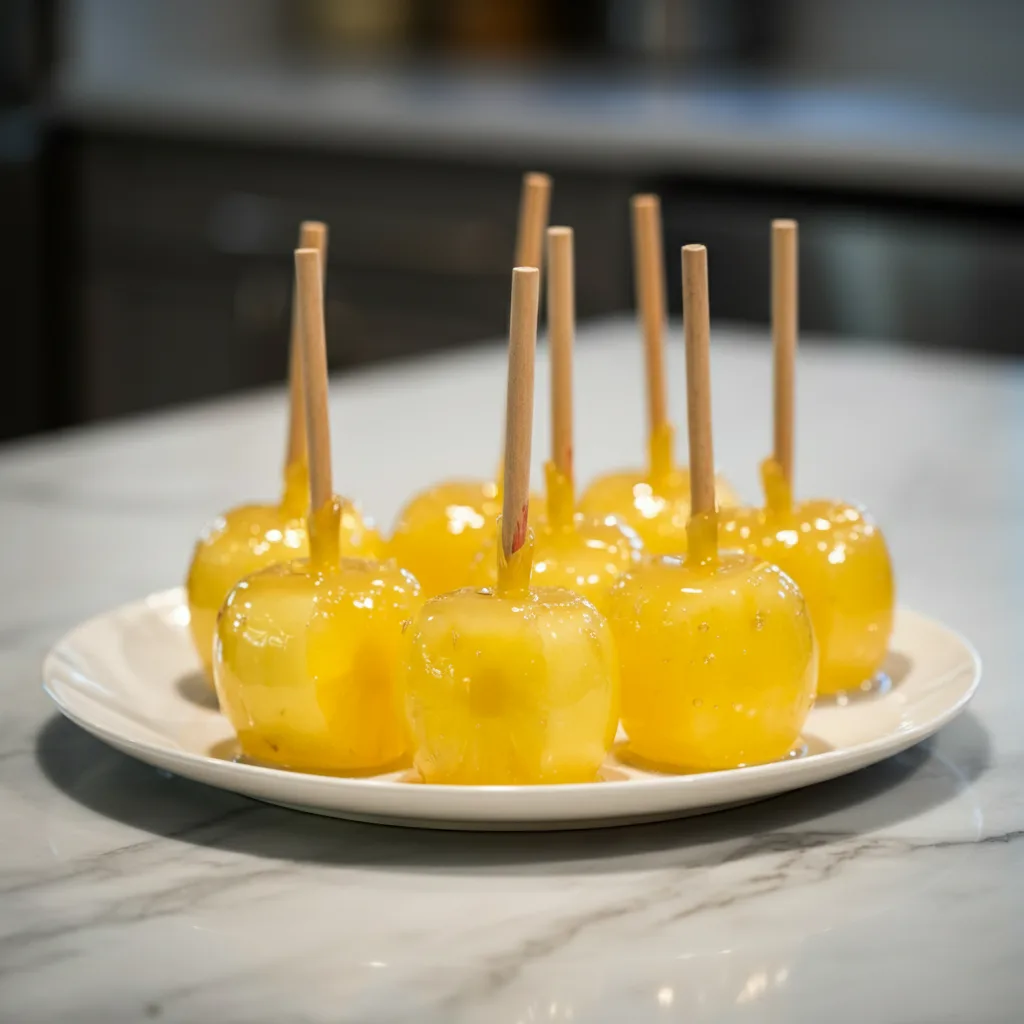
I remember this one summer, trying to beat the heat with a tall glass of homemade lemonade, and then seeing those bright yellow pineapple slices on the counter. My little niece, bless her creative heart, just blurted out, “Auntie, can we make lemonade apples?” I honestly laughed, but a tiny seed was planted. That afternoon, a sticky, glorious mess later, these Pineapple Lemonade Candy Apples were born. They’re not just a treat, they’re a burst of sunshine, a sweet-tart memory that always makes me smile. Who knew a child’s random thought could lead to something so wonderfully tangy and crunchy?
Oh, the first batch! I thought I had the candy thermometer game down, but nope. The syrup was either too thin, dripping everywhere, or rock-hard before I could even dip the second apple. My kitchen looked like a yellow crime scene, honestly. But after a few attempts, and a lot of sticky fingers, I figured out the nuances. It’s all about patience and getting that temperature just right, a lesson learned the hard, sugary way!

Ingredients for Pineapple Lemonade Candy Apples
- Small Apples (like Granny Smith or Fuji): These are your canvas! I lean towards Granny Smiths, their tartness really cuts through the sweet candy, balancing everything out. Fuji works well too if you like a slightly sweeter apple, but don’t use those super soft ones, they just get mushy under the candy.
- Granulated Sugar: The backbone of our candy shell. Don’t skimp, it’s what gives us that beautiful crackly texture. I remember one time I tried to use less sugar, thinking I’d be clever. The result? A sad, sticky, non-candy apple. Learn from my mistakes!
- Light Corn Syrup: This little secret weapon prevents crystallization, keeping your candy smooth and shiny. Honestly, don’t skip it, I tried once, and the sugar just seized up into a gritty mess. It’s a small amount but makes a huge difference.
- Water: Just enough to dissolve the sugar and corn syrup. Plain old tap water is fine, no need for anything fancy here. It’s the silent workhorse, making sure our syrup comes together properly.
- Lemonade Drink Mix Powder (unsweetened): This is where the “lemonade” magic happens! I use the unsweetened kind so I can control the tartness. You want that bright, zesty punch. I’ve tried sweetened before, and it was just too much sugar, even for me.
- Pineapple Extract: Hello, tropical vibes! This really brings out the pineapple flavor without adding extra liquid. I usually go for a good quality one, you can smell the difference, honestly. It just makes the whole kitchen smell like a sunny island.
- Yellow Food Coloring (gel): For that vibrant, cheerful pineapple lemonade color! Gel coloring is my go-to because it gives such intense color without diluting the syrup. I once used liquid and ended up with a pale, sad-looking apple, so definitely stick with gel.
- Wooden Candy Sticks or Skewers: Essential for handling these beauties. Make sure they’re sturdy, nothing worse than a stick snapping mid-dip, trust me, I’ve had that happen.
Crafting Your Pineapple Lemonade Candy Apples
- Prep Your Apples:
- First things first, you gotta get those apples squeaky clean. I wash mine really well, then dry them completely. And I mean completely! Any lingering moisture or waxy coating means your candy won’t stick, and that’s just heartbreaking. I always forget to do this thoroughly, and then I’m frantically wiping apples down last minute. Then, gently push a candy stick into the stem end of each apple, about halfway through. You want it secure, hon.
- Build the Syrup Base:
- In a heavy-bottomed saucepan, combine your granulated sugar, corn syrup, and water. Stir it gently over medium heat until the sugar dissolves. Don’t stir too vigorously after it starts boiling, that can cause crystallization, and we want a smooth, clear syrup. I made that mistake once, and my syrup turned grainy. Just let it do its thing, watch it shimmer.
- Infuse the Flavor & Color:
- Once the sugar is dissolved and the mixture is simmering, stir in your lemonade drink mix powder, pineapple extract, and yellow gel food coloring. This is where the magic really starts! The kitchen will smell amazing, like a tropical dream. Keep stirring until everything is fully combined and the color is bright and even. It should be a sunny yellow, vibrant and inviting.
- Achieve Candy Perfection:
- Insert a candy thermometer into the syrup, making sure it doesn’t touch the bottom of the pan. Continue to cook, without stirring, until the syrup reaches 300-310°F (149-154°C), which is the “hard crack” stage. This step is crucial for that satisfying crunch. I’ve pulled it off too early and ended up with chewy apples, and too late, and it was burnt. It’s a delicate balance, so keep an eye on that thermometer!
- Dip and Swirl:
- Once the syrup hits temperature, immediately remove it from the heat. Carefully dip each apple into the hot syrup, swirling to coat it completely. Work quickly but carefully, this syrup is hot! Let any excess drip off back into the pan. I usually tilt the pan a little to get a good, even coating. My first few were always lopsided, but practice makes… well, better, not perfect, honestly.
- Cool and Set:
- Place your coated Pineapple Lemonade Candy Apples on a baking sheet lined with parchment paper or a silicone mat. Let them cool completely at room temperature. This can take about 20-30 minutes, sometimes a bit longer. Don’t rush it! The candy needs to fully harden to get that wonderful, satisfying crack when you bite into it. I’m always tempted to touch them too soon, but resist!
There’s something so satisfying about watching that glossy, yellow candy harden on the apples. One time, my dog, Buster, almost got a pineapple lemonade candy apple because I set them too close to the edge of the counter! Crisis averted, thankfully. But it just goes to show, even in the sweetest moments, kitchen chaos is never far. These apples are a labor of love, a little bit messy, but so worth the effort for that bright, tangy crunch.
Storing Pineapple Lemonade Candy Apples
Okay, so once these beauties are cooled and set, you’ll want to store them properly to keep that glorious crunch. I usually place them individually in cellophane bags or wrap them loosely in plastic wrap. Don’t pile them up, hon, or they’ll stick to each other and that hard candy will chip. I made that mistake once, trying to save space, and ended up with a sticky, sad lump of candy apples. They’re best enjoyed within 1-2 days at room temperature. If it’s humid, they might start to get a little tacky after a day, so keep an eye on them. Refrigerating them can sometimes cause the candy to get sticky or cloudy due to condensation, so I generally avoid it unless absolutely necessary. Just try to eat them up quickly!

Pineapple Lemonade Candy Apples: Ingredient Substitutions
I’m all for experimenting, and sometimes you just gotta work with what you’ve got! If you can’t find unsweetened lemonade mix, you can try using a sweetened one, but be prepared for a very sweet candy apple. You might even want to dial back the sugar in the main syrup a tiny bit, though I haven’t perfected that balance myself I tried once and the candy didn’t set right, so proceed with caution! For the pineapple extract, if you don’t have it, you could try a tiny splash of pineapple juice, but be aware that adding extra liquid can mess with your candy setting time and temperature, so use it sparingly or just embrace a more subtle pineapple note. And for the apples, while Granny Smiths are my favorite for their tartness, any firm, crisp apple will work. I’ve used Honeycrisp before, and they were lovely, just a little less tart. It’s all about finding what you like!
Serving Your Pineapple Lemonade Candy Apples
These Pineapple Lemonade Candy Apples are a showstopper all on their own, honestly. But if you’re feeling fancy, they pair wonderfully with a scoop of vanilla bean ice cream for a delightful contrast in temperature and texture. A cold glass of actual homemade lemonade or a sparkling water with a lemon slice would also be just perfect to cut through the sweetness. For a party, I love to arrange them on a platter with some fresh lemon wedges and pineapple chunks for a vibrant display. They’re also fabulous for a movie night, just grab one and crunch away! I once served them at a summer BBQ, and they vanished faster than I could say “more lemonade!” They’re just that kind of fun, flavorful treat that makes everyone happy.
The Sweet Story of Pineapple Lemonade Candy Apples
Candy apples, in their classic red form, bring back so many nostalgic memories of carnivals and fairs. They’ve been a beloved treat for over a century, a simple concept of fruit coated in a hard sugar shell. My own spin on these Pineapple Lemonade Candy Apples really started with that childhood memory of summer lemonade and the desire to bring a bit of that sunny, zesty feeling to a traditional treat. It’s not a deep cultural dive, but more about how food evolves in our own kitchens, inspired by everyday flavors and happy accidents. For me, it’s a modern twist on a classic, a way to make something familiar feel fresh and exciting again, especially when you’re looking for that bright, tangy kick. It’s about making new traditions with old favorites, you know?
Making these Pineapple Lemonade Candy Apples always transports me back to that sunny kitchen with my niece, giggling over sticky fingers. They’re a little bit of work, honestly, but the reward is a truly unique, wonderfully crunchy, and delightfully tangy treat. Each bite is a burst of sunshine! I hope you give them a try and maybe even make some sweet, sticky memories of your own. Don’t forget to tell me how your batch turns out!

Frequently Asked Questions About Pineapple Lemonade Candy Apples
- → Why did my candy apple turn out sticky instead of crunchy?
Oh, I’ve been there! It usually means your syrup didn’t reach the “hard crack” stage, 300-310°F. Or, sometimes, high humidity can make them tacky. Keep that candy thermometer handy!
- → Can I use a different type of apple for candy apples?
Absolutely! I love Granny Smiths for the tartness, but any firm, crisp apple like Honeycrisp or Fuji works well. Just avoid soft varieties, they can get mushy under the candy shell.
- → My candy syrup crystallized. What went wrong?
That’s a common “oops” moment! It often happens if you stir the syrup too much once it starts boiling, or if sugar crystals get on the sides of the pan. The corn syrup helps prevent this, but gentle handling is key.
- → How long do Pineapple Lemonade Candy Apples last?
They’re best enjoyed within 1-2 days at room temperature. After that, the candy can start to get sticky, especially if it’s humid. I wouldn’t try to keep them much longer than that for optimal crunch!
- → Can I make these candy apples with other flavors?
Totally! I’ve experimented with cherry extract and red food coloring for a classic look, or even lime for a zesty twist. Just swap out the lemonade mix and extract for your desired flavor. Have fun with it!

Pineapple Lemonade Candy Apples: A Tangy, Zesty Treat
- Prep Time: 20 Minutes
- Cook Time: 15 Minutes
- Total Time: 1 Hour
- Yield: 6-8 Servings
- Category: Trending Recipes
Description
Make vibrant Pineapple Lemonade Candy Apples! Discover my easy recipe for a sweet, tart, and crunchy homemade treat. Perfect for any fun occasion.
Ingredients
- Apple Base:
- Small Apples (like Granny Smith or Fuji)
- Main Candy Coating:
- Granulated Sugar
- Light Corn Syrup
- Water
- Flavor & Color Boosters:
- Lemonade Drink Mix Powder (unsweetened)
- Pineapple Extract
- Yellow Food Coloring (gel)
- Finishing Touches:
- Wooden Candy Sticks or Skewers
Instructions
- Prep Your Apples:: First things first, you gotta get those apples squeaky clean. I wash mine really well, then dry them completely. And I mean *completely*! Any lingering moisture or waxy coating means your candy won’t stick, and that’s just heartbreaking. I always forget to do this thoroughly, and then I’m frantically wiping apples down last minute. Then, gently push a candy stick into the stem end of each apple, about halfway through. You want it secure, hon.
- Build the Syrup Base:: In a heavy-bottomed saucepan, combine your granulated sugar, corn syrup, and water. Stir it gently over medium heat until the sugar dissolves. Don’t stir too vigorously after it starts boiling; that can cause crystallization, and we want a smooth, clear syrup. I made that mistake once, and my syrup turned grainy. Just let it do its thing, watch it shimmer.
- Infuse the Flavor & Color:: Once the sugar is dissolved and the mixture is simmering, stir in your lemonade drink mix powder, pineapple extract, and yellow gel food coloring. This is where the magic really starts! The kitchen will smell amazing, like a tropical dream. Keep stirring until everything is fully combined and the color is bright and even. It should be a sunny yellow, vibrant and inviting.
- Achieve Candy Perfection:: Insert a candy thermometer into the syrup, making sure it doesn’t touch the bottom of the pan. Continue to cook, without stirring, until the syrup reaches 300-310°F (149-154°C), which is the “hard crack” stage. This step is crucial for that satisfying crunch. I’ve pulled it off too early and ended up with chewy apples, and too late, and it was burnt. It’s a delicate balance, so keep an eye on that thermometer!
- Dip and Swirl:: Once the syrup hits temperature, immediately remove it from the heat. Carefully dip each apple into the hot syrup, swirling to coat it completely. Work quickly but carefully; this syrup is hot! Let any excess drip off back into the pan. I usually tilt the pan a little to get a good, even coating. My first few were always lopsided, but practice makes… well, better, not perfect, honestly.
- Cool and Set:: Place your coated Pineapple Lemonade Candy Apples on a baking sheet lined with parchment paper or a silicone mat. Let them cool completely at room temperature. This can take about 20-30 minutes, sometimes a bit longer. Don’t rush it! The candy needs to fully harden to get that wonderful, satisfying crack when you bite into it. I’m always tempted to touch them too soon, but resist!


