Honestly, some of my favorite kitchen moments start with a bit of chaos. This Honey Sesame Chicken recipe? It came to life on a Tuesday night when I was utterly drained, staring into the fridge, and just craving something more than plain chicken. I had this vague memory of a restaurant dish, all sticky and glossy, and thought, “Hey, I bet I can make that… eventually.” The first attempt was a mess, to be real. Sauce everywhere, chicken not quite crispy. But the smell? Oh, the smell! It filled the kitchen with this warm, sweet, and savory aroma that just made everything feel okay. That’s when I knew this dish, even with its initial imperfections, was going to be a keeper. It’s become my little beacon of comfort, a reminder that even tired nights can end with something truly delicious and homemade.
I remember one time, I was so excited to get this Honey Sesame Chicken on the table, I accidentally swapped the sesame oil for olive oil in the sauce. Oops! The flavor was… unexpected, to say the least. My partner, bless his heart, just politely said, “Honey, this tastes a bit… earthy?” We had a good laugh, and I quickly corrected it. It just goes to show, even when you’ve made a dish a hundred times, a little kitchen brain fog can strike. But that’s part of the fun, right? Learning from your little blunders and ending up with something even better.

Honey Sesame Chicken Ingredients
- Chicken Thighs: Honestly, boneless, skinless chicken thighs are my secret weapon here. They stay so much juicier than breasts, even if you accidentally overcook them a smidge. Don’t use dry, sad chicken, just don’t.
- Low-Sodium Soy Sauce: This is the backbone of our savory flavor. I always go for low-sodium because it gives me more control over the saltiness. I tried regular once and it worked… kinda, but then I had to dilute the sauce later.
Honey: The sweet star! I love using local honey, it just feels right. You can adjust the amount to your sweet tooth, but please, don’t skimp on the honey, it’s essential for that sticky glaze.
Rice Vinegar: Adds a lovely tang that cuts through the sweetness and richness. I’ve used apple cider vinegar when I was out, and it worked, but rice vinegar gives it that authentic Asian-inspired zing.
Sesame Oil: A little goes a long way with this fragrant oil. It’s super potent, so be careful not to drown your dish. It brings that unmistakable nutty aroma that just screams “Honey Sesame Chicken.”
- Fresh Ginger & Garlic: These are non-negotiable for me! Fresh grated ginger and minced garlic make all the difference. The smell alone as they hit the pan is pure magic. Dried just doesn’t compare, honestly.
- Cornstarch: Our thickening agent! This is what gives the sauce its glossy, luscious texture. Mix it with a bit of water first to avoid lumps I’ve learned that the hard way, trust me.
- Toasted Sesame Seeds & Green Onions: These are our finishing touches. The sesame seeds add crunch and an extra nutty flavor, and the green onions provide a fresh, bright pop of color and mild oniony bite.
Cooking Up Honey Sesame Chicken
- Prep the Chicken:
- First things first, let’s get that chicken ready. I like to cut my boneless, skinless chicken thighs into bite-sized pieces, maybe 1-inch chunks. This helps them cook evenly and absorb all that delicious sauce later. Pat them dry with paper towels this is a small step I used to skip, but it seriously helps with browning! Then, a little salt and pepper, just enough to season the chicken itself. You want to build layers of flavor, you know?
- Whisk Up the Sauce:
- Now for the star of the show, this incredible sauce! In a medium bowl, whisk together your low-sodium soy sauce, honey, rice vinegar, and that potent sesame oil. Don’t forget the fresh grated ginger and minced garlic here they’re going to infuse so much goodness. Give it a good whisk until everything is combined and the honey has dissolved. This is where you can taste it and adjust, maybe a touch more honey for sweetness, or a splash more vinegar for tang. I always give it a little spoon-taste, just to make sure it’s balanced.
- Sear the Chicken:
- Heat a large skillet or wok over medium-high heat with a little oil. Once it’s shimmering, add your chicken in a single layer. Don’t overcrowd the pan, or it’ll steam instead of sear a mistake I’ve made too many times! Let it cook for about 3-4 minutes per side, until it’s beautifully golden brown and has a nice crust. You’re not cooking it all the way through yet, just getting that amazing color and texture. Pull it out and set it aside, we’ll bring it back later, promise!
- Thicken the Sauce:
- Reduce the heat to medium. If there’s too much oil left in the pan, carefully drain a little out. Pour your beautiful sauce mixture into the skillet. Bring it to a gentle simmer. While that’s happening, whisk your cornstarch with a tablespoon or two of cold water in a small bowl until it’s smooth. Slowly pour this cornstarch slurry into the simmering sauce, whisking constantly. You’ll see it start to thicken right before your eyes, becoming glossy and luscious. Keep whisking for a minute or two until it coats the back of a spoon.
- Combine and Glaze:
- Once the sauce has thickened to your liking, it’s time to bring the chicken back home! Add the seared chicken pieces directly into the skillet with the sauce. Toss everything gently, making sure every single piece of chicken is coated in that sticky, glorious glaze. Let it simmer together for another 2-3 minutes, allowing the chicken to finish cooking through and really soak up all those amazing flavors. This is where the magic happens, and your kitchen will smell absolutely incredible.
- Garnish and Serve:
- And just like that, you’re almost done! Remove the skillet from the heat. Now, for those crucial finishing touches: sprinkle generously with toasted sesame seeds and freshly sliced green onions. The sesame seeds add a lovely crunch and extra nutty flavor, and the green onions bring a pop of freshness and color. Serve this dish immediately over fluffy rice or noodles, and maybe a side of steamed veggies. Enjoy that sweet, savory, and simple perfection!
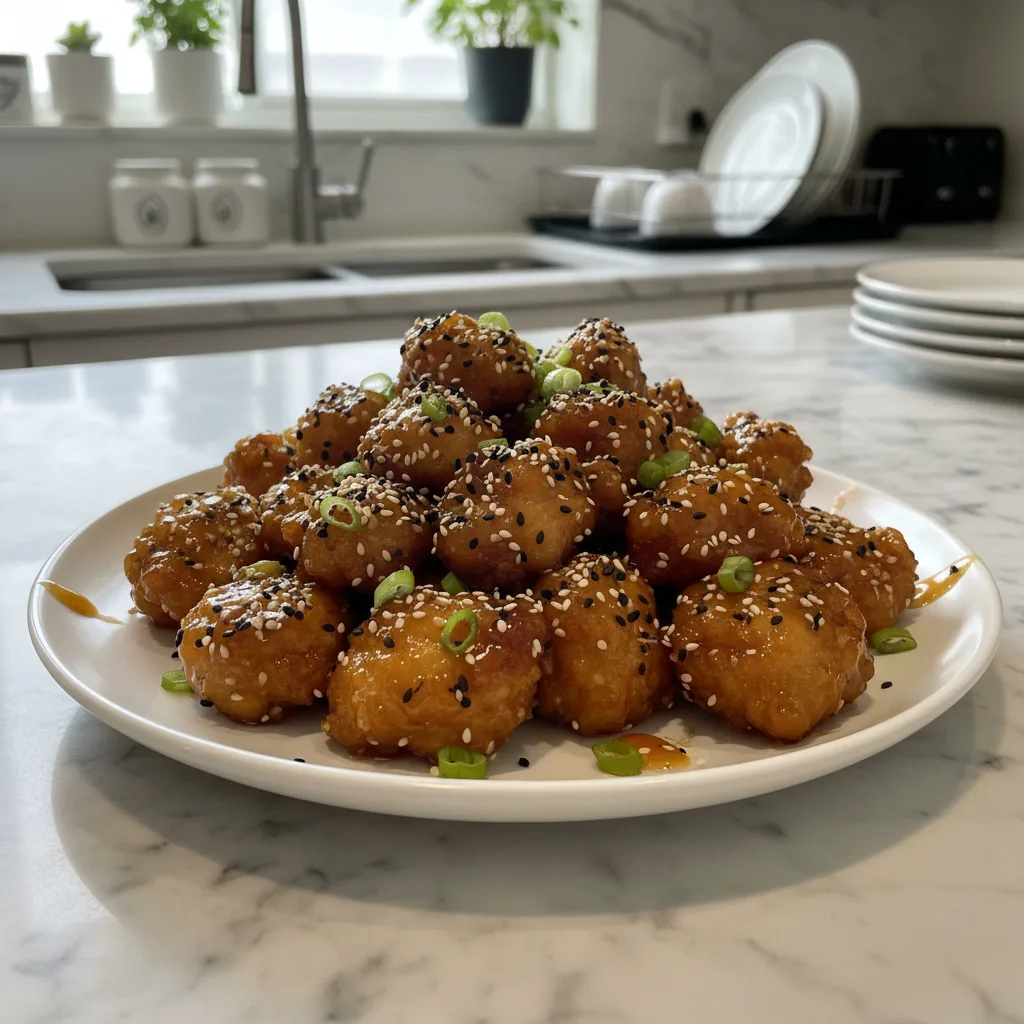
Honestly, seeing the finished Honey Sesame Chicken, all glossy and scattered with green onions and sesame seeds, it just makes my heart happy. There’s usually a bit of sauce splattered on the stove, and a few stray sesame seeds on the counter, but that’s just proof of a good time in the kitchen, right? The smell, the warmth, the anticipation of that first bite… it’s a whole experience. It’s those little moments of kitchen chaos that make the final dish taste even sweeter.
Honey Sesame Chicken Storage Tips
So, you’ve got some glorious leftovers? Lucky you! I find this dish stores surprisingly well. Once it’s completely cooled, transfer it to an airtight container. It’ll keep beautifully in the fridge for up to 3 days. I’ve tried freezing it before, and while it’s okay, the chicken texture can get a little… rubbery, and the sauce sometimes separates a bit upon thawing. So, I generally stick to refrigerating. When reheating, I highly recommend using a skillet over medium-low heat. Add a splash of water or chicken broth to loosen the sauce, then gently warm the chicken through. I microwaved it once and the sauce separated so don’t do that lol. The chicken also tends to dry out in the microwave. Low and slow on the stove is the way to go for tender, saucy goodness.

Honey Sesame Chicken Ingredient Substitutions
Life happens, and sometimes you don’t have every single ingredient. I get it! For the chicken, if you only have breasts, that’s fine, just be extra careful not to overcook them they dry out faster. Cut them into similar bite-sized pieces. No honey? Maple syrup or agave nectar can work in a pinch for the sweetness, though the flavor profile will shift slightly, I tried maple syrup once, and it worked… kinda, but it lacked that classic honey depth. If you’re out of rice vinegar, apple cider vinegar is your next best bet, just know it has a slightly sharper tang. And for the fresh ginger and garlic, if you absolutely must, a teaspoon of ground ginger and a half-teaspoon of garlic powder can substitute, but honestly, fresh is always superior for this dish. Don’t skip the sesame oil, it’s unique!
Serving Your Honey Sesame Chicken
This dish is incredibly versatile when it comes to serving! My absolute favorite way is piled high over a bed of fluffy white or brown rice, letting all that glorious sauce soak in. If I’m feeling a bit fancy or just want to use up some noodles, lo mein or even spaghetti works surprisingly well! For veggies, steamed broccoli, roasted asparagus, or a simple side salad with a light vinaigrette are perfect. And for a drink? A crisp, cold lager or even a sparkling water with a squeeze of lime really complements the flavors. Honestly, this dish and a rom-com on a Friday night? Yes please. It’s comforting, satisfying, and just feels right, no matter the mood.
Honey Sesame Chicken Cultural Backstory
While this particular recipe is very much a home-cook friendly, Americanized adaptation, its roots are deeply intertwined with the rich culinary traditions of East Asia. The combination of soy sauce, ginger, garlic, and sesame is a hallmark of many Asian cuisines, particularly Chinese and Korean cooking. Dishes featuring sticky, sweet, and savory glazes on chicken or pork have been enjoyed for centuries. My personal journey with this dish began with takeout cravings, but as I started experimenting in my own kitchen, I realized how beautifully these classic flavors could be simplified for a quick weeknight meal. It’s a testament to how food traditions evolve and adapt, bringing comfort and deliciousness to tables around the world, including my very own.
So there you have it, my simple, sweet, and savory chicken. It’s more than just a recipe, it’s a little piece of comfort, a reminder of those accidental kitchen discoveries, and honestly, just a really good meal. I hope it brings as much joy and deliciousness to your table as it does to mine. Don’t be shy about making it your own, adding your own little quirks. And if you have any kitchen chaos stories while making it, please share them! I love hearing about real-life cooking adventures.

Frequently Asked Questions About Honey Sesame Chicken
- → Is this recipe spicy?
Nope, not typically! This recipe leans sweet and savory. If you like a little heat, I’d suggest adding a pinch of red pepper flakes to the sauce, or a drizzle of sriracha when serving. I always keep a bottle handy for those who want an extra kick!
- → Can I use frozen chicken for this recipe?
You sure can, but make sure it’s fully thawed and patted very dry before you cut and sear it. Otherwise, you’ll get a lot of water in your pan, and the chicken won’t brown properly. I’ve tried to rush it once, and it just ended up steaming, not searing.
- → How do I make the sauce thicker?
If your sauce isn’t as thick as you like, you can make a little extra cornstarch slurry (1 tsp cornstarch mixed with 1 tbsp cold water) and whisk it into the simmering sauce a little at a time until it reaches your desired consistency. Just be careful not to add too much at once!
- → What’s the best way to reheat leftovers?
My go-to is reheating gently in a skillet over low heat with a tiny splash of water or broth. This keeps the chicken tender and prevents the sauce from separating. Microwaving can make the chicken tough and the sauce watery, a mistake I learned early on!
- → Can I add vegetables to this dish?
Absolutely! I often toss in some broccoli florets, sliced bell peppers, or snap peas during the last few minutes of cooking with the sauce. Just make sure they’re cooked to your preferred crisp-tender stage. It’s a great way to sneak in extra greens, and I love the color it adds!

Simple Honey Sesame Chicken: Sweet & Savory Weeknight Meal
- Prep Time: 15 Minutes
- Cook Time: 20 Minutes
- Total Time: 35 Minutes
- Yield: 4 Servings
- Category: Dinner Recipes
Description
Whip up easy Honey Sesame Chicken! Sweet, savory, and simple, this recipe brings sticky-sweet goodness and a touch of ginger to your dinner table.
Ingredients
- Main Ingredients:
- Chicken Thighs: Honestly, boneless, skinless chicken thighs are my secret weapon here. They stay so much juicier than breasts, even if you accidentally overcook them a smidge. Don’t use dry, sad chicken, just don’t.
- Low-Sodium Soy Sauce: This is the backbone of our savory flavor. I always go for low-sodium because it gives me more control over the saltiness. I tried regular once and it worked… kinda, but then I had to dilute the sauce later.
- Honey: The sweet star! I love using local honey; it just feels right. You can adjust the amount to your sweet tooth, but please, don’t skimp on the honey, it’s essential for that sticky glaze.
- Rice Vinegar: Adds a lovely tang that cuts through the sweetness and richness. I’ve used apple cider vinegar when I was out, and it worked, but rice vinegar gives it that authentic Asian-inspired zing.
- Sesame Oil: A little goes a long way with this fragrant oil. It’s super potent, so be careful not to drown your dish. It brings that unmistakable nutty aroma that just screams “Honey Sesame Chicken.”
- Fresh Ginger & Garlic: These are non-negotiable for me! Fresh grated ginger and minced garlic make all the difference. The smell alone as they hit the pan is pure magic. Dried just doesn’t compare, honestly.
- Cornstarch: Our thickening agent! This is what gives the sauce its glossy, luscious texture. Mix it with a bit of water first to avoid lumps – I’ve learned that the hard way, trust me.
- Toasted Sesame Seeds & Green Onions: These are our finishing touches. The sesame seeds add crunch and an extra nutty flavor, and the green onions provide a fresh, bright pop of color and mild oniony bite.
Instructions
- Prep the Chicken:: First things first, let’s get that chicken ready. I like to cut my boneless, skinless chicken thighs into bite-sized pieces, maybe 1-inch chunks. This helps them cook evenly and absorb all that delicious sauce later. Pat them dry with paper towels – this is a small step I used to skip, but it seriously helps with browning! Then, a little salt and pepper, just enough to season the chicken itself. You want to build layers of flavor, you know?
- Whisk Up the Sauce:: Now for the star of the show, this incredible sauce! In a medium bowl, whisk together your low-sodium soy sauce, honey, rice vinegar, and that potent sesame oil. Don’t forget the fresh grated ginger and minced garlic here – they’re going to infuse so much goodness. Give it a good whisk until everything is combined and the honey has dissolved. This is where you can taste it and adjust, maybe a touch more honey for sweetness, or a splash more vinegar for tang. I always give it a little spoon-taste, just to make sure it’s balanced.
- Sear the Chicken:: Heat a large skillet or wok over medium-high heat with a little oil. Once it’s shimmering, add your chicken in a single layer. Don’t overcrowd the pan, or it’ll steam instead of sear – a mistake I’ve made too many times! Let it cook for about 3-4 minutes per side, until it’s beautifully golden brown and has a nice crust. You’re not cooking it all the way through yet, just getting that amazing color and texture. Pull it out and set it aside; we’ll bring it back later, promise!
- Thicken the Sauce:: Reduce the heat to medium. If there’s too much oil left in the pan, carefully drain a little out. Pour your beautiful sauce mixture into the skillet. Bring it to a gentle simmer. While that’s happening, whisk your cornstarch with a tablespoon or two of cold water in a small bowl until it’s smooth. Slowly pour this cornstarch slurry into the simmering sauce, whisking constantly. You’ll see it start to thicken right before your eyes, becoming glossy and luscious. Keep whisking for a minute or two until it coats the back of a spoon.
- Combine and Glaze:: Once the sauce has thickened to your liking, it’s time to bring the chicken back home! Add the seared chicken pieces directly into the skillet with the sauce. Toss everything gently, making sure every single piece of chicken is coated in that sticky, glorious glaze. Let it simmer together for another 2-3 minutes, allowing the chicken to finish cooking through and really soak up all those amazing flavors. This is where the magic happens, and your kitchen will smell absolutely incredible.
- Garnish and Serve:: And just like that, you’re almost done! Remove the skillet from the heat. Now, for those crucial finishing touches: sprinkle generously with toasted sesame seeds and freshly sliced green onions. The sesame seeds add a lovely crunch and extra nutty flavor, and the green onions bring a pop of freshness and color. Serve this dish immediately over fluffy rice or noodles, and maybe a side of steamed veggies. Enjoy that sweet, savory, and simple perfection!


