I remember the first time I truly nailed this recipe for Crispy Golden Chicken That Never Lasts. It was a Tuesday, total chaos, kids doing homework at the kitchen table, and I was just trying to get dinner on. I had this vague idea for fried chicken, but honestly, I was just winging it. The smell, though, when that chicken hit the hot oil? Oh my goodness, it filled the whole house with this warm, comforting aroma. It’s special because it reminds me that even on the busiest, messiest days, a little homemade magic can happen, and everyone will come running for seconds. This dish, it’s more than just food, it’s a memory in the making.
One time, I was so focused on getting the seasoning just right for my Crispy Golden Chicken That Never Lasts, I totally forgot to add the salt to the flour dredge. Oops! The chicken was still juicy, but it lacked that oomph. My husband, bless his heart, politely asked if I was “trying a new low-sodium thing.” I just laughed, added extra salt at the table, and made a mental note: never skip the salt, Mama Tessa! It’s all part of the cooking adventure, right?

Ingredients
Main Chicken Components
- Chicken Thighs & Drumsticks (bone-in, skin-on): These cuts stay incredibly juicy and that skin? It crisps up like a dream. Honestly, don’t even think about boneless, skinless for this, you’ll miss all the good stuff.
- Buttermilk: This is the secret for tenderizing the chicken and helping the coating stick. Don’t use skim milk, just don’t, the fat content in whole buttermilk is your friend here.
Seasoning Magic
- Garlic Powder: I swear by a generous amount, it adds a deep, savory foundation. Fresh garlic is great, but here, the powder just melts into the flavor profile so perfectly.
- Onion Powder: Works hand-in-hand with garlic powder, giving it that classic, irresistible flavor. I tried dried flakes once and it worked… kinda, but the powder is superior for even coating.
- Smoked Paprika: Oh, this is where the magic happens! It gives a gorgeous color and a subtle smoky depth. I like a little more than the recipe calls for, honestly, for that extra warmth.
- Cayenne Pepper: Just a pinch for a gentle kick. You can totally adjust this, I like a little heat, but my kids prefer less. Don’t go crazy unless you love the fire!
Crisp Coating Essentials
- All-Purpose Flour: The base for that glorious, crispy crust. Make sure it’s fresh, old flour can sometimes make things taste a bit off.
- Salt & Freshly Ground Black Pepper: Essential, of course! Season every layer, hon. I once forgot the salt in the flour and it was a tragedy, a bland, bland tragedy.
Finishing Touches
- Vegetable Oil (or Peanut Oil): You need a good, neutral oil for frying. I usually go for vegetable oil, but peanut oil works wonders for that authentic fried chicken taste. You want enough to submerge about halfway.
Instructions
- Prep Your Chicken, Mama!
- First things first, get those chicken pieces ready. Give them a good pat dry with paper towels, this is crucial for crispy skin, trust me! Trim off any excess skin or fat that’s hanging loose, but leave most of it on. You want that beautiful, golden crunch later. I usually do this right on a cutting board, and honestly, it can get a little messy, but that’s just kitchen life, right? Feel the texture of the skin, you want it as dry as possible before the next step.
- Season & Soak Time!
- In a big bowl, whisk together your garlic powder, onion powder, smoked paprika, cayenne pepper, a good pinch of salt, and a generous grind of black pepper. Don’t be shy here! Toss your chicken pieces in this seasoning mix, making sure every nook and cranny gets covered. Then, pour that buttermilk over the seasoned chicken. Give it a good stir to coat everything. I usually let it sit for at least 30 minutes on the counter, or better yet, pop it in the fridge for a few hours. I once rushed this step, and the flavor just wasn’t as deep, oops!
- Flour Power!
- While your chicken is soaking up all that goodness, get your dredging station ready. In a shallow dish or a brown paper bag (my grandma’s trick!), combine your all-purpose flour with another good pinch of salt and pepper. Now, take each piece of chicken, let any excess buttermilk drip off, and dredge it thoroughly in the flour mixture. Press the flour onto the chicken to ensure a thick, even coating. This is where you build that incredible crust! I always make sure there are no bare spots, it’s like wrapping a present, but for your taste buds!
- Heat That Oil!
- In a large, heavy-bottomed skillet or Dutch oven, pour in enough vegetable oil to come about 1 to 1.5 inches up the sides. Heat the oil over medium-high heat until it reaches around 350-375°F (175-190°C). If you don’t have a thermometer, drop a tiny pinch of flour in, if it sizzles vigorously, you’re good to go! Don’t let it get smoking hot, though, or your Crispy Golden Chicken That Never Lasts will burn before it cooks through.
- Fry ‘Em Up!
- Carefully, and I mean carefully, place a few chicken pieces into the hot oil. Don’t overcrowd the pan, hon! You want them to have space to crisp up. Fry for about 6-8 minutes per side, turning occasionally, until they’re a beautiful golden brown and cooked through. The internal temperature should be 165°F (74°C). This step always makes my kitchen smell amazing, like a proper Sunday dinner! I usually use tongs for turning, less splashing, more control!
- Rest & Devour!
- Once your chicken is cooked to golden perfection, transfer it to a wire rack set over a baking sheet. This allows any excess oil to drip off and keeps the bottom from getting soggy. Let it rest for a few minutes before serving, this helps the juices redistribute, making every bite super tender. Honestly, this is the hardest part resisting! The smell is just intoxicating. Your Crispy Golden Chicken That Never Lasts is ready to be demolished!
Making this Crispy Golden Chicken That Never Lasts always brings a smile to my face. I remember once, my youngest spilled the flour dredge all over the floor right as I was about to fry. It was a disaster, flour everywhere! But we just laughed, swept it up, and started over. Those little kitchen mishaps are part of the charm, aren’t they? It’s a dish that’s seen a lot of life in my kitchen.
Crispy Golden Chicken That Never Lasts: My Storage Secrets
So, you’ve got some leftover Crispy Golden Chicken That Never Lasts? Lucky you! Store it in an airtight container in the fridge for up to 3-4 days. Now, here’s my honest advice: don’t just microwave it if you want that crisp back. I microwaved it once, and while it was still tasty, the skin turned a bit rubbery so don’t do that lol. What holds up well is the flavor, but the crunch needs a little love. My personal tip? Reheat it in a toaster oven or air fryer at around 350°F (175°C) for 10-15 minutes. It won’t be quite as fresh as day one, but it gets pretty darn close to that original crispy glory. It’s a great meal-prep win, just plan for the reheat!

Ingredient Swaps for Your Crispy Golden Chicken That Never Lasts
Life happens, and sometimes you don’t have exactly what the recipe calls for. I get it! If you’re out of buttermilk, don’t fret. I tried this once: just add a tablespoon of white vinegar or lemon juice to regular milk (whole milk works best) and let it sit for 5-10 minutes until it curdles a bit. It works… kinda, it’s not exactly the same, but it’ll do the trick for your Crispy Golden Chicken That Never Lasts! No smoked paprika? Regular paprika is fine, you’ll just miss that lovely smoky undertone, but the chicken will still be flavorful. If you’re feeling adventurous, you could even try a little hot sauce in the buttermilk for an extra kick before the flour dredge. I’ve done that for a spicier version, and it was a hit!
Serving Up Crispy Golden Chicken That Never Lasts
Oh, the possibilities with this Crispy Golden Chicken That Never Lasts! For me, a classic pairing is a must. Think creamy mashed potatoes (with lots of butter, obviously!) and some green beans sautéed with garlic. It’s that ultimate comfort meal. But honestly, for a lighter touch, a crisp coleslaw or a simple garden salad with a tangy vinaigrette is just chef’s kiss. And for drinks? A cold glass of sweet tea just feels right, or maybe a light lager if you’re feeling it. This dish and a good old rom-com? Yes please. It’s versatile enough for a fancy dinner party or a casual weeknight, depending on what you serve alongside it. My favorite combo for a cozy night is definitely mashed potatoes and a big squeeze of lemon on the chicken.
The Story Behind This Crispy Golden Chicken That Never Lasts
This style of crispy, pan-fried chicken has roots deep in comfort food traditions, especially in Southern American kitchens. It’s often passed down through generations, with each family having their own secret blend of spices or a special technique. For me, it reminds me of my Auntie Mae’s kitchen, always bustling, always smelling of something delicious. While my version of Crispy Golden Chicken That Never Lasts isn’t an exact replica of hers, it carries that same spirit of generosity and warmth. It’s a dish that brings people together, makes them feel nourished and loved. It’s about taking simple ingredients and, with a little care and a lot of heart, turning them into something truly memorable that connects us to those timeless, comforting meals.
So there you have it, my recipe for Crispy Golden Chicken That Never Lasts. It’s a dish that’s seen me through countless dinners, celebrated little victories, and salvaged many chaotic evenings. It always disappears from the plate faster than I can blink. I hope it brings as much joy and deliciousness to your table as it does to mine. Don’t be shy, give it a try, and maybe share your own kitchen chaos moments with me!

Frequently Asked Questions
- → How do I get my Crispy Golden Chicken That Never Lasts extra crispy?
Pat your chicken super dry before seasoning, don’t overcrowd the pan, and make sure your oil is at the right temperature (350-375°F). I also find resting it on a wire rack helps keep that crispness!
- → What if I don’t have buttermilk for this recipe?
You can make a quick substitute! Add 1 tbsp of white vinegar or lemon juice to 1 cup of regular milk and let it sit for about 5-10 minutes. It won’t be exactly the same, but it works in a pinch, I’ve done it!
- → My chicken always comes out soggy, what am I doing wrong?
Ah, that’s a common one! Likely culprits are overcrowding the pan, which drops the oil temperature, or not letting the cooked chicken rest on a wire rack. I used to make that mistake all the time!
- → Can I make Crispy Golden Chicken That Never Lasts ahead of time?
You can prep the chicken by seasoning and dredging it, then storing it in the fridge for a few hours before frying. For leftovers, reheat in an air fryer or oven to regain some crispness, as I mentioned above!
- → Can I bake this instead of frying for a healthier option?
You can, but it won’t have the same deep fried crisp. If you bake, spray generously with oil and bake at a higher temp (like 400°F/200°C) until golden and cooked through. I’ve tried it, it’s good, but different!

Crispy Golden Chicken That Never Lasts: Dinner Winner!
- Prep Time: 20 Minutes
- Cook Time: 25 Minutes
- Total Time: 45 Minutes
- Yield: 4 Servings 1x
- Category: Dinner Recipes
Description
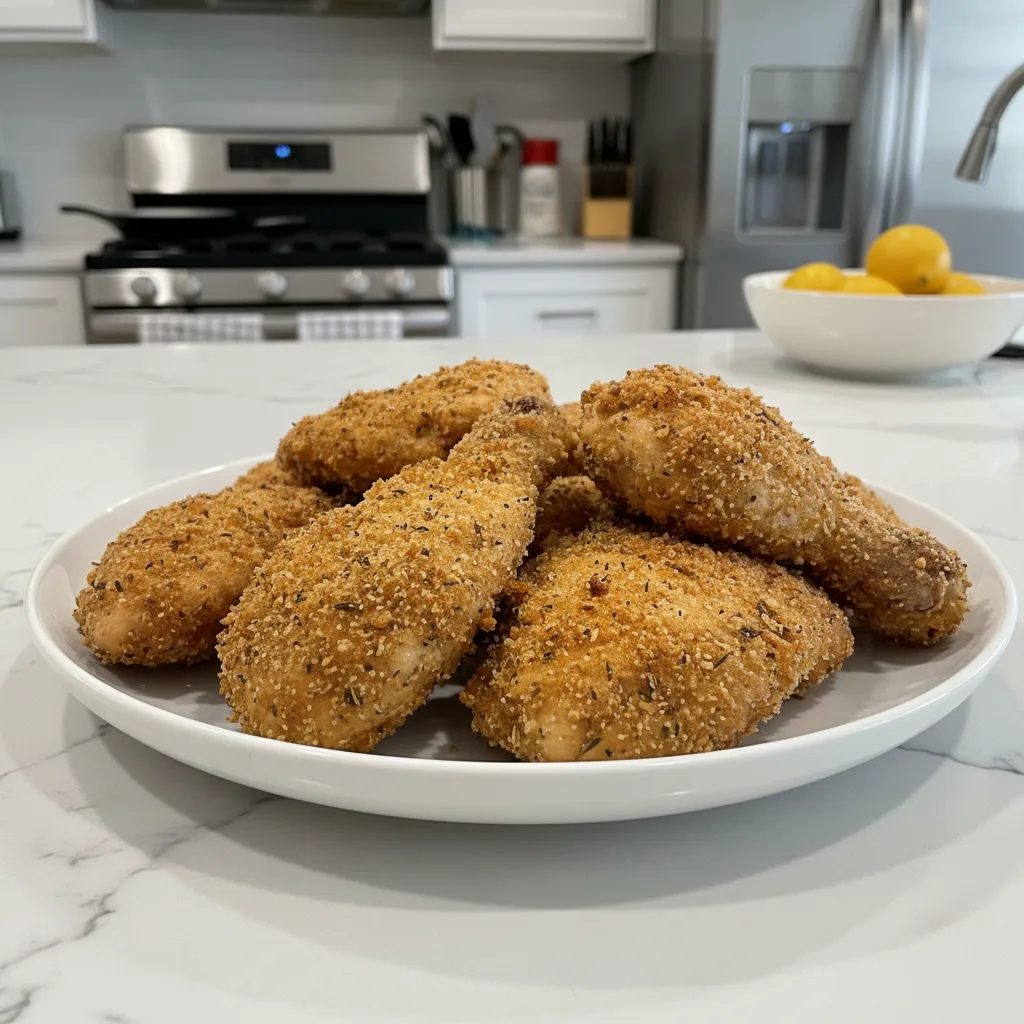
Crispy Golden Chicken That Never Lasts is a family favorite! Learn my easy steps for juicy, flavorful chicken with an irresistible crunch. You’ll make it often!
Ingredients
- Main Chicken Components:
- 8 bone-in, skin-on chicken thighs and/or drumsticks
- 1 cup buttermilk
- Seasoning Magic:
- 1 tbsp garlic powder
- 1 tbsp onion powder
- 1 tsp smoked paprika
- 1/2 tsp cayenne pepper (or to taste)
- Crisp Coating Essentials:
- 1 1/2 cups all-purpose flour
- 1 tsp salt (plus more for seasoning chicken)
- 1/2 tsp freshly ground black pepper (plus more for seasoning chicken)
- Finishing Touches:
- 3–4 cups vegetable oil (or peanut oil), for frying
Instructions
- Prep Your Chicken, Mama!: First things first, get those chicken pieces ready. Give them a good pat dry with paper towels; this is crucial for crispy skin, trust me! Trim off any excess skin or fat that’s hanging loose, but leave most of it on. You want that beautiful, golden crunch later. I usually do this right on a cutting board, and honestly, it can get a little messy, but that’s just kitchen life, right? Feel the texture of the skin; you want it as dry as possible before the next step.
- Season & Soak Time!: In a big bowl, whisk together your garlic powder, onion powder, smoked paprika, cayenne pepper, a good pinch of salt, and a generous grind of black pepper. Don’t be shy here! Toss your chicken pieces in this seasoning mix, making sure every nook and cranny gets covered. Then, pour that buttermilk over the seasoned chicken. Give it a good stir to coat everything. I usually let it sit for at least 30 minutes on the counter, or better yet, pop it in the fridge for a few hours. I once rushed this step, and the flavor just wasn’t as deep, oops!
- Flour Power!: While your chicken is soaking up all that goodness, get your dredging station ready. In a shallow dish or a brown paper bag (my grandma’s trick!), combine your all-purpose flour with another good pinch of salt and pepper. Now, take each piece of chicken, let any excess buttermilk drip off, and dredge it thoroughly in the flour mixture. Press the flour onto the chicken to ensure a thick, even coating. This is where you build that incredible crust! I always make sure there are no bare spots; it’s like wrapping a present, but for your taste buds!
- Heat That Oil!: In a large, heavy-bottomed skillet or Dutch oven, pour in enough vegetable oil to come about 1 to 1.5 inches up the sides. Heat the oil over medium-high heat until it reaches around 350-375°F (175-190°C). If you don’t have a thermometer, drop a tiny pinch of flour in; if it sizzles vigorously, you’re good to go! Don’t let it get smoking hot, though, or your Crispy Golden Chicken That Never Lasts will burn before it cooks through.
- Fry ‘Em Up!: Carefully, and I mean *carefully*, place a few chicken pieces into the hot oil. Don’t overcrowd the pan, hon! You want them to have space to crisp up. Fry for about 6-8 minutes per side, turning occasionally, until they’re a beautiful golden brown and cooked through. The internal temperature should be 165°F (74°C). This step always makes my kitchen smell amazing, like a proper Sunday dinner! I usually use tongs for turning; less splashing, more control!
- Rest & Devour!: Once your chicken is cooked to golden perfection, transfer it to a wire rack set over a baking sheet. This allows any excess oil to drip off and keeps the bottom from getting soggy. Let it rest for a few minutes before serving; this helps the juices redistribute, making every bite super tender. Honestly, this is the hardest part – resisting! The smell is just intoxicating. Your Crispy Golden Chicken That Never Lasts is ready to be demolished!


