You know those days when you just want something comforting, something that feels like a hug on a plate, but without all the fuss? I swear, I used to think a truly good roast chicken was some mythical beast, reserved for fancy chefs or grandmothers with endless patience. My first few attempts? Honestly, a bit dry, a bit bland, and always a scramble. But then, one lazy Sunday afternoon, I stumbled upon a method that changed everything. The kitchen wasn’t spotless, there was flour on my cheek (don’t ask), but the aroma that filled the air as this chicken roasted… pure magic. This isn’t just a recipe, it’s the story of how I finally cracked the code to Easy Chicken That Always Turns Out Perfect, no matter what chaos is happening around you.
I remember one time, I was so distracted trying to help my son with his science project (volcanoes, naturally) that I completely forgot to preheat the oven. I just slapped the chicken in! About 20 minutes later, the timer went off for the actual preheat, and I just stared at it, a bit bewildered. “Oops,” I thought. But you know what? It still came out juicy and flavorful. A little slower, sure, but it proved that this Easy Chicken That Always Turns Out Perfect is pretty forgiving, even for us chaotic cooks.

Ingredients for Easy Chicken That Always Turns Out Perfect
- Whole Chicken (3-4 lbs): Honestly, don’t overthink it, just grab a good quality bird. This is the star of our show, so a decent foundation matters for Easy Chicken That Always Turns Out Perfect.
- Olive Oil (2 tbsp): Extra virgin, please! It helps get that skin nice and crispy and carries all those lovely flavors. Don’t skimp, it’s worth it.
Lemon (1, halved): Not just for looks! Tucks inside the cavity to infuse a bright, fresh flavor that makes a huge difference. I tried it once with lime, worked kinda, but lemon is superior here.
Yellow Onion (1, quartered): Pop this in the cavity too. It adds a subtle sweetness and moisture as it roasts. I’ve used red onion in a pinch, it’s a bit stronger, but still good.
Garlic (6-8 cloves, smashed): Yes, I said 6-8. I’m a garlic fiend, and you should be too. Smash them, don’t chop, and tuck them around and inside. Fresh over dried, always!
- Fresh Rosemary (2 sprigs): The piney notes are just divine with chicken. If you only have dried, use about 1 tsp, but honestly, get fresh if you can. It smells heavenly.
Fresh Thyme (4 sprigs): Another herb hero! It complements the rosemary beautifully. Again, fresh is best, it just gives that earthy aroma you want.
Smoked Paprika (1 tsp): This is my little secret. It gives a beautiful color and a subtle smoky depth. Don’t skip it, it adds that ‘something special’ to our Easy Chicken That Always Turns Out Perfect.
Kosher Salt (1.5 tsp): Don’t be afraid of salt, it brings out all the flavors. I tried using regular table salt once and oversalted everything oops! Kosher is easier to control.
Black Pepper (0.5 tsp, freshly ground): Freshly ground makes all the difference, trust me. It’s got a zing that pre-ground just can’t match.
How to Make Easy Chicken That Always Turns Out Perfect
- Prep the Bird:
- First things first, take your chicken out of the fridge about 30-45 minutes before you plan to roast it. This lets it come closer to room temperature, which helps it cook more evenly, honestly. Pat it super dry with paper towels this is key for crispy skin, folks! I always forget this step and then wonder why my skin isn’t as crunchy as I want it. Don’t be like me!
- Season Generously:
- Drizzle that olive oil all over the chicken, then rub it in everywhere, getting into all the nooks and crannies. Sprinkle the salt, pepper, and smoked paprika evenly, making sure to coat the entire bird. Don’t forget the underside! This is where the magic starts for our Easy Chicken That Always Turns Out Perfect. I once missed a whole side, and that part was a bit bland, lesson learned!
- Stuff & Arrange:
- Now, stuff the lemon halves, onion quarters, smashed garlic cloves, rosemary, and thyme sprigs into the chicken cavity. This infuses incredible flavor from the inside out, trust me, the aroma is going to be amazing! Place your seasoned chicken breast-side up in a roasting pan or on a baking sheet. Make sure it’s got a little room around it.
- Roast It Up:
- Pop that beauty into a preheated 400°F (200°C) oven. Let it roast for about 45-60 minutes, depending on its size. You’re looking for that gorgeous golden-brown skin and an internal temperature of 165°F (74°C) in the thickest part of the thigh, without touching the bone. I always use a meat thermometer here, it’s a game-changer for consistently juicy results.
- Rest, Don’t Rush:
- This is crucial! Once cooked, take the chicken out of the oven and tent it loosely with foil. Let it rest for at least 10-15 minutes before carving. Seriously, don’t skip this part! This allows the juices to redistribute throughout the meat, giving you that incredibly tender, moist chicken we’re aiming for. I used to carve immediately and ended up with dry chicken and a puddle of juice on my board oops!
- Carve & Serve:
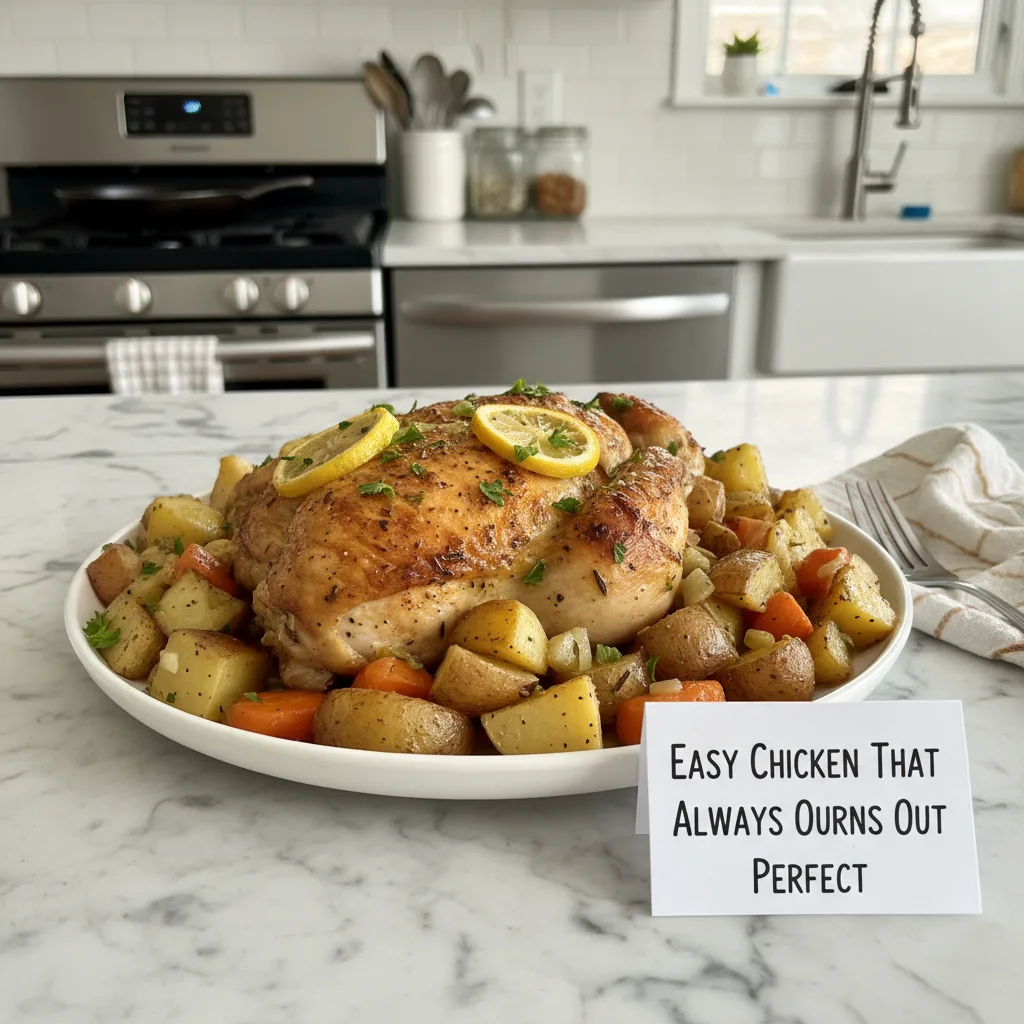
- After resting, carve your Easy Chicken That Always Turns Out Perfect. The skin should be wonderfully crispy, the meat incredibly juicy and flavorful. Drizzle with any pan juices, if you like. The smell alone at this stage is enough to make your mouth water. Serve it up with your favorite sides, and prepare for happy faces!
Honestly, this recipe has saved my dinner plans more times than I can count. There was that one chaotic Tuesday when I thought I had nothing for dinner, then remembered this little gem. Within an hour, the house smelled amazing, and we had a fantastic meal. It’s those moments of simple kitchen triumphs, especially when everything else feels a bit messy, that make cooking so rewarding. This truly is Easy Chicken That Always Turns Out Perfect, even for me!
Storing Your Easy Chicken That Always Turns Out Perfect
Leftovers of this Easy Chicken That Always Turns Out Perfect are a dream, honestly! Once cooled, carve any remaining meat off the bone and store it in an airtight container in the fridge. It usually lasts about 3-4 days. I’ve made the mistake of leaving it on the counter too long after dinner, thinking I’d get to it later don’t do that, food safety first! For reheating, I actually prefer warming it gently in a skillet with a splash of broth to keep it from drying out. Microwaving it once made the meat a bit rubbery and the sauce separated so don’t do that lol. It holds up beautifully for salads, sandwiches, or even a quick chicken noodle soup base. The bones? Save ’em for broth! It’s liquid gold.

Ingredient Substitutions for Easy Chicken That Always Turns Out Perfect
Life happens, and sometimes you don’t have exactly what the recipe calls for, right? For the herbs, feel free to swap rosemary and thyme for a mix of dried Italian herbs (about 2 tsp total), though fresh really does shine. I tried dried once, and it worked, kinda, but the aroma wasn’t quite the same. No lemon? An orange half can work in a pinch for a slightly sweeter, less tart flavor. As for the garlic, if you’re out of fresh, a teaspoon of garlic powder can stand in, but those smashed cloves give such a rustic, deep flavor. Want a kick? Add a pinch of cayenne pepper with the paprika. I’ve even thrown in some sliced bell peppers or carrots into the roasting pan with the chicken for a one-pan meal, and it was delicious. Don’t be afraid to experiment a little, that’s how we find our favorites!
Serving Your Easy Chicken That Always Turns Out Perfect
Oh, the possibilities! This Easy Chicken That Always Turns Out Perfect is so versatile. For a simple weeknight, I love serving it with some fluffy mashed potatoes (hello, pan juices!) and steamed green beans. If I’m feeling a bit more ambitious, a vibrant roasted root vegetable medley or a fresh garden salad with a light vinaigrette works wonders. A crisp Sauvignon Blanc or even just a sparkling lemonade pairs beautifully. This dish and a good rom-com? Yes please. It’s comfort food that can be dressed up or down. Sometimes I just shred the leftovers and make killer chicken tacos the next day. It’s the kind of meal that just fits any mood or occasion, honestly.
The Backstory of My Easy Chicken That Always Turns Out Perfect
While this isn’t a recipe with ancient cultural origins, its roots for me are deeply personal, tied to my own journey in the kitchen. Growing up, chicken was often, well, just chicken. It wasn’t until I started really cooking for myself and my family that I sought out a reliable, simple method. This version evolved from countless attempts, a few kitchen disasters (remember the dry chicken?), and a lot of tasting. It’s become my personal benchmark for what a home-cooked chicken should be: straightforward, flavorful, and consistently satisfying. It’s the kind of dish that feels like a warm hug, a reminder that even the simplest ingredients, prepared with a little love and a few tricks, can create something truly special. It’s my family’s go-to for Easy Chicken That Always Turns Out Perfect.
So there you have it, my friends. This isn’t just chicken, it’s a trusty companion for busy evenings, a centerpiece for relaxed gatherings, and a little piece of comfort I hope you’ll love as much as I do. It truly is the Easy Chicken That Always Turns Out Perfect in my book. Give it a try, and let me know your kitchen tales. Happy roasting!

Frequently Asked Questions about Easy Chicken That Always Turns Out Perfect
- → Why does my chicken sometimes turn out dry?
Oh, I’ve been there! Usually, it’s overcooking or not letting it rest. Use a meat thermometer to hit 165°F, and then tent it with foil for 10-15 minutes. That resting step is a lifesaver, honestly, it lets the juices settle back into the meat.
- → Can I use chicken pieces instead of a whole chicken?
Absolutely! This method works great for bone-in, skin-on thighs or drumsticks. Just adjust the cooking time down, probably around 30-40 minutes, and still aim for that 165°F internal temp. I’ve done it many times for quicker weeknight meals.
- → What’s the secret to really crispy skin?
Two things: patting the chicken super dry before seasoning, and roasting at a higher temperature. Also, don’t overcrowd the pan, let that hot air circulate! Sometimes I even add a tiny pinch of baking powder to the salt mix, it helps, honestly!
- → How long do leftovers last, and how should I reheat them?
Leftover chicken is good for 3-4 days in an airtight container in the fridge. For reheating, I always recommend gently warming it in a skillet with a splash of broth or in the oven at a low temperature to keep it moist. Microwaving can make it tough, I learned that the hard way!
- → Can I add vegetables to the roasting pan?
Yes, please do! I often toss chopped potatoes, carrots, or even Brussels sprouts with a little olive oil, salt, and pepper and roast them alongside the chicken. They soak up all those delicious pan juices and make it a complete meal! It’s one of my favorite ways to make this Easy Chicken That Always Turns Out Perfect even easier.

Simple Roast Chicken, Reliably Delicious
- Prep Time: 15 Minutes
- Cook Time: 45 Minutes
- Total Time: 60 Minutes
- Yield: 4 Servings
- Category: Easy dinners
Description
Simple Roast Chicken, reliably delicious and tender every time. This easy recipe promises juicy results, perfect for busy weeknights or a relaxed family dinner.
Ingredients
- Main Ingredients:
- Whole Chicken (3-4 lbs)
- Olive Oil (2 tbsp)
- Lemon (1, halved)
- Yellow Onion (1, quartered)
- Flavor Boosters:
- Garlic (6-8 cloves, smashed)
- Fresh Rosemary (2 sprigs)
- Fresh Thyme (4 sprigs)
- Smoked Paprika (1 tsp)
- Seasonings & Spices:
- Kosher Salt (1.5 tsp)
- Black Pepper (0.5 tsp, freshly ground)
Instructions
- Prep the Bird:: First things first, take your chicken out of the fridge about 30-45 minutes before you plan to roast it. This lets it come closer to room temperature, which helps it cook more evenly, honestly. Pat it *super* dry with paper towels – this is key for crispy skin, folks! I always forget this step and then wonder why my skin isn’t as crunchy as I want it. Don’t be like me!
- Season Generously:: Drizzle that olive oil all over the chicken, then rub it in everywhere, getting into all the nooks and crannies. Sprinkle the salt, pepper, and smoked paprika evenly, making sure to coat the entire bird. Don’t forget the underside! This is where the magic starts for our Easy Chicken That Always Turns Out Perfect. I once missed a whole side, and that part was a bit bland, lesson learned!
- Stuff & Arrange:: Now, stuff the lemon halves, onion quarters, smashed garlic cloves, rosemary, and thyme sprigs into the chicken cavity. This infuses incredible flavor from the inside out, trust me, the aroma is going to be amazing! Place your seasoned chicken breast-side up in a roasting pan or on a baking sheet. Make sure it’s got a little room around it.
- Roast It Up:: Pop that beauty into a preheated 400°F (200°C) oven. Let it roast for about 45-60 minutes, depending on its size. You’re looking for that gorgeous golden-brown skin and an internal temperature of 165°F (74°C) in the thickest part of the thigh, without touching the bone. I always use a meat thermometer here; it’s a game-changer for consistently juicy results.
- Rest, Don’t Rush:: This is crucial! Once cooked, take the chicken out of the oven and tent it loosely with foil. Let it rest for at least 10-15 minutes before carving. Seriously, don’t skip this part! This allows the juices to redistribute throughout the meat, giving you that incredibly tender, moist chicken we’re aiming for. I used to carve immediately and ended up with dry chicken and a puddle of juice on my board – oops!
- Carve & Serve:: After resting, carve your Easy Chicken That Always Turns Out Perfect. The skin should be wonderfully crispy, the meat incredibly juicy and flavorful. Drizzle with any pan juices, if you like. The smell alone at this stage is enough to make your mouth water. Serve it up with your favorite sides, and prepare for happy faces!


