Introduction to Grilled Tri-Tip Sliders
There’s something incredibly satisfying about grilling, and when it comes to making the excellent Grilled Tri-Tip Sliders, I can’t help but feel a sense of joy and excitement. Imagine juicy slices of marinated tri-tip, bursting with flavor, nestled between soft, buttery buns. This recipe is not just a meal; it’s an experience that brings family and friends together around the grill.
Over the years, I’ve perfected my approach to crafting these tantalizing sliders. They are ideal for summer barbecues, game day gatherings, or even a cozy weeknight dinner. The best part? They’re surprisingly easy to make. Each slider is a delightful combination of savory meat and fresh toppings that will leave everyone coming back for more. With every bite, you’ll savor the rich, smoky flavors that only grilling can achieve.

As a passionate home cook, I find that these Grilled Tri-Tip Sliders not only satisfy hunger but also foster connections. Whether you’re entertaining guests or treating yourself to a special meal, these sliders are sure to impress. So, let’s fire up the grill and dive into this mouthwatering recipe that promises to elevate your culinary game!
Why You’ll Love This Grilled Tri-Tip Sliders
When I first discovered the magic of Grilled Tri-Tip Sliders, I knew I had stumbled upon something truly special. The blend of juicy, tender meat with the right balance of spices creates an explosion of flavor that’s just irresistible. Each bite transports you to a summer barbecue, regardless of the season. This dish has become a staple in my home, and I can’t wait to share why you’ll love making these sliders as much as I do.
First and foremost, the Grilled Tri-Tip Sliders are incredibly easy to prepare. With just a handful of ingredients, you’ll find yourself whipping up a gourmet burger experience in no time. Even on busy weeknights, this recipe comes together quickly, allowing you to serve a tasty meal without spending hours in the kitchen. The satisfying sizzle of the tri-tip on the grill is a sound that brings joy, and the aroma wafting through your home will have everyone eagerly anticipating dinner.
Another reason to love these sliders is their versatility. You can customize them to suit your taste or dietary preferences. Whether you prefer a classic approach with tangy barbecue sauce or want to explore flavors with a spicy aioli, the options are endless. Plus, the small size of these sliders makes them excellent for gatherings, allowing everyone to sample multiple flavors without feeling overly stuffed.
And let’s not forget about the texture! The combination of the grilled tri-tip’s crusty exterior and juicy interior, paired with a soft slider bun, creates a delightful contrast that’s hard to resist. When you take a bite of these Grilled Tri-Tip Sliders, you’ll experience a satisfying crunch followed by a burst of savory goodness. It’s an experience that will leave your taste buds dancing.
Overall, these sliders are a nice way to bring family and friends together. They’re not just food; they’re an invitation to gather around the table, share stories, and create lasting memories. Once you make these Grilled Tri-Tip Sliders, they will undoubtedly become a beloved dish in your home, just as they have in mine. So, let’s get started on this tasty journey!
Ingredients for Grilled Tri-Tip Sliders
When it comes to making Grilled Tri-Tip Sliders, the right ingredients make all the difference. Each component brings its own unique flavor and texture to the table, ensuring that every bite is a delightful experience. Here’s what you’ll need to create these mouthwatering sliders.
- Tri-Tip Steak: This flavorful cut of beef is the star of the show. Its rich marbling ensures tenderness and a juicy bite when grilled to perfection.
- Olive Oil: A drizzle of high-quality olive oil not only helps to marinate the meat but also enhances its natural flavors. Plus, it creates a beautiful crust on the grill.
- Garlic Powder: This seasoning adds depth and aroma, infusing the tri-tip with a savory essence that pairs beautifully with beef.
- Onion Powder: Similar to garlic powder, onion powder brings a subtle sweetness and complexity to the seasoning mix, elevating the overall taste.
- Smoked Paprika: For a hint of smokiness, smoked paprika is essential. It adds a warm, vibrant color and a depth of flavor that truly enhances the grilled meat.
- Salt and Pepper: Simple yet vital, these staples are crucial for bringing out the natural flavors of the tri-tip. Be generous but mindful to season to taste.
- Slider Buns: Choose soft and slightly toasted slider buns to cradle your grilled tri-tip. They should be sturdy enough to hold all the tasty toppings.
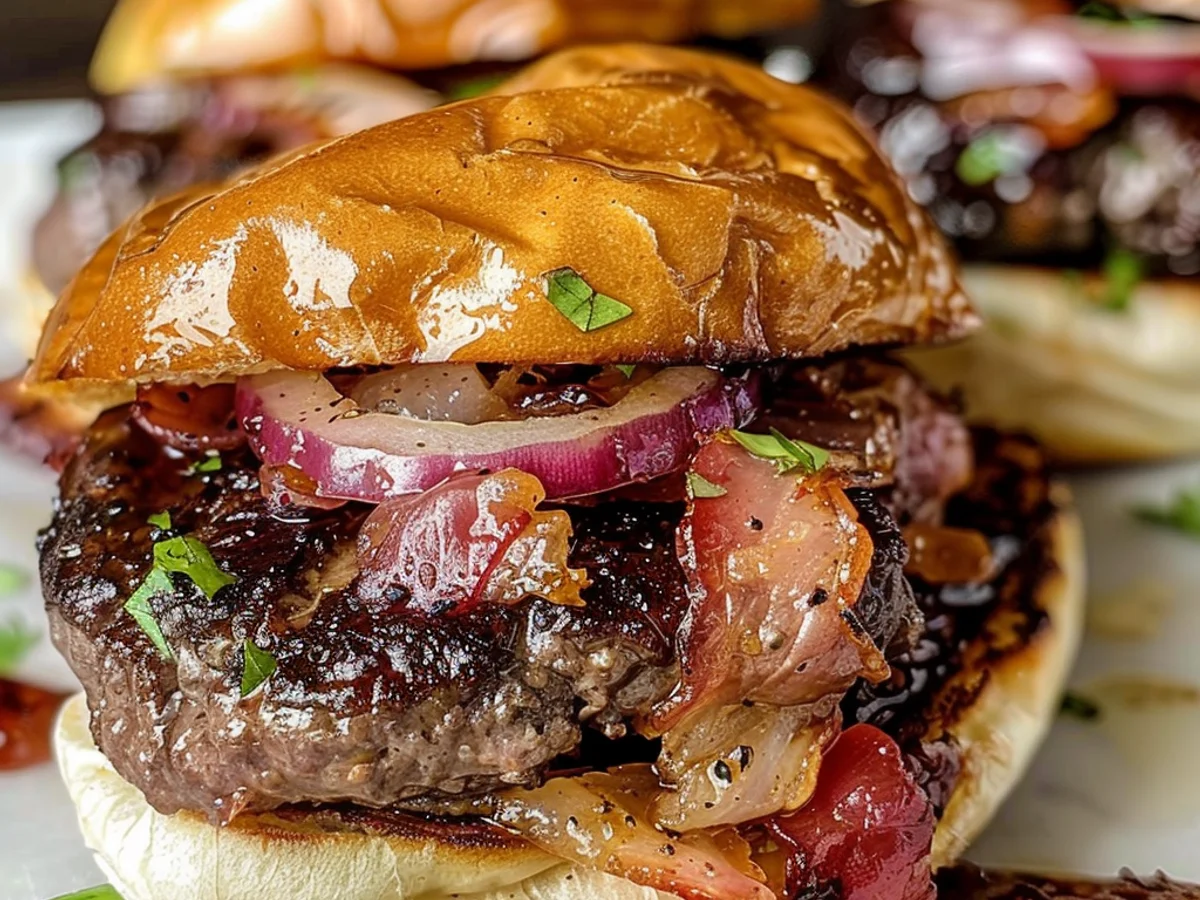
- Toppings: The possibilities are endless! I love adding slices of sharp cheddar cheese for creaminess, crisp lettuce for freshness, and juicy tomatoes for a burst of flavor. You can also include tangy pickles or a zesty aioli for an extra kick.
These ingredients combine to create unforgettable Grilled Tri-Tip Sliders, excellent for gatherings or a tasty weeknight dinner. Feel free to get creative with the toppings; after all, the beauty of sliders lies in their versatility. Whether you’re grilling in the backyard or cooking on a stovetop, you’ll find that these ingredients come together to create a meal that’s not just satisfying but downright memorable.
How to Make Grilled Tri-Tip Sliders
- Prepare the Tri-Tip: Start by selecting a beautiful piece of tri-tip, about 2 to 3 pounds. I love to season it generously with a blend of salt, pepper, and garlic powder. This simple seasoning enhances the natural flavor of the meat. Let it sit at room temperature for about 30 minutes to allow the spices to penetrate.
- Preheat the Grill: While the tri-tip is resting, preheat your grill to medium-high heat, around 400°F. I usually aim for a nice sear, which locks in the juices and creates a tasty crust. If you’re using a charcoal grill, make sure the coals are evenly distributed.
- Grill the Tri-Tip: Once the grill is hot, place the tri-tip on it. Grill for about 5-7 minutes on each side to achieve a lovely sear. After searing, move it to a cooler part of the grill and cover it. Allow it to cook for an additional 20-30 minutes, or until it reaches an internal temperature of 135°F for medium-rare. Use a meat thermometer for accuracy!
- Rest the Meat: Once off the grill, let the tri-tip rest for at least 10-15 minutes. Resting helps the juices redistribute throughout the meat, making your Grilled Tri-Tip Sliders incredibly juicy and tender. While it rests, I like to prepare the slider buns and toppings.
- Slice the Tri-Tip: Using a sharp knife, slice the tri-tip against the grain into thin strips. This is crucial for tenderness! The aroma of the grilled meat will fill your kitchen, making it hard to resist.
- Assemble the Sliders: Take your slider buns and lightly toast them on the grill for a minute. This adds a delightful crunch. Then, pile on the sliced tri-tip, and I love to add some caramelized onions and a dollop of creamy horseradish sauce for extra flavor. Feel free to customize with your favorite toppings!
- Serve and Enjoy: Arrange the sliders on a platter, and watch them disappear! The smoky flavor from the grill combined with the juicy tri-tip makes these Grilled Tri-Tip Sliders a hit at any gathering. Pair them with chips or a fresh salad for a complete meal.
Making Grilled Tri-Tip Sliders is not just about cooking; it’s about creating an experience. The savory scent of the meat on the grill is bound to draw everyone in, and the satisfaction of biting into a perfectly crafted slider is truly rewarding. Enjoy your culinary adventure!
Tips for Success
When it comes to making the excellent Grilled Tri-Tip Sliders, there are a few tips I’ve learned that can truly elevate your dish. These aren’t just simple suggestions; they’re insights from countless grilling sessions that have helped me refine my technique. Here’s what I recommend:
- Choose the right cut: Opt for a well-marbled tri-tip. The fat will render and keep the meat juicy, enhancing the flavor in your Grilled Tri-Tip Sliders.
- Marinate wisely: Allow the tri-tip to marinate for at least 4 hours, or even overnight. This step infuses deep flavors and tenderizes the meat.
- Grill with precision: Aim for a two-zone fire on your grill. Start with high heat to sear the meat, then move it to a cooler side to finish cooking through.
- Rest your meat: After grilling, let the tri-tip rest for at least 10 minutes. This helps redistribute the juices, ensuring each bite of your sliders is packed with flavor.
- Slice against the grain: For the most tender bites, slice the tri-tip against the grain. This small step makes a big difference in texture for your Grilled Tri-Tip Sliders.
- Don’t forget the toppings: Fresh toppings like crunchy coleslaw or a zesty aioli can elevate your sliders, adding flavor and texture that complements the beef perfectly.
- Keep it simple: Sometimes, less is more. A good quality bun and a few well-chosen toppings can make your Grilled Tri-Tip Sliders shine without overwhelming them.
With these tips, you’ll be well on your way to mastering the art of Grilled Tri-Tip Sliders. Each bite will be a burst of flavor, thanks to your careful attention to detail!
Equipment Needed
When it comes to making Grilled Tri-Tip Sliders, having the right equipment can make all the difference. Over the years, I’ve honed my list of essentials that not only streamline the cooking process but also enhance the flavors of this delectable dish. Below, I’ve outlined the must-have tools for crafting these mouthwatering sliders with ease.
- Grill: A charcoal or gas grill works beautifully for achieving those excellent grill marks and smoky flavor. If you don’t have a grill, you can use a grill pan on the stovetop.
- Meat Thermometer: This tool is essential for checking the internal temperature of the tri-tip, ensuring it’s cooked to your desired doneness.
- Cutting Board: A sturdy cutting board is crucial for slicing the tri-tip. Opt for one that can handle a bit of pressure.
- Sharp Knife: A good chef’s knife will help you slice the meat thinly and evenly, making for tender sliders.
- Serving Platter: Once your Grilled Tri-Tip Sliders are assembled, a beautiful serving platter will showcase your creation and impress your guests.
- Grilling Tools: Tongs and a spatula are important for flipping and serving your tri-tip without losing that precious juiciness.
With these tools in hand, you’re set to create the best Grilled Tri-Tip Sliders that will have everyone coming back for seconds. The right equipment not only makes the cooking process smoother but also elevates the entire experience, allowing you to focus on the joy of grilling and serving tasty food.
Variations
As a passionate home cook, I love experimenting with my Grilled Tri-Tip Sliders to create exciting variations that cater to different tastes and dietary preferences. Here are some of my favorite adaptations that elevate this recipe even further:
- Spicy Chipotle Sliders: For those who crave a kick, mix chipotle powder into the marinade. Additionally, serve the sliders with a spicy chipotle mayo made by blending mayo with adobo sauce from a can of chipotle peppers. This adds a smoky heat that pairs beautifully with the savory tri-tip.
- Asian-Inspired Sliders: Marinate the tri-tip in a mix of soy sauce, ginger, and garlic for an Asian twist. Top the sliders with a crunchy slaw made from carrots, cabbage, and a sesame vinaigrette. This combination brings a fresh, vibrant flavor profile to the Grilled Tri-Tip Sliders.
- BBQ Glazed Sliders: After grilling, brush the tri-tip with your favorite barbecue sauce. Serve the sliders with a slice of sharp cheddar cheese and pickles for a classic BBQ experience that’s both tangy and tasty.
- Vegetarian Option: For a meatless alternative, replace the tri-tip with grilled portobello mushrooms. Marinate the mushrooms in balsamic vinegar and olive oil, then grill them until tender. Serve on slider buns with fresh basil and mozzarella for a delightful flavor combination.
- Herbed Aioli: Instead of regular mayo, whip up a herbed aioli with garlic, lemon juice, and fresh herbs like parsley and dill. This creamy spread adds a layer of sophistication to the Grilled Tri-Tip Sliders and enhances the overall flavor.
Each of these variations showcases how versatile the Grilled Tri-Tip Sliders can be. Whether you’re hosting a gathering or enjoying a casual family meal, these adaptations will impress your guests and keep everyone coming back for more!
Print

Grilled Tri-Tip Sliders: enhance Your BBQ taste!
- Prep Time: 15 minutes
- Cook Time: 30 minutes
- Total Time: 45 minutes
- Yield: 12 servings 1x
- Category: Main Dish
- Cuisine: American
Description
Savory grilled tri-tip sliders served on soft buns, perfect for a casual gathering or game day.
Ingredients
- 2 pounds tri-tip roast
- 1 tablespoon olive oil
- 2 teaspoons garlic powder
- 2 teaspoons onion powder
- 1 teaspoon smoked paprika
- 1 teaspoon black pepper
- 1 teaspoon salt
- 12 slider buns
- 1 cup barbecue sauce
- 1 cup coleslaw (optional)
Instructions
- Preheat your grill to medium-high heat.
- In a small bowl, mix together the olive oil, garlic powder, onion powder, smoked paprika, black pepper, and salt to create a dry rub.
- Rub the mixture all over the tri-tip roast, ensuring it is evenly coated.
- Place the tri-tip on the grill and cook for about 25-30 minutes, turning occasionally, until it reaches an internal temperature of 135°F for medium-rare.
- Remove the tri-tip from the grill and let it rest for 10 minutes before slicing.
- While the meat is resting, warm the slider buns on the grill for about 2 minutes.
- Slice the tri-tip against the grain into thin slices.
- Assemble the sliders by placing a few slices of tri-tip onto each bun, adding a drizzle of barbecue sauce and a spoonful of coleslaw if desired.
- Serve immediately and enjoy!
Notes
- For a spicier version, add cayenne pepper to the dry rub.
- Feel free to use your favorite barbecue sauce for added flavor.
- Leftover tri-tip can be stored in the refrigerator for up to 3 days.
Nutrition
- Serving Size: 1 slider
- Calories: 250
- Sugar: 5 g
- Sodium: 350 mg
- Fat: 10 g
- Saturated Fat: 3 g
- Carbohydrates: 30 g
- Fiber: 1 g
- Protein: 15 g
- Cholesterol: 50 mg


