Honestly, I still remember the first time I stumbled upon the idea of Baked Caesar Chicken. It was one of those frantic Tuesday nights, you know the drill fridge looking a bit sparse, kids asking “what’s for dinner?” every five minutes. I had some chicken breasts, a bottle of Caesar dressing that was about to expire, and a prayer. I thought, “What if…?” The kitchen was a glorious mess, flour everywhere, but the smell? Oh my goodness. That first bite was a revelation. It tasted like comfort, like a hug, and surprisingly, like I knew what I was doing! This dish became my secret weapon, my “I got this” meal, and it’s been a staple ever since. It’s cheesy, it’s creamy, and it just works.
One time, I got a little too enthusiastic with the garlic powder, thinking “more garlic, more flavor, right?” Wrong. The chicken tasted like a vampire’s worst nightmare! My family still teases me about that dinner. It was edible, but honestly, it taught me a lesson about restraint. You live and learn, especially in my kitchen, where experiments are a daily occurrence!

Ingredients for Baked Caesar Chicken
- Boneless, Skinless Chicken Breasts: I always go for organic if I can, but honestly, any good quality chicken will do. These are the stars, so don’t skimp!
- Caesar Dressing: Use your favorite creamy Caesar dressing, hon. The bottled stuff is totally fine here. I once tried making my own and it was an… adventure. Let’s just say a good store-bought one saves you a headache.
- Parmesan Cheese (grated): Freshly grated Parmesan just melts better and tastes richer. Don’t use the pre-shredded stuff if you can help it, it just doesn’t have the same oomph.
- Cream Cheese (softened): This is what gives us that dreamy, creamy sauce. Make sure it’s softened, or you’ll have lumps, and nobody wants lumpy sauce!
- Milk (any kind): I usually use whole milk for richness, but almond milk works if you’re dairy-free or just prefer it. I tried skim once and it was too watery, just don’t!
- Garlic Powder & Onion Powder: These are my secret weapons for a savory kick. I always add a little extra, you can never have too much flavor, right?
- Dried Oregano: A little herbal note really brightens things up. I’ve been known to sprinkle a bit extra, especially if my kitchen is smelling a bit bland.
- Black Pepper: Freshly ground, always! It just has more zing than the pre-ground stuff.
- Fresh Parsley (for garnish): A sprinkle of green at the end makes everything look fancy. It’s not just for looks, though, it adds a lovely freshness.
Baked Caesar Chicken: Step-by-Step Instructions
- Prep Your Chicken, Caesar Chicken Style:
- First things first, let’s get that oven preheating to 400°F (200°C). Grab your chicken breasts and pat them dry with paper towels. This step is super important, honestly, it helps them get a nice sear later if you decide to go that route, or just helps the seasoning stick. Then, season them lightly with a pinch of salt and pepper. I usually do this right on the baking dish to save on cleaning extra plates. Oh, and give your baking dish a quick spray with cooking oil, trust me, future you will thank you for easier cleanup!
- Whip Up the Creamy Caesar Sauce:
- Alright, time for the magic sauce! In a medium bowl, combine your softened cream cheese, that lovely Caesar dressing, half of your grated Parmesan, milk, garlic powder, onion powder, and dried oregano. Whisk it all together until it’s smooth and creamy. I sometimes get impatient and try to use cold cream cheese, and oops, I end up with little lumps. So, make sure it’s really soft! Taste it does it need a little more pepper? A tiny pinch of salt? Adjust it to your heart’s content, you’re the chef here!
- Coat and Bake Your Chicken:
- Now, place those seasoned chicken breasts into your prepared baking dish. Pour that glorious, creamy Caesar sauce all over the chicken, making sure each piece is nicely coated. I like to use a spoon to really spread it evenly, getting into all the nooks and crannies. Pop the dish into your preheated oven and bake for about 20-25 minutes. You want the chicken to be cooked through, reaching an internal temperature of 165°F (74°C). The kitchen will start smelling absolutely divine around this point, honestly!
- Add More Cheese for Golden Perfection:
- After that initial bake, pull the dish out of the oven. Now for the best part, in my humble opinion! Sprinkle the remaining grated Parmesan cheese generously over the top of the chicken and sauce. I mean, don’t be shy here. More cheese is always a good idea, right? Return the dish to the oven and bake for another 5-10 minutes, or until the cheese is melted, bubbly, and a beautiful golden brown. Keep an eye on it so it doesn’t get too dark!
- Let Your Chicken Rest:
- This step is crucial, friends! Once the chicken is perfectly golden and cooked through, take it out of the oven. I know it’s tempting to dig right in, but letting it rest for 5-10 minutes is a game-changer. It allows the juices to redistribute throughout the chicken, keeping it super tender and moist. If you slice it too soon, all those delicious juices will just run out onto your plate, and we don’t want that! This is where patience pays off.
- Garnish and Serve Your Creamy Chicken:
- Finally, the grand finale! Before serving, sprinkle your freshly chopped parsley over the top. The vibrant green adds a lovely pop of color and a fresh, herbaceous note that balances the richness of the sauce. It just makes the whole dish look incredibly inviting. Serve your creamy chicken with your favorite sides. I love it with some crusty bread to sop up all that amazing sauce. Honestly, this dish is a winner every single time!
I remember one chaotic evening, I had friends coming over unexpectedly, and I realized I was out of my usual baking dish. I ended up using a cast-iron skillet, and honestly, the chicken came out with this incredible crispy bottom! It was a happy accident, proof that sometimes kitchen chaos leads to delicious discoveries. This Baked Caesar Chicken really shines no matter what you bake it in, as long as it’s made with love.
Storing Your Oven-Baked Chicken
So, you’ve got leftovers of this amazing Baked Caesar Chicken? Lucky you! I usually store any cooled chicken and sauce in an airtight container in the fridge for up to 3-4 days. Honestly, it reheats beautifully. I’ve found that gently reheating it on the stovetop over low heat, or in the oven at 300°F (150°C) covered, works best to keep the chicken tender and the sauce creamy. I microwaved it once, and oops, the sauce separated a bit and the chicken got a little tough so don’t do that lol. If you want to freeze it, I’ve had decent luck with just the cooked chicken breasts (without the sauce) for up to a month, then making a fresh batch of sauce when I’m ready to serve. The sauce itself doesn’t freeze super well, in my experience, as the cream cheese can get a bit grainy when thawed. So, best to enjoy that creamy goodness fresh!

Baked Caesar Chicken: Ingredient Substitutions
Life happens, and sometimes you don’t have exactly what the recipe calls for. I get it! For the chicken, boneless, skinless thighs work wonderfully too, they stay even juicier, honestly. Just adjust the cooking time a bit. If you’re out of Caesar dressing, a mix of mayo, lemon juice, Dijon mustard, and a dash of Worcestershire sauce can pinch-hit in a bind, though it won’t be quite the same, I tried it once and it worked… kinda. No cream cheese? Greek yogurt or sour cream can add tang and creaminess, but start with a smaller amount and taste as you go. For Parmesan, Pecorino Romano is a good swap, offering a sharper, saltier kick. And if you don’t have fresh parsley, dried parsley works, but use about a third of the amount and add it with the sauce for the best flavor infusion. Don’t be afraid to experiment, that’s how some of the best kitchen discoveries happen!
Serving Suggestions for this Creamy Chicken
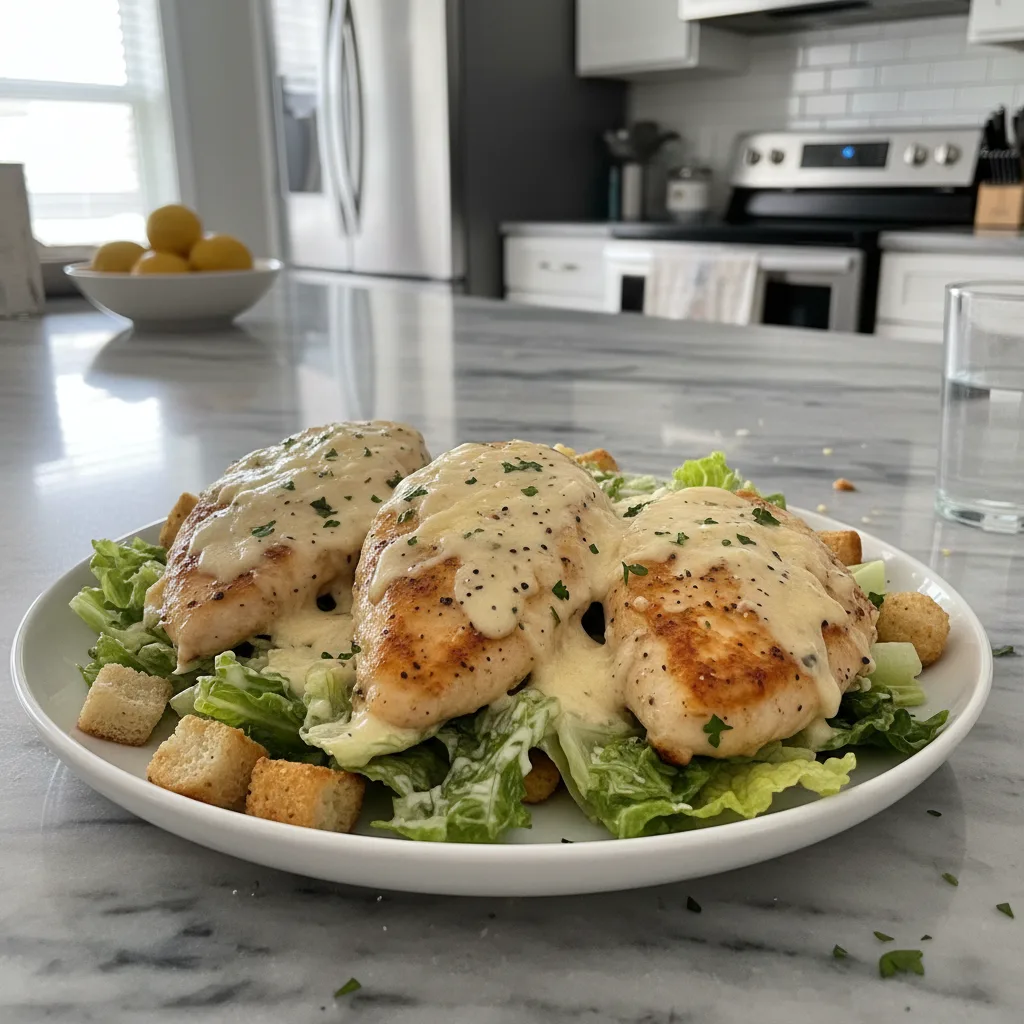
This creamy chicken is so versatile, it pairs with almost anything! For a simple weeknight, I love serving it with a side of steamed green beans or a crisp garden salad. If I’m feeling a bit more ambitious, roasted asparagus or broccoli always hit the spot. For something heartier, mashed potatoes or a simple rice pilaf are fantastic for soaking up all that incredible creamy Parmesan sauce. Honestly, a side of crusty garlic bread is non-negotiable in my house, it’s practically a requirement to scoop up every last drop. And for a truly cozy night in, this dish with a glass of crisp white wine and a good rom-com? Yes please, that’s my ideal evening right there. You could even top it with some homemade croutons for extra crunch, making it feel like a deconstructed Caesar salad!
Cultural Backstory of this Dish
While the Caesar salad itself has a fascinating origin story, often attributed to Tijuana, Mexico, this specific dish is more of a modern, comforting twist born from the sheer genius of home cooks looking for easy, flavorful weeknight meals. It’s not steeped in centuries of tradition, but rather in the very real, relatable need to turn simple ingredients into something special, quickly. For me, it became special because it was one of the first dishes where I truly felt like I was creating something new and delicious, rather than just following a recipe. It’s a testament to how classic flavors, like those in a Caesar salad, can be reimagined and repurposed into completely new, beloved comfort foods that bring families together around the dinner table. It’s a dish that celebrates convenience without sacrificing flavor, a true modern classic in my kitchen.
Honestly, this Baked Caesar Chicken has saved dinner more times than I can count. It’s become one of those dishes that just feels like home, filled with all the delicious memories and even a few kitchen mishaps. I hope it brings as much joy and easy comfort to your table as it does to mine. Don’t forget to tell me how your version turns out, I always love hearing about your kitchen adventures!

Baked Caesar Chicken: Frequently Asked Questions
- → Can I use chicken thighs instead of breasts for Baked Caesar Chicken?
Absolutely! I often use thighs because they stay so juicy. Just note that the cooking time might increase by about 5-10 minutes, so always check for an internal temperature of 165°F (74°C).
- → What if I don’t have Caesar dressing for this recipe?
You can try a quick homemade version with mayo, lemon juice, Dijon mustard, and a dash of Worcestershire. It won’t be exactly the same, but it gets the job done in a pinch, I’ve done it!
- → How do I prevent the sauce from separating in this chicken dish?
The key is using softened cream cheese and not overheating the sauce during reheating. Gentle, slow reheating on the stovetop or in the oven is your best friend, trust me!
- → Can I prep this oven-baked chicken ahead of time?
You can mix the sauce ingredients ahead of time and store them in the fridge. Assemble and bake just before serving for the best texture. I’ve tried assembling it completely, and the chicken can get a bit soggy, oops!
- → What vegetables pair well with Creamy Baked Caesar Chicken?
Roasted broccoli, asparagus, or a simple side salad are fantastic. I also love some sautéed spinach for a quick green veggie. Experiment with what you have!

Creamy Baked Caesar Chicken: Easy Oven Dinner
- Prep Time: 15 Minutes
- Cook Time: 35 Minutes
- Total Time: 50 Minutes
- Yield: 4 Servings 1x
- Category: Easy dinners
Description
Make tender Baked Caesar Chicken with creamy Parmesan sauce! This easy oven dinner is packed with flavor, perfect for weeknights.
Ingredients
- Main Ingredients:
- 4 boneless, skinless chicken breasts
- 1/2 cup creamy Caesar dressing
- 4 oz cream cheese, softened
- 1/4 cup milk (whole or almond)
- Flavor Boosters:
- 1 cup grated Parmesan cheese, divided
- 1 tsp garlic powder
- 1/2 tsp onion powder
- 1/2 tsp dried oregano
- 1/4 tsp black pepper
- Salt to taste
- Garnish & Finishing Touches:
- 2 tbsp fresh parsley, chopped
- Optional Extras:
- Pinch of red pepper flakes
- Homemade croutons
Instructions
- Prep Your Chicken, Caesar Chicken Style:: First things first, let’s get that oven preheating to 400°F (200°C). Grab your chicken breasts and pat them dry with paper towels. This step is super important, honestly, it helps them get a nice sear later if you decide to go that route, or just helps the seasoning stick. Then, season them lightly with a pinch of salt and pepper. I usually do this right on the baking dish to save on cleaning extra plates. Oh, and give your baking dish a quick spray with cooking oil; trust me, future you will thank you for easier cleanup!
- Whip Up the Creamy Caesar Sauce:: Alright, time for the magic sauce! In a medium bowl, combine your softened cream cheese, that lovely Caesar dressing, half of your grated Parmesan, milk, garlic powder, onion powder, and dried oregano. Whisk it all together until it’s smooth and creamy. I sometimes get impatient and try to use cold cream cheese, and oops, I end up with little lumps. So, make sure it’s really soft! Taste it – does it need a little more pepper? A tiny pinch of salt? Adjust it to your heart’s content, you’re the chef here!
- Coat and Bake Your Chicken:: Now, place those seasoned chicken breasts into your prepared baking dish. Pour that glorious, creamy Caesar sauce all over the chicken, making sure each piece is nicely coated. I like to use a spoon to really spread it evenly, getting into all the nooks and crannies. Pop the dish into your preheated oven and bake for about 20-25 minutes. You want the chicken to be cooked through, reaching an internal temperature of 165°F (74°C). The kitchen will start smelling absolutely divine around this point, honestly!
- Add More Cheese for Golden Perfection:: After that initial bake, pull the dish out of the oven. Now for the best part, in my humble opinion! Sprinkle the remaining grated Parmesan cheese generously over the top of the chicken and sauce. I mean, don’t be shy here. More cheese is always a good idea, right? Return the dish to the oven and bake for another 5-10 minutes, or until the cheese is melted, bubbly, and a beautiful golden brown. Keep an eye on it so it doesn’t get too dark!
- Let Your Chicken Rest:: This step is crucial, friends! Once the chicken is perfectly golden and cooked through, take it out of the oven. I know it’s tempting to dig right in, but letting it rest for 5-10 minutes is a game-changer. It allows the juices to redistribute throughout the chicken, keeping it super tender and moist. If you slice it too soon, all those delicious juices will just run out onto your plate, and we don’t want that! This is where patience pays off.
- Garnish and Serve Your Creamy Chicken:: Finally, the grand finale! Before serving, sprinkle your freshly chopped parsley over the top. The vibrant green adds a lovely pop of color and a fresh, herbaceous note that balances the richness of the sauce. It just makes the whole dish look incredibly inviting. Serve your creamy chicken with your favorite sides. I love it with some crusty bread to sop up all that amazing sauce. Honestly, this dish is a winner every single time!


