Introduction to Baking Cheesy Garlic Breadsticks Perfectly At Home
There’s something just irresistible about the aroma of freshly baked bread, especially when it’s infused with the rich flavors of garlic and melted cheese. When I first set out on my journey of Baking Cheesy Garlic Breadsticks Perfectly At Home, I never imagined how easy and satisfying it would be. It quickly became a staple in my kitchen, and now it’s a family favorite that never fails to bring smiles to our faces.
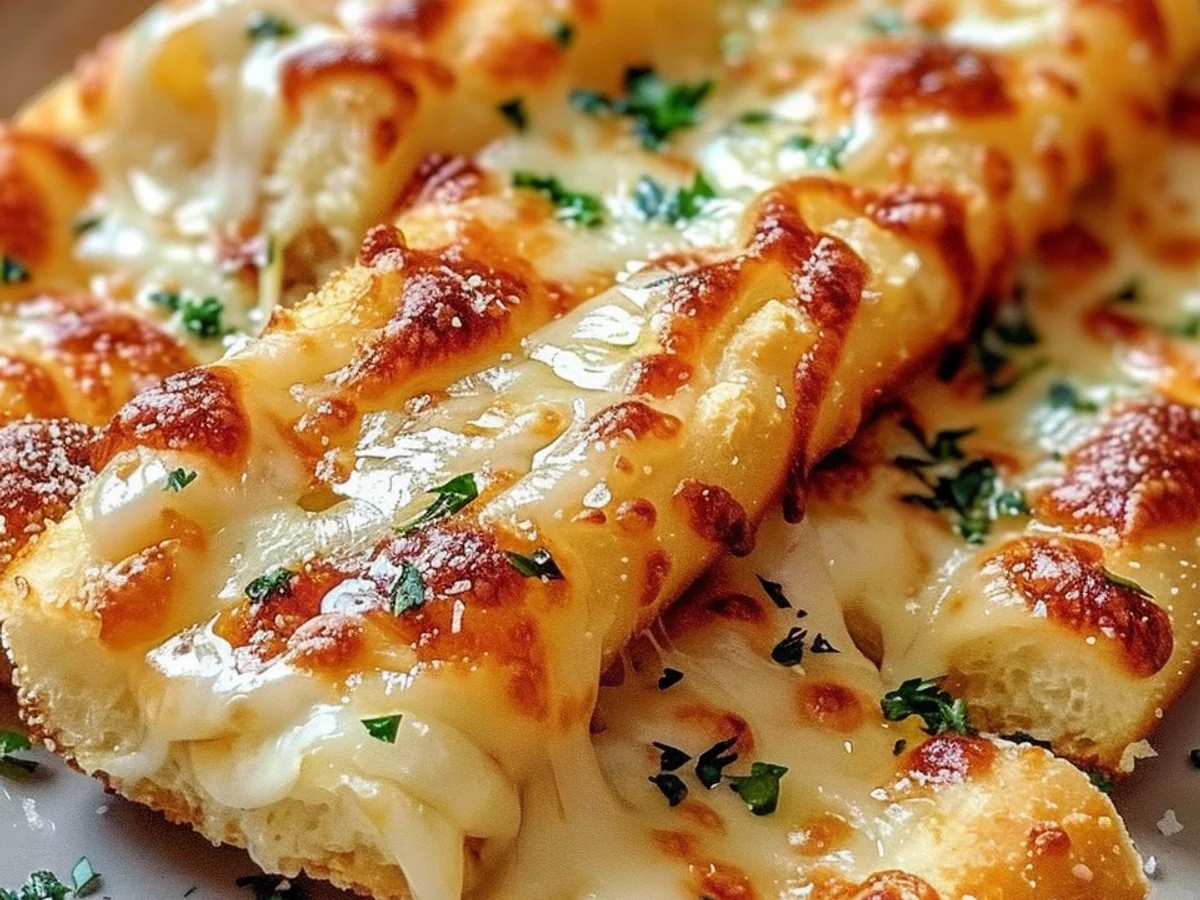
If you’ve ever ordered cheesy garlic breadsticks from your favorite pizzeria and thought, “I wish I could make this at home,” then you’re in for a delightful treat. This recipe is all about achieving that excellent balance of crispy edges and a soft, gooey center, topped with a generous shower of cheese and a tasty garlic butter spread. Trust me, once you master the art of Baking Cheesy Garlic Breadsticks Perfectly At Home, you’ll never want to go back to store-bought versions.

Additionally, the beauty of this recipe lies in its simplicity. With just a handful of ingredients that you likely already have in your pantry, you can create a dish that’s not only comforting but also impressive enough to serve at gatherings or cozy family dinners. You’ll find that each bite is a warm, cheesy hug, and the best part? You can customize it to suit your taste. Whether you prefer a sprinkle of herbs or a dash of red pepper flakes, the possibilities are endless. So, grab your apron, and let’s embark on this tasty journey of Baking Cheesy Garlic Breadsticks Perfectly At Home together!
Why You’ll Love This Baking Cheesy Garlic Breadsticks Perfectly At Home
One of the reasons I absolutely love baking cheesy garlic breadsticks perfectly at home is the incredible aroma that wafts through my kitchen. There’s something magical about the scent of freshly baked bread mingling with rich garlic and melted cheese. It instantly transports me to my favorite pizzeria, but the best part is that I can enjoy this delightful treat right in my own home.
Another aspect that makes this recipe so appealing is its simplicity. With just a handful of ingredients, I can whip up a batch of cheesy garlic breadsticks in no time. Whether I’m hosting a gathering or just craving a comforting snack, this recipe saves the day. Plus, it’s a fantastic way to involve my family in the cooking process, making it a fun activity that brings us all together.
The versatility of these cheesy garlic breadsticks is another major plus. I can serve them as an appetizer, a side dish, or even as a main attraction alongside a fresh salad or hearty soup. No matter the occasion, they never fail to impress. And let’s not forget the gooey, melted cheese that stretches with each bite-it’s just irresistible!
Lastly, baking cheesy garlic breadsticks perfectly at home gives me the satisfaction of creating something tasty from scratch. I take pride in knowing exactly what goes into my food, and I can customize the flavors to suit my family’s preferences. So, if you’re looking for a quick and delightful recipe that’s sure to please everyone, look no further than baking cheesy garlic breadsticks perfectly at home. Trust me, you’ll love every cheesy, garlicky bite!
Ingredients for Baking Cheesy Garlic Breadsticks Perfectly At Home
When I set out to create my excellent batch of Baking Cheesy Garlic Breadsticks Perfectly At Home, I discovered that the right combination of ingredients makes all the difference. Each component plays a vital role in achieving that heavenly, golden-brown texture and irresistible flavor. Let’s dive into the ingredients that will elevate your breadstick game.
- All-purpose flour: This is the base of our dough, providing structure and chewiness. You can experiment with bread flour for a chewier texture or whole wheat flour for a nutty flavor.
- Active dry yeast: Essential for leavening, yeast gives our breadsticks that delightful rise. If you prefer, you can substitute with instant yeast to skip the proofing step.
- Warm water: The temperature is crucial here; it should be just warm enough to activate the yeast. Too hot, and you’ll kill it; too cold, and it won’t awaken.
- Olive oil: This adds richness and flavor to the dough while keeping it moist. For an extra kick, consider using garlic-infused olive oil.
- Sugar: A touch of sugar feeds the yeast and enhances browning, resulting in a beautifully golden crust. If you’re avoiding sugar, honey can be a wonderful substitute.
- Salt: Don’t skip this! Salt enhances the bread’s flavor and controls yeast fermentation, ensuring a balanced taste.
- Garlic: Freshly minced garlic is a must for that aromatic punch. Alternatively, you can use garlic powder if that’s what you have on hand.
- Cheese: When it comes to cheese, I love using a blend of mozzarella and parmesan for a gooey, flavorful finish. Feel free to mix in some cheddar for a different twist!
- Parsley: Fresh chopped parsley not only adds a pop of color but also a fresh herbal note that complements the garlic beautifully.
- Optional toppings: You can add a sprinkle of red pepper flakes for heat or a drizzle of balsamic glaze for sweetness. The sky’s the limit!
These ingredients will come together to create a marvelous dough that bakes into the most tasty cheesy garlic breadsticks. Each bite will be a warm, cheesy embrace, making your kitchen feel like a cozy pizzeria. With these components on hand, you’re well on your way to Baking Cheesy Garlic Breadsticks Perfectly At Home.
How to Make Baking Cheesy Garlic Breadsticks Perfectly At Home
- Prepare the Dough: Start by mixing 2 cups of all-purpose flour, 1 tablespoon of sugar, 1 teaspoon of salt, and 1 packet of instant yeast in a large bowl. This combination creates a flavorful base for your Baking Cheesy Garlic Breadsticks Perfectly At Home. Gradually add 1 cup of warm water and 2 tablespoons of olive oil. Stir until the dough comes together, then knead it on a floured surface for about 5 minutes until it’s smooth and elastic.
- Let the Dough Rise: Place the kneaded dough in a lightly greased bowl, cover it with a damp cloth, and let it rise in a warm spot for about 1 hour. This step is crucial because it allows the dough to double in size, making your breadsticks fluffy and delightful. I always find that the smell of the rising dough is one of the best parts of making these breadsticks!
- Shape the Breadsticks: Once the dough has risen, punch it down gently to release the air. Then, turn it out onto a floured surface and roll it into a rectangle about 1/2 inch thick. Cut the dough into 1-inch strips. These strips will become your cheesy garlic breadsticks, so don’t worry about making them excellent; a little rustic charm adds to their appeal!
- Prepare the Garlic Butter: In a small bowl, combine 4 tablespoons of melted butter, 3 cloves of minced garlic, and 1 teaspoon of Italian seasoning. This fragrant mixture is the key to elevating your Baking Cheesy Garlic Breadsticks Perfectly At Home. Brush half of this mixture over the shaped dough before baking to infuse it with tasty garlic flavor.
- Bake the Breadsticks: Preheat your oven to 400°F (200°C). Place the strips on a baking sheet lined with parchment paper, making sure to leave some space between them. Bake for about 15-20 minutes or until they are golden brown. The aroma wafting through your kitchen will surely make your mouth water!
- Add the Cheese: Once the breadsticks are out of the oven, immediately sprinkle 1 cup of shredded mozzarella cheese over the warm breadsticks. The cheese will melt beautifully, creating that gooey, cheesy goodness we all love. Drizzle the remaining garlic butter over the top for an extra touch of flavor.
- Serve and Enjoy: Finally, let your cheesy garlic breadsticks cool for a few minutes before slicing them apart. Serve them warm with a side of marinara sauce for dipping. Trust me, the combination of flavors and textures in these Baking Cheesy Garlic Breadsticks Perfectly At Home will become a favorite in your household.
Tips for Success
When it comes to baking cheesy garlic breadsticks perfectly at home, a few tried-and-true tips can elevate your experience and the final product. As someone who has baked these delightful sticks many times, I’m excited to share some insights that will help you achieve that golden, cheesy goodness every time.
- Use fresh ingredients: Fresh garlic and high-quality cheese make a world of difference in flavor. I recommend grabbing a block of mozzarella and shredding it yourself for the best melt.
- Don’t skimp on the garlic: The more garlic, the better! I often add a little extra minced garlic to the butter for an intense, savory punch.
- Let the dough rest: After mixing, let your dough rest for at least 10 minutes. This relaxes the gluten and results in softer, fluffier breadsticks.
- Preheat your oven: Make sure your oven is fully preheated before baking. This ensures even cooking and helps achieve that excellent crispy exterior.
- Experiment with herbs: While garlic is a star, don’t hesitate to add dried Italian herbs like oregano or basil to the dough for an extra layer of flavor.
- Brush with garlic butter: Generously brush the breadsticks with garlic butter right before and after baking for a luscious, aromatic finish.
- Watch the baking time: Every oven is different, so keep a close eye on your breadsticks as they bake. You want them golden brown but not too dark.
- Serve warm: These cheesy garlic breadsticks are best enjoyed fresh from the oven. Pair them with your favorite marinara sauce for dipping!
By keeping these tips in mind, you’re setting yourself up for success in baking cheesy garlic breadsticks perfectly at home. Enjoy the process and the tasty aroma that fills your kitchen!
Equipment Needed
When it comes to Baking Cheesy Garlic Breadsticks Perfectly At Home, having the right equipment is essential for achieving that golden-brown crust and cheesy goodness. Over the years, I’ve discovered that using specific tools can make all the difference. Here’s what you’ll need:
- Mixing Bowl: A large mixing bowl is crucial for combining your dough ingredients. If you don’t have one, a deep saucepan can work in a pinch.
- Dough Scraper: This handy tool helps in kneading and shaping the dough. A spatula can serve as a good alternative.
- Baking Sheet: A standard rimmed baking sheet is excellent for your breadsticks. If you have a pizza stone, it can enhance the crust even more!
- Parchment Paper: Line your baking sheet with parchment for easy cleanup and to prevent sticking. If you don’t have it, a light greasing of the pan will also do.
- Rolling Pin: This tool is ideal for shaping your dough to the excellent thickness. A wine bottle can be a clever substitute if you’re in a bind.
- Oven Mitts: Protect your hands when handling hot trays. If you don’t have these, thick kitchen towels can serve as makeshift mitts.
- Grater: Freshly grated cheese elevates your breadsticks. A food processor can also work for grating if you have one.
Having these essential tools at your disposal will set you on the right path to Baking Cheesy Garlic Breadsticks Perfectly At Home. Each piece of equipment plays a unique role, from mixing to baking, ensuring that your experience is enjoyable and your results are delightful.
Print

Baking Cheesy Garlic Breadsticks ideally At Home Today!
- Prep Time: 1 hour 15 minutes
- Cook Time: 15 minutes
- Total Time: 1 hour 30 minutes
- Yield: 12 servings 1x
- Category: Appetizer
- Cuisine: Italian
Description
Baking Cheesy Garlic Breadsticks at home is a delightful way to indulge in a warm, gooey treat that’s perfect as a snack or appetizer. With a crispy exterior and a cheesy, garlicky interior, these breadsticks are sure to please everyone.
Ingredients
- 1 ½ cups warm water (110°F to 115°F)
- 2 teaspoons sugar
- 2 ¼ teaspoons active dry yeast (1 packet)
- 4 cups all-purpose flour
- 2 teaspoons salt
- 2 tablespoons olive oil
- 4 tablespoons unsalted butter, melted
- 3 cloves garlic, minced
- 1 ½ cups shredded mozzarella cheese
- ½ cup grated Parmesan cheese
- 1 teaspoon dried oregano
- 1 teaspoon garlic powder
Instructions
- In a large bowl, combine warm water and sugar. Sprinkle yeast on top and let sit for 5-10 minutes until frothy.
- Add flour, salt, and olive oil to the yeast mixture. Stir until a dough forms.
- Knead the dough on a floured surface for about 5-7 minutes until smooth and elastic.
- Place the dough in a lightly oiled bowl, cover with a damp cloth, and let rise in a warm place for about 1 hour, or until doubled in size.
- Preheat your oven to 425°F (220°C) and line a baking sheet with parchment paper.
- Punch down the risen dough and roll it out into a rectangle about ½ inch thick.
- Brush the melted butter over the top of the dough and sprinkle with minced garlic, mozzarella, Parmesan, oregano, and garlic powder.
- Cut the dough into strips and place them on the prepared baking sheet.
- Bake in the preheated oven for 12-15 minutes or until golden brown and cheese is bubbly.
- Remove from the oven, brush with more melted butter if desired, and serve warm.
Notes
- For extra flavor, add fresh herbs like basil or parsley.
- These breadsticks can be frozen before baking; just thaw and bake when ready.
- Serve with marinara sauce for dipping!
Nutrition
- Serving Size: 1 breadstick
- Calories: 180
- Sugar: 1 g
- Sodium: 250 mg
- Fat: 7 g
- Saturated Fat: 4 g
- Carbohydrates: 24 g
- Fiber: 1 g
- Protein: 5 g
- Cholesterol: 15 mg


