Description
Halloween Dirt Cups Variations – Learn to make easy, spooky treats! Oreo, gluten-free, or pudding-free options for everyone.
Ingredients
Scale
- Base Ingredients:
- 1 (14.3 oz) package chocolate sandwich cookies (like Oreos, or gluten-free alternative)
- 1 (3.9 oz) package instant chocolate pudding mix
- 2 cups cold whole milk
- 1 (8 oz) container frozen whipped topping, thawed
- Flavor Boosters & Optional Extras:
- 4 oz cream cheese, softened (for pudding-free option)
- 1/2 cup powdered sugar (for pudding-free option)
- 1/2 teaspoon vanilla extract (optional)
- Garnish & Toppings:
- 10–12 gummy worms
- Assorted Halloween candies (candy corn, candy pumpkins)
- Edible gravestones or bones (optional)
Instructions
- Crush the ‘Dirt’: Okay, first things first, let’s make some dirt! Take your chocolate sandwich cookies and crush them. I usually pop them in a Ziploc bag and go at it with a rolling pin – it’s surprisingly therapeutic, honestly. Just be careful not to overdo it; you want some bigger crumbs for texture, not just dust. My kitchen always ends up with a fine dusting of cookie crumbs, but hey, that’s just part of the charm, right? It should smell wonderfully chocolatey right about now.
- Whip Up the Pudding (or Pudding-Free Base): Next, grab a large bowl. If you’re using instant pudding, whisk the mix with cold milk for about 2 minutes until it starts to thicken. Don’t rush this part; I once tried to speed it up and ended up with runny pudding, which was a total bummer. If you’re going pudding-free, beat softened cream cheese with powdered sugar, then fold in thawed whipped topping until it’s light and fluffy. It’s surprisingly easy, and the texture is so dreamy!
- Layering Your Halloween Dirt Cups: Now for the fun part – layering! Grab your clear cups (they make the layers look so cool). Start with a spoonful of crushed cookies at the bottom. Then, dollop a generous amount of your pudding or cream cheese mixture on top. Repeat! Cookie, then pudding, cookie, then pudding. I always try to make my layers even, but honestly, it never quite works out, and that’s perfectly okay. It’s homemade, not perfect, right?
- Chill Out, Literally: Once your cups are layered, pop them in the fridge. They need at least an hour to chill, but honestly, two hours is even better. This lets the pudding really set and the cookie crumbs soften just a bit, marrying all those flavors together. This is the hardest part for me, the waiting! I always find myself peeking in the fridge every five minutes, just checking.
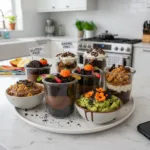
- Decorate Your Halloween Dirt Cups: Now for the grand finale – decorating! This is where you can really let your spooky creativity shine. Stick a few gummy worms into the top layer of ‘dirt’ so they look like they’re crawling out. Add some candy corn, maybe a few candy pumpkins, or even those little edible gravestones. Let the kids help with this step; they always come up with the best, most chaotic ideas!
- Serve and Enjoy Your Spooky Treats: And there you have it! Your amazing Halloween Dirt Cups are ready to be devoured. The final result should look like a miniature graveyard, complete with creepy crawlies and delicious, chocolatey layers. They smell sweet and look so invitingly spooky. Seriously, these are always a hit, and it’s so satisfying to see everyone’s faces when they dig in. Enjoy the sweet, spooky goodness!