Description
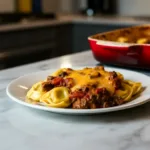
Cheesy Beef Enchilada Tortellini is a comforting, easy meal. Perfect for busy weeknights, this dish brings big flavor with minimal fuss. My family’s favorite!
Ingredients
Scale
- Main Ingredients:
- 1 lb ground beef (80/20 recommended)
- 1 (19-ounce) package refrigerated beef tortellini
- 1 (19-ounce) can red enchilada sauce
- 1 (10-ounce) can diced tomatoes with green chiles (Rotel)
- 1/2 cup beef broth
- Flavor Boosters:
- 1 medium onion, diced
- 3 cloves garlic, minced
- 1 tbsp chili powder
- 1 tsp ground cumin
- Finishing Touch:
- 2 cups shredded Mexican cheese blend (or Cheddar/Monterey Jack)
Instructions
- Brown the Beef & Aromatics:: Okay, first things first, grab your biggest skillet or Dutch oven and get it heating over medium-high. Toss in that ground beef and let it sizzle, breaking it up with a spoon until it’s beautifully browned. This is where all that rich flavor starts! Drain off any excess grease—I usually just tilt the pan and scoop it out with a spoon, honestly, no fancy tools needed. Then, throw in your diced onion and minced garlic. Oh, the smell! Let them soften for a few minutes until they’re fragrant and translucent. This step is crucial for building a flavorful base for our Cheesy Beef Enchilada Tortellini, so don’t rush it!
- Spice it Up:: Now for the good stuff! Sprinkle in your chili powder and cumin, stirring them right into the beef and onion mixture. Let them cook for about a minute, stirring constantly. You’ll smell those spices really open up and become incredibly fragrant—that’s how you know they’re ready. This step is where our Cheesy Beef Enchilada Tortellini gets its signature warmth and depth. I once added the spices too late, and they didn’t meld as well, so trust me, a little time in the hot pan makes all the difference.
- Simmer the Sauce:: Pour in the red enchilada sauce, diced tomatoes with green chiles, and beef broth. Give everything a good stir, making sure to scrape up any browned bits from the bottom of the pan—that’s pure flavor, friend! Bring the mixture to a gentle simmer, then reduce the heat to low, letting it bubble quietly for about 10-15 minutes. This allows all those amazing flavors to meld together beautifully. It’s during this simmer that the kitchen starts smelling absolutely divine, a preview of the delicious Cheesy Beef Enchilada Tortellini to come!
- Cook the Tortellini:: While your sauce is simmering away, get a separate pot of salted water boiling. Drop in your beef tortellini and cook according to package directions, usually just 3-5 minutes for fresh tortellini. You want it al dente, a little bite to it! Seriously, don’t overcook it, or it’ll get mushy in the casserole. I’ve definitely done that before, and it’s a texture tragedy. Once cooked, drain it well. This is a quick step, but it’s important for the overall texture of your Cheesy Beef Enchilada Tortellini.
- Combine & Layer:: Carefully add the drained tortellini directly into your simmering beef and enchilada sauce mixture. Stir gently to coat every little pasta pocket. Now, pour about half of this glorious Cheesy Beef Enchilada Tortellini mixture into a greased 9×13 inch baking dish. Sprinkle generously with about a third of your shredded Mexican cheese blend. Then, spoon over the remaining tortellini mixture, spreading it out evenly. It’s starting to look like a real meal now, isn’t it?
- Bake to Cheesy Perfection:: Finally, top the entire Cheesy Beef Enchilada Tortellini casserole with the remaining cheese. Pop it into a preheated oven at 375°F (190°C) for 20-25 minutes, or until the cheese is bubbling, golden, and slightly browned on top. Oh, and the edges? They should be gloriously crispy. Let it rest for a few minutes when it comes out—it’ll be screaming hot! This waiting part is the hardest, but it helps everything set. The aroma filling your kitchen will be incredible, trust me!
