Introduction to Cherry Pretzel Squares Recipe
Welcome to my kitchen, where I’ve whipped up countless delights, but nothing quite compares to my beloved Cherry Pretzel Squares Recipe. This dish always brings a smile to my face, combining a crunchy pretzel crust with a creamy cherry filling and a fluffy whipped topping. It’s a dessert that’s excellent for gatherings, potlucks, or just treating yourself after a long day.
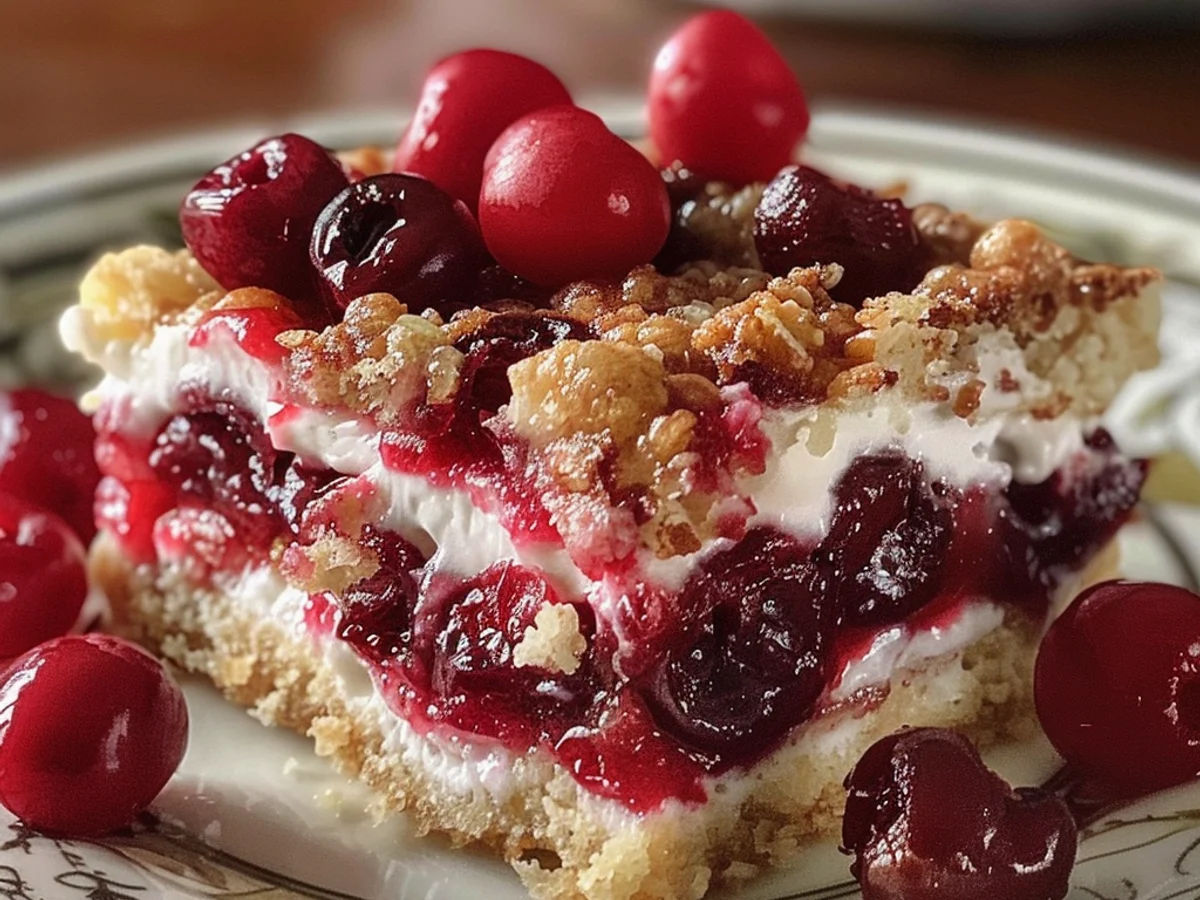
Every time I make these Cherry Pretzel Squares, I’m reminded of the joy they bring to family and friends. The contrast between the salty pretzels and the sweet cherry filling creates a symphony of flavors that dances on the palate. The texture is equally delightful, with the crunch of the pretzels giving way to the creamy, dreamy layers above. Not to mention, the vibrant color of the cherry topping adds a beautiful pop to any dessert table.

This Cherry Pretzel Squares Recipe is not just a treat for the taste buds; it’s also a feast for the eyes. Each bite is a reminder of summer picnics and joyful celebrations. If you’re looking for a dessert that’s both simple to prepare and will impress your guests, you’ve come to the right place. Let’s dive into this tasty recipe, and I promise you’ll want to make it again and again!
Why You’ll Love This Cherry Pretzel Squares Recipe
As someone who loves to cook and create delightful treats, I can confidently say that you’ll absolutely love this Cherry Pretzel Squares Recipe. The combination of sweet and salty flavors makes these squares a truly irresistible snack. Each bite offers a delightful crunch from the pretzel crust, followed by a creamy layer of cheesecake, and topped off with a tangy cherry filling. It’s a flavor experience that keeps you coming back for more!
What I find most appealing about this Cherry Pretzel Squares Recipe is how incredibly easy it is to make. In just a short amount of time, you can whip up a dessert that looks and tastes like it took hours to prepare. This is excellent for busy women like us, who want to impress guests without spending the entire day in the kitchen. The straightforward steps ensure that even novice bakers can master this recipe with confidence.
Another reason to love this recipe is its versatility. While the cherry topping is a classic choice, you can easily switch it up with your favorite fruits, such as blueberries or strawberries. This makes the Cherry Pretzel Squares Recipe adaptable for any occasion, whether it’s a summer barbecue or a cozy holiday gathering. Plus, the vibrant colors of the cherries against the creamy filling and crunchy crust are just stunning, making it a feast for the eyes as well as the palate.
Finally, let’s talk about the joy of sharing these delightful squares with friends and family. Watching their faces light up with delight as they take their first bite is one of the most rewarding feelings. So, if you’re looking for a dessert that combines ease, flavor, and a touch of nostalgia, this Cherry Pretzel Squares Recipe is just the ticket. Trust me, you’ll find yourself reaching for seconds and maybe even thirds!
Ingredients for Cherry Pretzel Squares Recipe
When I set out to make my Cherry Pretzel Squares Recipe, I gather all the ingredients that make this dessert a delightful treat. Each component blends together to create a excellent balance of sweet and salty flavors, and I can’t wait to share what you’ll need to whip up this crowd-pleasing dish!
First, let’s start with the pretzels. I use pretzel sticks for the base, as they add a satisfying crunch. Their salty nature complements the sweetness of the cherries beautifully. If you prefer a different texture, you could even opt for mini pretzels!
Next, we move on to the butter. It enriches the crust, giving it a rich flavor that ties the whole dessert together. I always use unsalted butter, as it allows me to control the saltiness of the final product.
Now for the star of the show: cherry pie filling. This is where the magic happens! The sweet, tart cherries bring a burst of flavor that makes each bite heavenly. You can use store-bought or homemade cherry pie filling, depending on how much time you have.
To create that creamy layer on top, I include cream cheese. Make sure it’s softened for easy blending. It adds a tangy richness that perfectly balances the sweetness of the cherries. For a lighter option, you could substitute with Greek yogurt.
Next, I mix in powdered sugar to sweeten the cream cheese layer. This gives it a smooth texture and helps it spread easily over the cherries. If you’re looking for a sugar alternative, consider using a sugar substitute that measures like powdered sugar.
Lastly, I sprinkle some whipped topping on top for that light and airy finish. It adds a whimsical touch to the Cherry Pretzel Squares Recipe, making them feel special. If you want to make this recipe fully from scratch, feel free to whip your own cream!
In summary, here’s a quick list of what you’ll need:
- Pretzel sticks (or mini pretzels)
- Unsalted butter
- Cherry pie filling (store-bought or homemade)
- Softened cream cheese
- Powdered sugar
- Whipped topping (store-bought or homemade)
Gather these ingredients, and you’ll be ready to embark on your journey to creating Cherry Pretzel Squares that will impress everyone at your next gathering!
How to Make Cherry Pretzel Squares Recipe
- Prepare the Pretzel Crust: Start by preheating your oven to 350°F (175°C). In a mixing bowl, combine 2 cups of crushed pretzels, ½ cup of melted butter, and 3 tablespoons of sugar. The mixture should resemble wet sand. Once everything is well combined, press it firmly into the bottom of a greased 9×13 inch baking dish. This pretzel crust will provide a lovely salty contrast to the sweet cherry filling.
- Bake the Crust: Place the baking dish in the preheated oven and bake for about 10 minutes. You want to see a light golden color on the edges. The aroma of warm pretzels will start to fill your kitchen, making it hard to wait!
- Make the Cream Cheese Layer: While the crust is cooling, it’s time to whip up the cream cheese layer. In a mixing bowl, beat 8 ounces of softened cream cheese with 1 cup of powdered sugar until smooth. Then, fold in 1 cup of whipped topping. This layer adds a creamy richness to your Cherry Pretzel Squares that perfectly balances the saltiness of the crust.
- Spread the Cream Cheese Mixture: Once the pretzel crust has cooled slightly, gently spread the cream cheese mixture over the top. Use a spatula to ensure it’s evenly distributed. This step is crucial, as it will provide a wonderful base for the cherry filling.
- Add the Cherry Topping: Now, it’s time to layer on the cherry pie filling. Open a 21-ounce can of cherry pie filling and spoon it over the cream cheese layer. You can adjust the amount based on your preference for cherries. The bright red cherries not only look stunning but also add a burst of flavor!
- Chill the Squares: Cover the dish with plastic wrap and place it in the refrigerator. Chill for at least 2 hours, or until the squares are set. This step allows the flavors to meld beautifully, creating a delightful treat that’s excellent for any occasion.
- Serve and Enjoy: After chilling, cut the Cherry Pretzel Squares into squares or bars. The first bite will surprise you with the sweet-tart cherries, creamy layer, and crunchy pretzel base. Serve them cold, and watch them disappear at your next gathering!
Making these Cherry Pretzel Squares Recipe has become a cherished tradition in my kitchen. Each time, the process is a joyful experience filled with anticipation. Trust me, once you try making this delightful dessert, it will quickly become one of your favorites too!
Tips for Success
When making my beloved Cherry Pretzel Squares Recipe, I’ve learned a few tips that can elevate this dessert from good to unforgettable. With a few simple tricks, you can ensure that your squares are perfectly sweet, salty, and utterly delightful. Here are my tried-and-true tips for success:
- Choose fresh cherries: For the best flavor, opt for fresh or high-quality canned cherries. Their vibrant taste brings the whole dish to life.
- Use unsalted pretzels: This enhances the balance between sweet and salty, allowing the cherry topping to shine without overwhelming the palate.
- Let the crust cool: After baking, allow the pretzel crust to cool completely before adding the cream cheese layer. This prevents it from melting and ensures a distinct texture.
- Chill before serving: Refrigerate the squares for at least two hours before cutting. This helps the layers set beautifully, making them easier to slice and serve.
- Garnish wisely: A sprinkle of crushed pretzels or a drizzle of chocolate can add an extra touch of elegance and flavor to your Cherry Pretzel Squares Recipe.
These tips have made a significant difference in my own baking journey. Each time I prepare this Cherry Pretzel Squares Recipe, I’m reminded of how small adjustments can lead to tasty outcomes. Happy baking!
Equipment Needed
As I embark on making my beloved Cherry Pretzel Squares Recipe, I find that having the right tools at hand makes the process not only smoother but also more enjoyable. Below is a list of essential equipment I recommend, along with handy alternatives that can be used if you don’t have the exact item.
- 9×13-inch baking dish: This is excellent for layering your pretzel squares. If you don’t have one, a similar-sized casserole dish will work just fine.
- Mixing bowls: A couple of medium to large mixing bowls are essential for combining the pretzel crust and the creamy filling. Alternatively, you can use a large pot if you’re in a pinch.
- Electric mixer: For whipping the cream cheese and sugar, an electric mixer makes the job quick and easy. If you don’t have one, a whisk and some elbow grease will do the trick too!
- Saucepan: You’ll need a saucepan to melt the butter for the pretzel mixture. A small frying pan can also work in a pinch.
- Measuring cups and spoons: Accurate measurements are key in baking. If you don’t have standard measuring tools, using a scale can help ensure precision.
- Spatula: A rubber spatula is invaluable for folding in ingredients and scraping down the sides of bowls. A wooden spoon can also serve this purpose effectively.
- Refrigerator: Allowing the squares to chill is crucial for setting the layers. If your fridge is full, a cool place in your kitchen can suffice for shorter periods.
With this Cherry Pretzel Squares Recipe, having the right equipment not only enhances the experience but also ensures that your squares turn out beautifully every time. I promise you, the right tools can make all the difference in creating this delightful treat!
Print

Cherry Pretzel Squares Recipe: A Sweet Twist Awaits!
- Prep Time: 20 minutes
- Cook Time: 10 minutes
- Total Time: 2 hours 30 minutes
- Yield: 12 servings 1x
- Category: Dessert
- Cuisine: American
Description
Deliciously sweet and salty Cherry Pretzel Squares that combine the crunch of pretzels with a creamy cherry filling, perfect for any occasion.
Ingredients
- 2 cups crushed pretzels
- 1/2 cup unsalted butter, melted
- 1/4 cup granulated sugar
- 8 oz cream cheese, softened
- 1 cup powdered sugar
- 1 cup whipped topping
- 1 can (21 oz) cherry pie filling
- 1/2 cup chopped walnuts (optional)
Instructions
- Preheat your oven to 350°F (175°C).
- In a mixing bowl, combine crushed pretzels, melted butter, and granulated sugar. Stir until well mixed.
- Press the pretzel mixture firmly into the bottom of a 9×13 inch baking dish. Bake for 10 minutes, then remove and let cool.
- In another bowl, beat together the cream cheese and powdered sugar until smooth. Fold in the whipped topping.
- Spread the cream cheese mixture over the cooled pretzel crust.
- Top with cherry pie filling, spreading evenly over the cream cheese layer.
- If desired, sprinkle chopped walnuts over the cherry filling.
- Refrigerate for at least 2 hours before serving to allow layers to set.
Notes
- For a chocolate twist, drizzle melted chocolate over the top before serving.
- Store leftovers in the refrigerator for up to 3 days.
- Make sure the cream cheese is softened for easier mixing.
Nutrition
- Serving Size: 1 square
- Calories: 250
- Sugar: 18 g
- Sodium: 300 mg
- Fat: 14 g
- Saturated Fat: 8 g
- Carbohydrates: 30 g
- Fiber: 1 g
- Protein: 3 g
- Cholesterol: 30 mg


