Remember those autumn days, when the air just started to get that crisp, cool bite? For me, that feeling always brings back the scent of baking apples and cinnamon wafting from Mama Tessa’s kitchen. It wasn’t fancy, honestly, just a big, bubbling dish of Classic Old-Fashioned Apple Crisp. I’d always try to sneak a peek, or a taste, before it was properly cooled, and usually ended up with a burnt tongue! It’s funny how a simple recipe can hold so many memories. This crisp isn’t about complicated techniques, it’s about that pure, unpretentious comfort that just makes everything feel right. It’s what I reach for when I need a hug in dessert form, every single time.
I remember one time, I was trying to impress some friends, and in my haste, I totally forgot to add the flour to the apple filling. Oops! It came out like a delicious, but very soupy, apple stew with a crunchy hat. We all had a good laugh, and I learned my lesson. This Classic Old-Fashioned Apple Crisp teaches you patience and the importance of reading the recipe through. But hey, even my kitchen disasters usually taste pretty good, you know?

Ingredients for Classic Old-Fashioned Apple Crisp
- Apples (6-7 medium, about 6 cups sliced): Oh, the stars of the show! I always go for a mix of Granny Smith for tartness and Honeycrisp or Fuji for sweetness and texture. Don’t use mushy apples, you’ll end up with apple sauce, and we want texture here, people!
- All-Purpose Flour (for filling, 1 tbsp, for topping, 1/2 cup): Just a little in the filling helps thicken those apple juices, preventing the dreaded “soup crisp.” For the topping, it’s the binder. Honestly, I’ve tried whole wheat flour for the topping, and it works, but it changes the texture.
- Granulated Sugar (for filling, 1/4 cup, for topping, 1/4 cup): Balances the tart apples. I’m usually a “less sugar” kind of gal, but for this Classic Old-Fashioned Apple Crisp, it’s just right.
- Brown Sugar (packed, 1/2 cup): This is where that deep, caramelly flavor comes from for the topping. Dark or light, your call. I prefer dark for that extra oomph.
- Old-Fashioned Rolled Oats (1/2 cup): Gives that signature chew and crispness to the topping. Quick oats work in a pinch, but they don’t give the same delightful texture. Trust me, I’ve tried both.
- Unsalted Butter (cold, 1/2 cup/1 stick): Cut into cubes, this is crucial for a crumbly, not cakey, topping. Don’t even think about melted butter here! I once accidentally used salted butter, and it was… interesting.
- Cinnamon (1 tsp for filling, 1/2 tsp for topping): The heart of that warm, nostalgic spice. I’m a cinnamon fiend, so sometimes I add a little extra.
- Nutmeg (1/4 tsp): Just a whisper, it elevates the apple and cinnamon. Freshly grated is a dream if you have it, but ground works just fine.
- Lemon Juice (1 tbsp): Brightens the apples and keeps them from browning. A little zing is always welcome.
- Pinch of Salt (1/4 tsp): Don’t skip this! It balances all the sweet and spice, bringing everything into harmony.
Crafting Your Classic Old-Fashioned Apple Crisp
- Prep Those Apples:
- First things first, preheat your oven to 375°F (190°C). Then, get those apples peeled, cored, and sliced into about 1/4-inch thick pieces. I usually aim for a consistent size so they cook evenly nobody wants crunchy bits mixed with mushy ones! This is the part where my kitchen counter always gets a bit messy, with apple peels everywhere. Honestly, it’s worth it for the deliciousness to come. I always smell that fresh, crisp apple scent, which is just the best start.
- Mix the Apple Filling:
- In a large bowl, toss your sliced apples with 1 tablespoon of flour, 1/4 cup granulated sugar, 1 teaspoon of cinnamon, 1/4 teaspoon of nutmeg, and 1 tablespoon of lemon juice. Make sure every apple slice gets a good coating. This is where I always double-check that I actually added the flour, I’ve had a few soupy incidents in my past, and you learn from those oops moments! Give it a good stir, like you’re gently persuading them to get along.
- Whip Up the Crisp Topping:
- Now for the best part, the crisp! In a separate medium bowl, combine 1/2 cup all-purpose flour, 1/4 cup granulated sugar, 1/2 cup packed brown sugar, 1/2 cup old-fashioned rolled oats, 1/2 teaspoon of cinnamon, and a pinch of salt. Whisk those dry ingredients together. Then, add your cold, cubed 1/2 cup butter. Use your fingers or a pastry blender to cut the butter into the dry ingredients until it looks like coarse crumbs, with some pea-sized pieces remaining. My hands always get a little buttery here, but that’s the sign you’re doing it right!
- Assemble Your Masterpiece:
- Pour the apple mixture into an 8×8 or 9×9 inch baking dish. Try to spread them out evenly. Then, sprinkle that glorious crisp topping all over the apples. Don’t be shy, get it everywhere! This is where you can see the magic starting to happen, like a cozy blanket for your fruit. I always make sure there are no naked apple spots, because who doesn’t love maximum crisp?
- Time to Bake:
- Pop that dish into your preheated oven. Bake for 35-45 minutes, or until the topping is golden brown and the apples are tender and bubbly. You’ll know it’s ready when your kitchen smells like pure heaven that warm, sweet, spiced aroma is unmistakable! I always peek in at about 30 minutes, just to make sure things aren’t getting too dark too fast. If they are, a loose foil tent works wonders.
- Cool and Enjoy Your Classic Old-Fashioned Apple Crisp:
- Once it’s beautifully baked, carefully remove the dish from the oven. Resist the urge to dive in immediately! Let it cool on a wire rack for at least 15-20 minutes. This lets the filling set up a bit, preventing a molten apple lava explosion on your plate. Honestly, this is the hardest part for me, but the wait is so worth it for that perfect scoop. It should look bubbly, smell incredible, and feel warm and comforting.
I remember one time I was so excited to make this Classic Old-Fashioned Apple Crisp for a potluck, I baked it right before leaving. The car ride was filled with the most incredible smells, but when I arrived, the topping had shifted a bit from the bumps! Still delicious, of course, but it taught me to let things settle. It’s those little kitchen chaos moments that make cooking so real and, honestly, more fun.
Storing Your Classic Old-Fashioned Apple Crisp
So, you’ve got leftovers of this delightful Classic Old-Fashioned Apple Crisp? Lucky you! Once completely cooled, cover the dish tightly with plastic wrap or aluminum foil and pop it in the fridge. It’ll stay good for about 3-4 days. I’ve definitely made the mistake of trying to cover it while still warm, and condensation made the topping soggy so don’t do that, lol. When you’re ready to enjoy it again, you can scoop out a serving and microwave it for about 30-60 seconds for a quick warm-up. For the best texture, though, I prefer to reheat it in a preheated oven (around 350°F / 175°C) for 15-20 minutes. It crisps up the topping beautifully. Freezing? I’ve tried it, and while the flavor is still there, the topping loses some of its crispness. It’s just not the same, to be real.

Ingredient Substitutions for Apple Crisp
Life happens, and sometimes you don’t have exactly what the recipe calls for. I get it! For the apples, feel free to mix and match. Pears are a fantastic substitute, or even a combination of apples and pears for a different twist. I tried peaches once, and while it was delicious, it was definitely more of a peach crisp, not quite the Classic Old-Fashioned Apple Crisp I was aiming for. If you’re out of brown sugar, you can use all granulated sugar, but you’ll miss that deep molasses note. For the topping, if you don’t have oats, you can increase the flour slightly, but the texture won’t be as chewy. I’ve also swapped out half the flour for almond flour for a slightly nuttier flavor, and it worked, kinda! Just be prepared for a slightly different crumb. As for spices, feel free to add a pinch of allspice or ginger for an extra layer of warmth if you’re feeling adventurous.
Serving Your Classic Old-Fashioned Apple Crisp
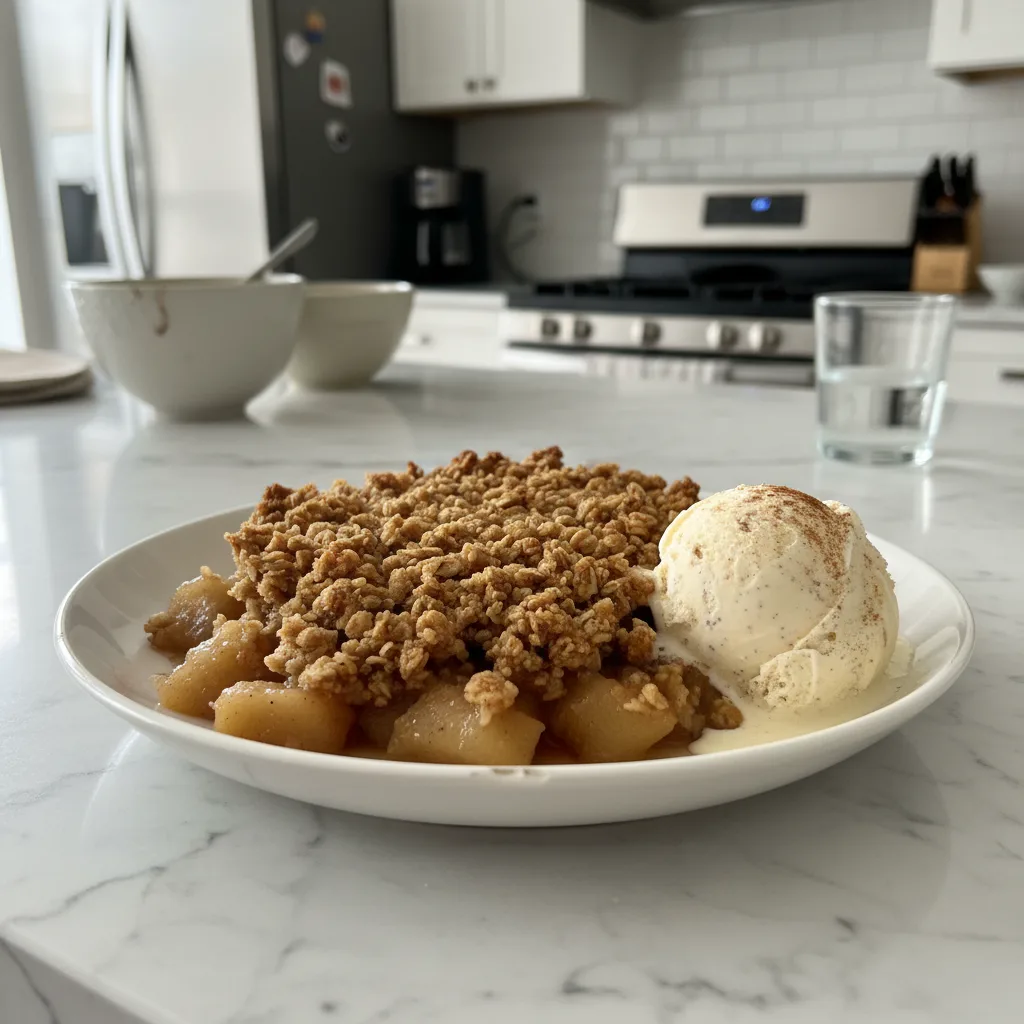
Oh, the serving possibilities for this Classic Old-Fashioned Apple Crisp! My absolute favorite way to enjoy it is warm, straight from the oven, with a generous scoop of vanilla bean ice cream melting into those tender apples. The contrast of warm and cold, creamy and crisp, is just chef’s kiss. A dollop of homemade whipped cream is also divine, or for something a little richer, a drizzle of warm caramel sauce. Honestly, this dish and a good cup of coffee on a chilly afternoon? Yes please! It’s also fantastic with a sprinkle of toasted chopped pecans or walnuts on top for extra crunch and nutty flavor. It’s truly versatile perfect for a quiet night in with a rom-com, or as the star dessert at a family gathering.
The Story Behind Classic Old-Fashioned Apple Crisp
The apple crisp, or “crumb” as it’s sometimes called, is a beloved dessert with roots firmly planted in American and British culinary traditions. It really gained popularity during World War II when rationing made pie crust ingredients scarce. People got creative, and a simple, buttery crumb topping became the ingenious solution. It’s a testament to resourcefulness and the enduring human desire for something sweet and comforting, even in tough times. For me, this Classic Old-Fashioned Apple Crisp feels like a culinary hug from generations past. It’s not just a recipe, it’s a connection to simpler times, to grandmothers in aprons, and to the joy of sharing something homemade. It reminds me of how food can tell a story, even without words, just through its warmth and flavor.
And there you have it, my friends. This Classic Old-Fashioned Apple Crisp isn’t just a dessert, it’s a little slice of home, a memory on a plate. It comes out of the oven bubbly, golden, and smelling like everything good in the world. I mean, honestly, sometimes a simple crisp is all you need to make a day better. I really hope you make this and it brings as much warmth to your kitchen as it does to mine. Don’t forget to share your own kitchen adventures with me!

Frequently Asked Questions
- → Can I use different types of apples for this Classic Old-Fashioned Apple Crisp?
Absolutely! I always recommend a mix of sweet and tart apples like Granny Smith and Honeycrisp. I once used all Red Delicious, and it was a bit too sweet and mushy for my liking, so a good blend is key!
- → What if I don’t have old-fashioned oats for the crisp topping?
You can use quick oats in a pinch, but the texture will be softer and less chewy. I’ve tried it, and while it’s okay, the old-fashioned oats truly give this Classic Old-Fashioned Apple Crisp its signature crunch.
- → How do I know when the apples in the Classic Old-Fashioned Apple Crisp are tender?
The best way is to gently poke them with a fork through the topping. They should feel soft, but not completely mushy. I’ve pulled it too early before, and ended up with slightly crunchy apples, which wasn’t ideal, so keep an eye on them!
- → Can I prepare this Classic Old-Fashioned Apple Crisp ahead of time?
You can definitely prep the apple filling and the topping separately, then store them in the fridge. Assemble and bake just before serving for the freshest, crispiest result. I don’t recommend assembling it too far in advance, as the topping can get soggy.
- → What are some fun variations for this Classic Old-Fashioned Apple Crisp?
Oh, the possibilities! I love adding a handful of chopped walnuts or pecans to the topping for extra crunch. A splash of rum or brandy in the apple filling can also add a delightful depth of flavor. I tried adding dried cranberries once, and it was a tasty tart surprise!

Classic Old-Fashioned Apple Crisp: Sweet & Spiced
- Prep Time: 20 Minutes
- Cook Time: 40 Minutes
- Total Time: 60 Minutes
- Yield: 6 Servings 1x
- Category: Low Carbs Meals
Description
Classic Old-Fashioned Apple Crisp recipe for a warm, sweet, spiced dessert. My kitchen’s favorite, simple to make with tender apples and a crunchy topping.
Ingredients
- Apple Filling Stars:
- 6–7 medium apples (about 6 cups sliced), like Granny Smith and Honeycrisp
- 1 tbsp all-purpose flour
- 1/4 cup granulated sugar
- 1 tsp ground cinnamon
- 1/4 tsp ground nutmeg
- 1 tbsp lemon juice
- Crisp Topping Essentials:
- 1/2 cup all-purpose flour
- 1/4 cup granulated sugar
- 1/2 cup packed light or dark brown sugar
- 1/2 cup old-fashioned rolled oats
- 1/2 cup (1 stick) cold unsalted butter, cut into cubes
- 1/2 tsp ground cinnamon
- 1/4 tsp salt
- Flavor Enhancers:
- Extra pinch of nutmeg (optional, for that cozy spice)
- Dash of allspice (optional, for added warmth)
- Serving Suggestions:
- Vanilla bean ice cream
- Freshly whipped cream
- Caramel sauce
- Toasted chopped pecans or walnuts
Instructions
- Prep Those Apples: First things first, preheat your oven to 375°F (190°C). Then, get those apples peeled, cored, and sliced into about 1/4-inch thick pieces. I usually aim for a consistent size so they cook evenly – nobody wants crunchy bits mixed with mushy ones! This is the part where my kitchen counter always gets a bit messy, with apple peels everywhere. Honestly, it’s worth it for the deliciousness to come. I always smell that fresh, crisp apple scent, which is just the best start.
- Mix the Apple Filling: In a large bowl, toss your sliced apples with 1 tablespoon of flour, 1/4 cup granulated sugar, 1 teaspoon of cinnamon, 1/4 teaspoon of nutmeg, and 1 tablespoon of lemon juice. Make sure every apple slice gets a good coating. This is where I always double-check that I actually added the flour; I’ve had a few soupy incidents in my past, and you learn from those oops moments! Give it a good stir, like you’re gently persuading them to get along.
- Whip Up the Crisp Topping: Now for the best part, the crisp! In a separate medium bowl, combine 1/2 cup all-purpose flour, 1/4 cup granulated sugar, 1/2 cup packed brown sugar, 1/2 cup old-fashioned rolled oats, 1/2 teaspoon of cinnamon, and a pinch of salt. Whisk those dry ingredients together. Then, add your cold, cubed 1/2 cup butter. Use your fingers or a pastry blender to cut the butter into the dry ingredients until it looks like coarse crumbs, with some pea-sized pieces remaining. My hands always get a little buttery here, but that’s the sign you’re doing it right!
- Assemble Your Masterpiece: Pour the apple mixture into an 8×8 or 9×9 inch baking dish. Try to spread them out evenly. Then, sprinkle that glorious crisp topping all over the apples. Don’t be shy; get it everywhere! This is where you can see the magic starting to happen, like a cozy blanket for your fruit. I always make sure there are no naked apple spots, because who doesn’t love maximum crisp?
- Time to Bake: Pop that dish into your preheated oven. Bake for 35-45 minutes, or until the topping is golden brown and the apples are tender and bubbly. You’ll know it’s ready when your kitchen smells like pure heaven – that warm, sweet, spiced aroma is unmistakable! I always peek in at about 30 minutes, just to make sure things aren’t getting too dark too fast. If they are, a loose foil tent works wonders.
- Cool and Enjoy Your Classic Old-Fashioned Apple Crisp: Once it’s beautifully baked, carefully remove the dish from the oven. Resist the urge to dive in immediately! Let it cool on a wire rack for at least 15-20 minutes. This lets the filling set up a bit, preventing a molten apple lava explosion on your plate. Honestly, this is the hardest part for me, but the wait is so worth it for that perfect scoop. It should look bubbly, smell incredible, and feel warm and comforting.


