Description
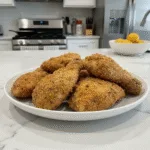
Crispy Golden Chicken That Never Lasts is a family favorite! Learn my easy steps for juicy, flavorful chicken with an irresistible crunch. You’ll make it often!
Ingredients
Scale
- Main Chicken Components:
- 8 bone-in, skin-on chicken thighs and/or drumsticks
- 1 cup buttermilk
- Seasoning Magic:
- 1 tbsp garlic powder
- 1 tbsp onion powder
- 1 tsp smoked paprika
- 1/2 tsp cayenne pepper (or to taste)
- Crisp Coating Essentials:
- 1 1/2 cups all-purpose flour
- 1 tsp salt (plus more for seasoning chicken)
- 1/2 tsp freshly ground black pepper (plus more for seasoning chicken)
- Finishing Touches:
- 3–4 cups vegetable oil (or peanut oil), for frying
Instructions
- Prep Your Chicken, Mama!: First things first, get those chicken pieces ready. Give them a good pat dry with paper towels; this is crucial for crispy skin, trust me! Trim off any excess skin or fat that’s hanging loose, but leave most of it on. You want that beautiful, golden crunch later. I usually do this right on a cutting board, and honestly, it can get a little messy, but that’s just kitchen life, right? Feel the texture of the skin; you want it as dry as possible before the next step.
- Season & Soak Time!: In a big bowl, whisk together your garlic powder, onion powder, smoked paprika, cayenne pepper, a good pinch of salt, and a generous grind of black pepper. Don’t be shy here! Toss your chicken pieces in this seasoning mix, making sure every nook and cranny gets covered. Then, pour that buttermilk over the seasoned chicken. Give it a good stir to coat everything. I usually let it sit for at least 30 minutes on the counter, or better yet, pop it in the fridge for a few hours. I once rushed this step, and the flavor just wasn’t as deep, oops!
- Flour Power!: While your chicken is soaking up all that goodness, get your dredging station ready. In a shallow dish or a brown paper bag (my grandma’s trick!), combine your all-purpose flour with another good pinch of salt and pepper. Now, take each piece of chicken, let any excess buttermilk drip off, and dredge it thoroughly in the flour mixture. Press the flour onto the chicken to ensure a thick, even coating. This is where you build that incredible crust! I always make sure there are no bare spots; it’s like wrapping a present, but for your taste buds!
- Heat That Oil!: In a large, heavy-bottomed skillet or Dutch oven, pour in enough vegetable oil to come about 1 to 1.5 inches up the sides. Heat the oil over medium-high heat until it reaches around 350-375°F (175-190°C). If you don’t have a thermometer, drop a tiny pinch of flour in; if it sizzles vigorously, you’re good to go! Don’t let it get smoking hot, though, or your Crispy Golden Chicken That Never Lasts will burn before it cooks through.
- Fry ‘Em Up!: Carefully, and I mean *carefully*, place a few chicken pieces into the hot oil. Don’t overcrowd the pan, hon! You want them to have space to crisp up. Fry for about 6-8 minutes per side, turning occasionally, until they’re a beautiful golden brown and cooked through. The internal temperature should be 165°F (74°C). This step always makes my kitchen smell amazing, like a proper Sunday dinner! I usually use tongs for turning; less splashing, more control!
- Rest & Devour!: Once your chicken is cooked to golden perfection, transfer it to a wire rack set over a baking sheet. This allows any excess oil to drip off and keeps the bottom from getting soggy. Let it rest for a few minutes before serving; this helps the juices redistribute, making every bite super tender. Honestly, this is the hardest part – resisting! The smell is just intoxicating. Your Crispy Golden Chicken That Never Lasts is ready to be demolished!