I remember the first time I tried to make homemade pizza pockets. It was a Tuesday, a school night, and my kids were bouncing off the walls, declaring they were “starving” after soccer practice. The frozen ones from the store just weren’t cutting it anymore, honestly. I had this vision of warm, gooey, cheesy goodness, but let’s be real, my first attempt was a bit… flat. Literally. I overloaded them, and the dough just burst. Pizza explosion, kitchen chaos! But we laughed, cleaned up, and I learned a thing or two. These pizza pockets have since become a family legend, a comforting hug in a crispy crust. They’re a lifesaver for those hectic evenings, and honestly, way better than anything from a box.
Once, I was so proud of my perfectly crimped pizza pockets, I stacked them like a Jenga tower on the baking sheet. Big mistake. The cheese, bless its gooey heart, decided to stage a dramatic escape, welding a few pockets together. It was a sticky, delicious mess, but a mess nonetheless! My kids thought it was hilarious, pulling them apart like cheesy taffy. Now, I always give them space. Live and learn, right?

Ingredients
Pocket Essentials
- Refrigerated Pizza Dough: Honestly, don’t overthink it. Store-bought is your friend here for speed. I grab the rectangular kind, not the round, it’s just easier to cut into squares.
- All-Purpose Flour: Just a little dusting for your workspace. Keeps things from sticking, which is my number one kitchen pet peeve!
Savory Fillings
- Marinara Sauce: Use a good quality one, hon. It makes all the difference. I’ve tried watery ones, and the pockets get soggy. Not ideal. My personal favorite is one with a little basil kick.
- Shredded Mozzarella Cheese: The star of the show! Freshly shredded melts better, but pre-shredded works fine for convenience. Don’t skimp here, we’re going for cheesy bliss!
- Pepperoni Slices: Mini pepperonis are fantastic here, but regular ones cut into quarters work just as well. Adds that classic pizza flavor everyone loves.
Flavor Boosters & Finishing Touches
- Dried Oregano: A sprinkle in the filling really boosts that classic pizza parlor vibe. I sometimes add a pinch of garlic powder too, just because I adore garlic!
- Egg: Whisked with a splash of water, this is our golden ticket for a beautiful, crispy crust. It makes them look all professional, even if you just rolled out of bed to make them.
Instructions
- Prep Your Workspace & Dough:
- Okay, first things first, preheat your oven to 400°F (200°C). Grab a large baking sheet and line it with parchment paper you’ll thank me later for the easy cleanup. Now, lightly flour your clean countertop and carefully unroll your pizza dough. I usually give it a gentle stretch to make it a bit thinner, but not so thin it tears. Think about a nice, even rectangle, maybe 10×15 inches or so. This is where I sometimes get a little too enthusiastic and stretch it too far, oops!
- Cut & Fill Your Pockets:
- Next, grab a pizza cutter or a sharp knife and cut your dough into 8 equal rectangles. They don’t have to be perfect squares, mine are usually wonky, but that’s part of the charm! On one half of each rectangle, spoon about 1-2 tablespoons of marinara sauce, leaving a small border around the edges. Then, pile on a generous sprinkle of mozzarella, a few pepperoni pieces, and a tiny pinch of dried oregano. Don’t overfill, I’ve learned that the hard way cheese escapes are no fun!
- Seal the Deal:
- Now for the fun part: fold! Take the empty half of the dough and gently fold it over the filling, lining up the edges. Use your fingers to press down firmly around the edges, really sealing them tight. This is where a fork comes in handy! Press the tines of a fork all around the sealed edges to create those pretty crimp marks and ensure no cheesy goodness leaks out. It also makes them look super professional, even if you’re just winging it like me!
- Egg Wash & Bake Your Pockets:
- In a small bowl, whisk that egg with about a tablespoon of water. This is your magic potion for a golden, crispy crust! Brush the tops of your pizza pockets with this egg wash. It doesn’t need to be thick, just a light, even coat. Carefully transfer your sealed pockets to the prepared baking sheet, making sure they have a little space between them so they don’t stick. I once crowded them, and they ended up steaming instead of crisping a rookie mistake!
- Bake to Golden Perfection:
- Pop that baking sheet into your preheated oven. Bake for about 12-15 minutes, or until your Homemade Cheesy Pizza Pockets are beautifully golden brown and puffed up. Keep an eye on them, ovens can be quirky! I usually peek around the 10-minute mark. You’ll start to smell that amazing pizza aroma filling your kitchen that’s when you know you’re getting close to deliciousness. The cheese inside should be bubbly and melted, just begging to be eaten.
- Cool & Serve:
- Alright, the hardest part: waiting! Once they’re out of the oven, let them cool on the baking sheet for 5 minutes. That cheese filling is molten hot, trust me, I’ve burned my tongue more times than I care to admit! This cooling time also helps the pockets set up a bit, making them easier to handle. Serve them warm with extra marinara for dipping, maybe a little ranch if you’re feeling wild. They smell absolutely incredible, like a pizzeria just opened in your kitchen!
Making these pizza pockets often takes me back to my grandma’s kitchen. She always had some little snack ready, something warm and comforting. While these aren’t her traditional recipe, the feeling of making something simple and delicious for my family, seeing their happy faces, it’s the same kind of kitchen magic. Sometimes, the simplest things bring the most joy, even if my counter is covered in flour afterwards!
Homemade Cheesy Pizza Pockets Storage Tips
Okay, so you’ve got leftover pockets? Lucky you! Once they’ve cooled completely, pop them into an airtight container. They’ll keep in the fridge for about 3-4 days. To reheat, I honestly prefer the oven or an air fryer. A quick 5-10 minutes at 350°F (175°C) in the oven, or about 3-5 minutes in the air fryer, brings back that lovely crispness. I microwaved them once, and the crust got a bit chewy and sad so don’t do that lol. If you want to freeze them, wrap individual pockets tightly in plastic wrap, then place them in a freezer-safe bag. They’ll last for up to 2 months. Reheat from frozen in the oven at 375°F (190°C) for about 20-25 minutes. They’re a total meal-prep win!

Homemade Cheesy Pizza Pockets: Ingredient Substitutions
I’ve tried so many variations of these pockets, you wouldn’t believe it! For the dough, puff pastry works in a pinch for an extra flaky crust, but it’s a different vibe. Sometimes I swap out mozzarella for a blend of provolone and cheddar for a sharper flavor it worked, kinda, but mozzarella is still king for that stretch. If you’re not a pepperoni fan, cooked crumbled sausage, diced ham, or even sautéed mushrooms and bell peppers are fantastic. I once used leftover shredded chicken and BBQ sauce, and honestly, it was a surprisingly good twist! Don’t be afraid to play around with your favorite pizza toppings, just remember not to overstuff them like I did that one time!
Serving Suggestions for Your Homemade Cheesy Pizza Pockets
These pockets are pretty perfect on their own, but a little something extra always makes them feel special. My kids love them with a side of extra marinara for dipping, and sometimes a ranch dressing for a tangy kick. For a lighter meal, a crisp green salad with a simple vinaigrette is a great contrast to the warm, cheesy pockets. If it’s a movie night, these and a big bowl of popcorn? Yes please! I also think a glass of sparkling lemonade or a cold beer (for the grown-ups, obviously) pairs wonderfully. They’re just so versatile, they fit almost any casual occasion or hungry moment.
Cultural Backstory
Pizza pockets, in their various forms, really speak to that universal love for pizza, but in a convenient, handheld package. While the exact “inventor” is debated, the concept of wrapping fillings in dough and baking them is ancient, found in cultures all over the world think calzones, empanadas, or even pasties. For me, these pizza pockets connect to a distinctly American comfort food culture, reminiscent of school lunch favorites and quick after-school snacks. It’s about taking something familiar and making it your own, a little slice of home that you can hold. It became special to me because it’s a dish my kids ask for by name, a request that always makes me smile.
Honestly, these pockets bring so much joy to my kitchen. They’re messy, they’re fun, and they always disappear way too fast. There’s something so satisfying about seeing those golden, puffed-up pockets come out of the oven, knowing you made them with your own two hands. I hope you give them a try and maybe even make a few kitchen memories (and messes!) of your own. Don’t forget to share your favorite filling combos with me!

Frequently Asked Questions about Homemade Cheesy Pizza Pockets
- → Can I use homemade pizza dough?
Absolutely! If you have a favorite homemade recipe, go for it! Just make sure it’s rolled out to a consistent thickness so your pockets bake evenly. I’ve used my sourdough discard dough before, and it worked surprisingly well for a tangier crust!
- → What other fillings work best in Homemade Cheesy Pizza Pockets?
Oh, the possibilities! Cooked sausage, diced ham, spinach (sautéed and squeezed dry), or even finely chopped bell peppers and onions. Just remember to cook any raw meats or veggies beforehand, and don’t make the filling too wet. I tried raw mushrooms once, and they made the pocket soggy, oops!
- → How do I prevent the pockets from bursting while baking?
The key is not to overfill them and to really seal those edges well! Use a fork to crimp all around the border, pressing firmly. Also, don’t stretch the dough too thin. I learned that after a few “pizza lava” incidents in my oven!
- → Can I make these ahead of time?
Yes, totally! You can assemble them, then either bake immediately or cover them and refrigerate for a few hours. For longer storage, freeze them unbaked on a baking sheet until solid, then transfer to a freezer bag. Bake from frozen, adding a few extra minutes to the cook time. So handy!
- → What if I don’t have an egg for the egg wash?
No worries! You can brush the tops with a little milk or even just a tiny bit of olive oil for some color. The egg wash gives the best golden shine and crisp, but it’s not a deal-breaker. I’ve forgotten it before, and they still tasted great, just looked a bit paler!

Homemade Cheesy Pizza Pockets: Quick Snack Delight
- Prep Time: 15 Minutes
- Cook Time: 15 Minutes
- Total Time: 30 Minutes
- Yield: 8 Servings 1x
- Category: Easy dinners
Description
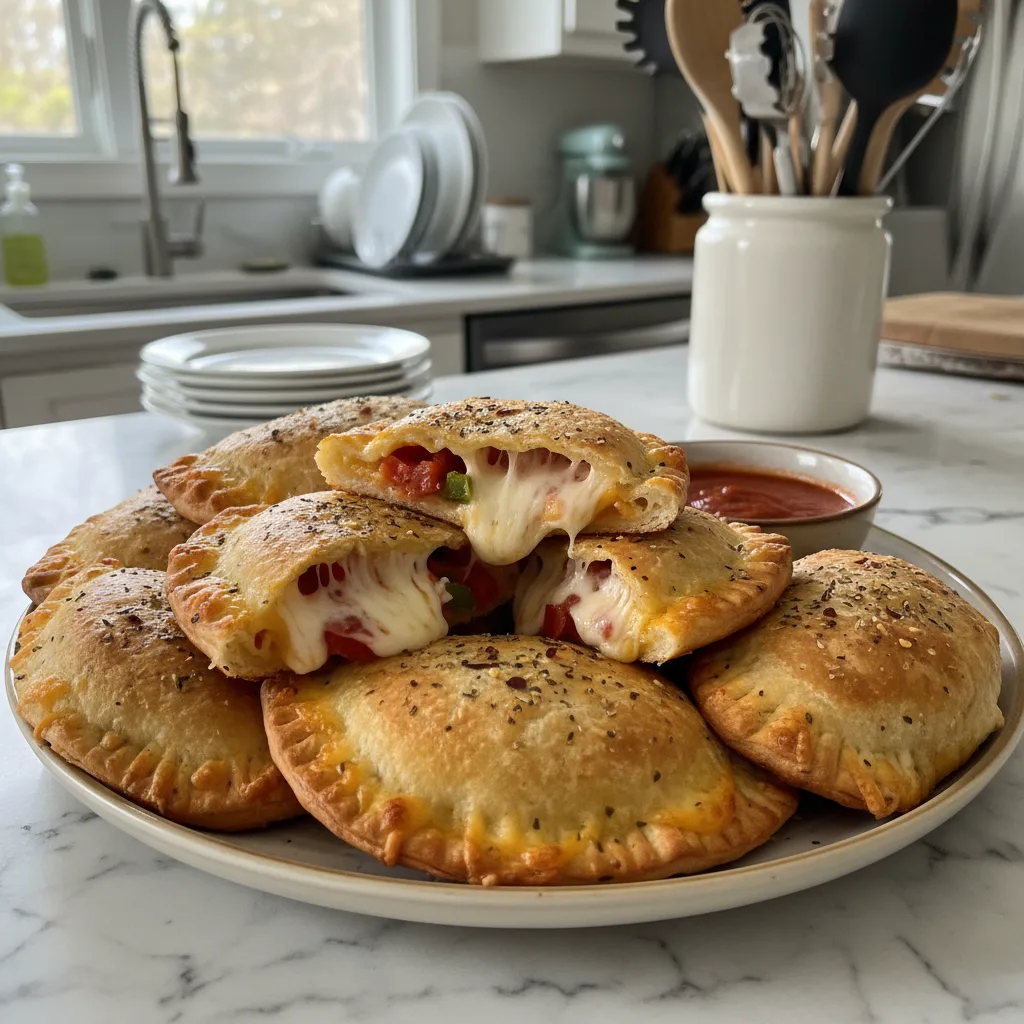
Homemade Cheesy Pizza Pockets are a quick, easy snack! Learn my simple recipe for warm, gooey pizza pockets, perfect for hungry kids or a nostalgic treat.
Ingredients
- Pocket Essentials:
- 1 (13.8 oz) can refrigerated pizza dough, rectangular
- 2 tbsp all-purpose flour, for dusting
- Savory Fillings:
- 1/2 cup marinara sauce
- 1.5 cups shredded mozzarella cheese
- 1/2 cup mini pepperoni slices
- Flavor Boosters & Finishing Touches:
- 1/2 tsp dried oregano
- 1 large egg, whisked with 1 tbsp water (for egg wash)
Instructions
- Prep Your Workspace & Dough:: Okay, first things first, preheat your oven to 400°F (200°C). Grab a large baking sheet and line it with parchment paper – you’ll thank me later for the easy cleanup. Now, lightly flour your clean countertop and carefully unroll your pizza dough. I usually give it a gentle stretch to make it a bit thinner, but not so thin it tears. Think about a nice, even rectangle, maybe 10×15 inches or so. This is where I sometimes get a little too enthusiastic and stretch it too far, oops!
- Cut & Fill Your Pockets:: Next, grab a pizza cutter or a sharp knife and cut your dough into 8 equal rectangles. They don’t have to be perfect squares, mine are usually wonky, but that’s part of the charm! On one half of each rectangle, spoon about 1-2 tablespoons of marinara sauce, leaving a small border around the edges. Then, pile on a generous sprinkle of mozzarella, a few pepperoni pieces, and a tiny pinch of dried oregano. Don’t overfill, I’ve learned that the hard way – cheese escapes are no fun!
- Seal the Deal:: Now for the fun part: fold! Take the empty half of the dough and gently fold it over the filling, lining up the edges. Use your fingers to press down firmly around the edges, really sealing them tight. This is where a fork comes in handy! Press the tines of a fork all around the sealed edges to create those pretty crimp marks and ensure no cheesy goodness leaks out. It also makes them look super professional, even if you’re just winging it like me!
- Egg Wash & Bake Your Pockets:: In a small bowl, whisk that egg with about a tablespoon of water. This is your magic potion for a golden, crispy crust! Brush the tops of your pizza pockets with this egg wash. It doesn’t need to be thick, just a light, even coat. Carefully transfer your sealed pockets to the prepared baking sheet, making sure they have a little space between them so they don’t stick. I once crowded them, and they ended up steaming instead of crisping – a rookie mistake!
- Bake to Golden Perfection:: Pop that baking sheet into your preheated oven. Bake for about 12-15 minutes, or until your Homemade Cheesy Pizza Pockets are beautifully golden brown and puffed up. Keep an eye on them, ovens can be quirky! I usually peek around the 10-minute mark. You’ll start to smell that amazing pizza aroma filling your kitchen – that’s when you know you’re getting close to deliciousness. The cheese inside should be bubbly and melted, just begging to be eaten.
- Cool & Serve:: Alright, the hardest part: waiting! Once they’re out of the oven, let them cool on the baking sheet for 5 minutes. That cheese filling is molten hot, trust me, I’ve burned my tongue more times than I care to admit! This cooling time also helps the pockets set up a bit, making them easier to handle. Serve them warm with extra marinara for dipping, maybe a little ranch if you’re feeling wild. They smell absolutely incredible, like a pizzeria just opened in your kitchen!


