Oh, Yaki Udon. This dish always brings me back to a slightly chaotic Tuesday evening, years ago. I was trying to recreate a dish from a little hole-in-the-wall Japanese place I loved, and honestly, I had no clue what I was doing. Noodles were flying, the sauce almost went everywhere, and I probably used way too much soy sauce the first time. But that first bite? Pure magic. It felt like a warm hug after a long day, and it’s been a staple in my kitchen ever since. There’s just something about those chewy, thick udon noodles coated in a savory sauce that makes everything right.
I remember one time, I was so focused on getting the sauce just right, I completely forgot to pre-cook the udon noodles. My husband, bless his heart, just watched me stir-frying hard, frozen blocks, trying to figure out what was going on. We had a good laugh, and eventually, the noodles softened, but it was a sticky, slightly embarrassing mess. Now, “cook the udon noodles first!” is practically my kitchen mantra.

Yaki Udon Noodles: Ingredients for a Savory Stir-Fry
- Frozen Udon Noodles: Okay, hear me out: frozen udon noodles are the secret weapon here. They cook up perfectly chewy, unlike some of the shelf-stable ones that can get a bit mushy. I’ve tried those once, and honestly, it was a texture nightmare I don’t wish on anyone. Just grab them from the freezer aisle, you won’t regret it.
- Chicken Thighs: I love chicken thighs for this Yaki Udon noodle recipe, they stay so juicy and tender. You could use chicken breast, but sometimes it dries out a bit too fast for my liking. I’ve even swapped it for shrimp when I’m feeling fancy works a treat!
- Cabbage: Shredded cabbage gives such a lovely crunch and a bit of sweetness to these udon noodles. Don’t skip it! I once tried using spinach, thinking ‘healthy!’, but it just wilted into nothing. Cabbage holds its own.
- Carrots: A pop of color and a touch of earthy sweetness. I usually julienne mine, but honestly, a quick chop works just fine. Adds a nice texture contrast to the soft udon noodles.
- Soy Sauce: This is the backbone of our udon sauce. Use a good quality one, hon. I prefer low-sodium because it lets me control the saltiness better. I once grabbed the wrong bottle, and everything was just… salty. Live and learn, right?
- Mirin: Sweet, tangy, and essential for that authentic Japanese flavor. Don’t confuse it with rice vinegar, it’s got a different sweetness. I tried that once in a pinch, and the flavor profile was definitely off.
- Oyster Sauce: Adds a deep, umami richness to the udon. If you’re vegetarian, there are some great mushroom-based ‘oyster’ sauces out there. I’ve used them, and they’re surprisingly good!
- Garlic: Loads of it! Minced fresh garlic, please, no powder here. I’m a garlic fiend, so I usually throw in an extra clove or two. You can really smell it when it hits the hot pan, and that’s when you know good things are happening.
- Green Onions: For garnish, but also for a fresh, oniony bite. I always chop extra for a generous sprinkle. They just brighten up the whole Yaki Udon noodle dish.
- Sesame Oil: A drizzle at the end for that nutty, aromatic finish. A little goes a long way, so don’t go crazy! I once overdid it, and my kitchen smelled like a sesame factory for days.
Yaki Udon Noodles: Step-by-Step Instructions
- Prep Your Noodle Base:
- First things first, get those Yaki Udon noodles ready! Boil them according to package directions, which usually means just a couple of minutes until they’re tender but still have a nice chew. Drain them well and maybe even give them a quick rinse with cold water to stop them from sticking. I’ve totally forgotten this step before, leading to a giant, sticky udon blob in the pan, and trust me, that’s not fun to untangle.
- Whip Up the Sauce:
- While your noodles are doing their thing, let’s mix the sauce. In a small bowl, whisk together the soy sauce, mirin, and oyster sauce. Give it a good stir until everything is combined. This is where the magic starts to happen! I always taste a tiny bit to make sure it’s balanced sometimes I add a tiny splash more mirin if I want it a bit sweeter. It’s totally fine to adjust it to your liking, that’s what home cooking is about!
- Cook Your Protein:
- Now, heat a large skillet or wok over medium-high heat with a bit of oil. Add your chicken pieces and cook until they’re nicely browned and cooked through. This usually takes about 5-7 minutes. Don’t overcrowd the pan, or your chicken will steam instead of sear, and we want that lovely golden crust! I learned that the hard way, trying to rush things on a hungry night.
- Add the Veggies:
- Once the chicken is done, toss in your minced garlic, shredded cabbage, and julienned carrots. Stir-fry for about 3-4 minutes, until the veggies are slightly tender-crisp. You want them to still have a bit of a bite, not go completely limp. I love how the kitchen starts smelling absolutely amazing at this point, all those savory garlic and fresh vegetable aromas mingling.
- Combine & Coat Yaki Udon Noodles:
- Time for the star: the Yaki Udon noodles! Add your cooked and drained noodles to the skillet with the chicken and veggies. Pour that beautiful sauce you mixed earlier all over everything. Using tongs, toss it all together really well, making sure every single strand of those Yaki Udon noodles gets coated in that delicious, savory sauce.
- Final Touches & Serve:
- Continue to stir-fry for another 1-2 minutes, just to let the sauce thicken slightly and really cling to the noodles. Take it off the heat, drizzle with a tiny bit of sesame oil, and sprinkle generously with fresh green onions. Give it one last gentle toss. The aroma, the colors it’s just perfect! Serve it up hot, maybe with a sprinkle of toasted sesame seeds if you have them. Enjoy your creation!
Honestly, Yaki Udon has saved my dinner plans more times than I can count. There was this one evening, I was totally drained, and the fridge looked pretty bare. But then I remembered the frozen udon and some leftover chicken. In about 20 minutes, I had a steaming bowl of deliciousness. It felt like a little victory, turning what could have been a sad toast-for-dinner night into something truly satisfying. That’s the magic of these udon noodles.
Yaki Udon Noodles: Storing and Reheating Tips
Got leftovers? Lucky you! These udon noodles actually hold up really well. Just pop them into an airtight container and keep them in the fridge for up to 3 days. When reheating, I usually do it on the stovetop over medium heat with a tiny splash of water or broth to loosen things up. I microwaved it once, and the sauce got a little sad and separated so don’t do that lol. The noodles can get a tiny bit softer, but the flavor is still there, sometimes even better the next day as the flavors meld. My personal tip? Add a fresh sprinkle of green onions after reheating to perk it right back up.

Ingredient Substitutions
Okay, let’s talk swaps for these udon noodles. No chicken? Ground pork or thinly sliced beef work wonderfully, I’ve tried both, and they bring their own deliciousness. For veggies, feel free to use what you have. Bell peppers, mushrooms, or even snap peas are all fantastic additions. I once tried using broccoli, and it was… fine, but it needed a bit longer to cook. If you’re out of mirin, a tiny pinch of sugar with a splash of rice vinegar can kinda mimic the sweetness, but it won’t be quite the same. For oyster sauce, a vegetarian mushroom sauce is a great alternative, and honestly, you might not even notice the difference!
Yaki Udon Noodles: Serving Suggestions
These udon noodles are a meal in themselves, but sometimes I like to make it a whole vibe. A crisp side salad with a ginger dressing is always a good idea, cutting through the richness. For a drink, a chilled sake or even just a simple green tea pairs beautifully. If I’m feeling extra, a fried egg on top with a runny yolk is just chef’s kiss that’s how my friend Chef Zoya always serves her stir-fries, and it’s genius! And for dessert? A little scoop of mango sorbet just cleanses the palate beautifully. This dish and a good documentary? Yes please, that’s my ideal Friday night.
The Story Behind Yaki Udon Noodles
Yaki Udon are a fantastic example of Japanese comfort food, a stir-fried dish that originated in Kitakyushu, Japan, around World War II. Legend has it, a noodle shop owner ran out of soba noodles and used udon instead, and a star was born! It’s a dish that speaks to resourcefulness and making something delicious from simple ingredients. For me, discovering Yaki Udon felt like uncovering a little culinary secret, a way to bring those vibrant, savory flavors right into my own home kitchen. It’s a taste of tradition, made accessible and utterly comforting, especially when I’m craving something hearty.
So there you have it, my heartfelt take on Yaki Udon. This dish is more than just a recipe, it’s a little piece of my kitchen journey, full of laughs, minor mishaps, and ultimately, pure satisfaction. Seeing those thick, chewy noodles coated in that glossy, savory sauce always makes me smile. I hope you try it, make it your own, and maybe even have your own little kitchen adventure with it. Don’t forget to tell me how your Yaki Udon turns out!

Frequently Asked Questions
- → Can I use fresh Yaki Udon noodles instead of frozen?
Absolutely! Fresh Yaki Udon noodles work great too. Just boil them according to the package directions, which might be a shorter time than frozen ones. I’ve used both, and while frozen often gives a slightly chewier texture, fresh is a fantastic option if that’s what you have on hand!
- → What if I don’t have oyster sauce for these Yaki Udon noodles?
No oyster sauce? No problem! You can use a vegetarian mushroom stir-fry sauce as a direct substitute, it offers a similar umami depth. I’ve also just bumped up the soy sauce and added a tiny pinch of sugar and a dash more mirin in a pinch, and it still tastes pretty good, just a little different.
- → My Yaki Udon noodles are sticking together in the pan, help!
Oh, I’ve been there! This usually happens if the noodles weren’t rinsed well after boiling, or if the pan isn’t hot enough. Make sure to rinse them thoroughly after boiling and give them a good toss in a hot pan quickly. If they’re still sticking, a tiny splash of oil can help loosen them up.
- → How long do Yaki Udon noodles last in the fridge?
These Yaki Udon noodles are good for about 3 days in an airtight container in the refrigerator. I wouldn’t push it much longer than that, as the noodles can start to get a bit too soft. It’s truly best eaten fresh or within a day or two for optimal texture.
- → Can I add other proteins to my Yaki Udon noodles?
Definitely! This Yaki Udon noodle recipe is super flexible. Tofu, shrimp, thinly sliced pork belly, or even just extra veggies make wonderful additions. I’ve thrown in some leftover steak strips before, and it was surprisingly delicious. Feel free to get creative with what you have!

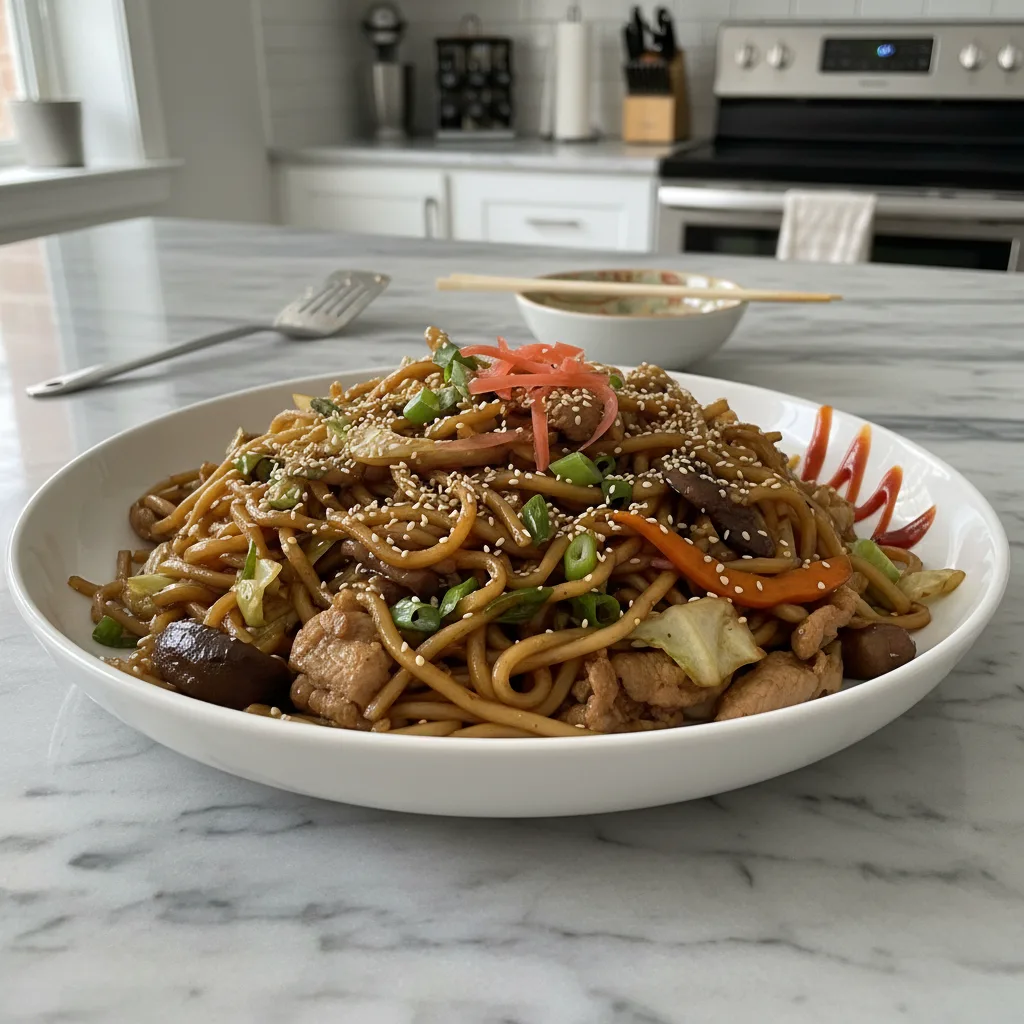
Hearty Yaki Udon Noodles: A Quick Weeknight Stir-Fry
- Prep Time: 15 Minutes
- Cook Time: 20 Minutes
- Total Time: 35 Minutes
- Yield: 4 Servings
- Category: Dinner Recipes
Description
Whip up these savory Yaki Udon noodles for a quick weeknight meal. This comforting stir-fry is packed with flavor, easy to make, and a family favorite.
Ingredients
- Noodle & Protein Base:
- Frozen Udon Noodles
- Chicken Thighs (boneless, skinless, cut into bite-sized pieces)
- Fresh Veggies & Flavor Boosters:
- Cabbage (shredded)
- Carrots (julienned)
- Garlic (minced)
- Green Onions (chopped, for garnish)
- Sauce Essentials:
- Soy Sauce (low sodium preferred)
- Mirin
- Oyster Sauce
- Sesame Oil
- Pantry Staples:
- Vegetable Oil (for stir-frying)
- Toasted Sesame Seeds (optional, for garnish)
Instructions
- Prep Your Noodle Base:: First things first, get those Yaki Udon noodles ready! Boil them according to package directions, which usually means just a couple of minutes until they’re tender but still have a nice chew. Drain them well and maybe even give them a quick rinse with cold water to stop them from sticking. I’ve totally forgotten this step before, leading to a giant, sticky udon blob in the pan, and trust me, that’s not fun to untangle.
- Whip Up the Sauce:: While your noodles are doing their thing, let’s mix the sauce. In a small bowl, whisk together the soy sauce, mirin, and oyster sauce. Give it a good stir until everything is combined. This is where the magic starts to happen! I always taste a tiny bit to make sure it’s balanced—sometimes I add a tiny splash more mirin if I want it a bit sweeter. It’s totally fine to adjust it to your liking, that’s what home cooking is about!
- Cook Your Protein:: Now, heat a large skillet or wok over medium-high heat with a bit of oil. Add your chicken pieces and cook until they’re nicely browned and cooked through. This usually takes about 5-7 minutes. Don’t overcrowd the pan, or your chicken will steam instead of sear, and we want that lovely golden crust! I learned that the hard way, trying to rush things on a hungry night.
- Add the Veggies:: Once the chicken is done, toss in your minced garlic, shredded cabbage, and julienned carrots. Stir-fry for about 3-4 minutes, until the veggies are slightly tender-crisp. You want them to still have a bit of a bite, not go completely limp. I love how the kitchen starts smelling absolutely amazing at this point, all those savory garlic and fresh vegetable aromas mingling.
- Combine & Coat Yaki Udon Noodles:: Time for the star: the Yaki Udon noodles! Add your cooked and drained noodles to the skillet with the chicken and veggies. Pour that beautiful sauce you mixed earlier all over everything. Using tongs, toss it all together really well, making sure every single strand of those Yaki Udon noodles gets coated in that delicious, savory sauce.
- Final Touches & Serve:: Continue to stir-fry for another 1-2 minutes, just to let the sauce thicken slightly and really cling to the noodles. Take it off the heat, drizzle with a tiny bit of sesame oil, and sprinkle generously with fresh green onions. Give it one last gentle toss. The aroma, the colors—it’s just perfect! Serve it up hot, maybe with a sprinkle of toasted sesame seeds if you have them. Enjoy your creation!


