Introduction to Mock Apple Crisp
As a passionate home cook, I cherish those moments when I can whip up a comforting dessert that brings everyone together. One of my absolute favorites is Mock Apple Crisp. This delightful dish captures the essence of a traditional apple crisp, but with a surprising twist that makes it incredibly simple and accessible. Every time I make it, the sweet aroma fills my kitchen, and I can’t help but smile at the anticipation of that first warm bite.
What I love most about Mock Apple Crisp is its versatility. You can create it with ingredients you likely already have on hand, making it excellent for impromptu gatherings or cozy family dinners. The combination of tender fruit and a crunchy topping creates a delightful texture that lingers on your palate. Plus, it’s an excellent way to impress friends and family without spending hours in the kitchen.

This recipe has become a staple in my home, and I often find myself reminiscing about the first time I tried it. The flavors meld together beautifully, and the way the warm topping contrasts with a scoop of vanilla ice cream is pure bliss. Whether served as a weeknight dessert or a festive holiday treat, Mock Apple Crisp never fails to evoke smiles and satisfied sighs. Join me as we dive into this irresistible recipe that’s sure to become a favorite in your household too!
Why You’ll Love This Mock Apple Crisp
When I first discovered the recipe for Mock Apple Crisp, I was immediately drawn to its simplicity and the delightful aroma that fills my kitchen while it bakes. This dish is not just quick to prepare, but it also captures the essence of a classic dessert without the fuss of peeling and slicing apples. As a busy home cook, I appreciate how easy it is to whip up this tasty treat on a whim.
One of the main reasons you’ll love this Mock Apple Crisp is its incredible flavor. The combination of cinnamon and sugar creates a warm, inviting scent that makes my mouth water. Every bite is a sweet explosion of taste, perfectly balanced with a crunchy topping that adds just the right amount of texture. It’s as satisfying as any traditional apple crisp, yet it comes together in a fraction of the time.
Moreover, this Mock Apple Crisp is an excellent way to impress your family and friends. The beauty of this dessert lies in its versatility; you can use canned peaches, pears, or even berries if you prefer. This flexibility means you can enjoy it year-round, regardless of the season. Just imagine serving this delightful dish at your next gathering-everyone will rave about it!
Additionally, this recipe is a nice way to bring a touch of nostalgia into your kitchen. It reminds me of cozy autumn evenings when the leaves start to fall. Each spoonful takes me back to simpler times, making it a excellent dessert for family gatherings or a quiet night in. With just a handful of ingredients, you can create a warm and comforting dessert that feels like a hug in a bowl.
In short, if you’re looking for an easy, tasty, and nostalgic dessert, this Mock Apple Crisp is your answer. It’s quick to prepare, bursting with flavor, and sure to become a new family favorite!
Ingredients for Mock Apple Crisp
Creating a delightful Mock Apple Crisp begins with selecting the excellent ingredients, and over the years, I have fine-tuned this list to ensure every bite bursts with flavor. Let me walk you through what you’ll need to bring this comforting dessert to life.
First and foremost, the star of the show is the rhubarb. Its tartness mimics the zing of traditional apples, making it the ideal base for this Mock Apple Crisp. You can find fresh rhubarb at local markets in spring or use frozen rhubarb for convenience. Either way, it will provide a lovely tang that balances the sweetness.
Next up is granulated sugar. This ingredient is essential, as it enhances the natural sweetness of the rhubarb and ties all the flavors together. You can also experiment with brown sugar for a deeper, caramel-like taste.
To add some warmth and spice, we include cinnamon. This aromatic spice not only brings a cozy flavor but also complements the tartness of the rhubarb beautifully. If you’re feeling adventurous, a pinch of nutmeg can add an extra layer of warmth.
Then, we move on to the oats. Rolled oats are the foundation of the crisp topping, providing a wonderful texture that contrasts with the soft filling. They soak up the juices and create that satisfying crunch we all crave.
Don’t forget the all-purpose flour, which helps bind the topping together. If you’re looking for a gluten-free option, feel free to substitute it with almond flour or a gluten-free blend.
For richness and flavor in the topping, you’ll need butter. You can use unsalted butter for more control over the sweetness, or opt for coconut oil if you’re looking for a dairy-free alternative.
Lastly, a pinch of salt is crucial. It enhances all the other flavors and balances the sweetness, making the Mock Apple Crisp utterly irresistible.
Here’s a quick rundown of the essential ingredients you’ll need for this delightful Mock Apple Crisp:
- Fresh or frozen rhubarb
- Granulated sugar
- Cinnamon
- Rolled oats
- All-purpose flour (or gluten-free alternative)
- Unsalted butter (or coconut oil)
- Salt
With these ingredients in hand, you’re well on your way to creating a tasty Mock Apple Crisp that will warm your heart and delight your taste buds. Now, let’s dive into how to make this scrumptious dessert!
How to Make Mock Apple Crisp
Start by preheating your oven to 350°F (175°C). This step is essential for ensuring that your Mock Apple Crisp bakes evenly and achieves that excellent golden crust.
Next, prepare your filling. I like to use canned peaches or pears for this recipe, as they provide a sweet and juicy base that mimics the texture of apples. Drain the fruit and place it in a large mixing bowl. If you’re feeling adventurous, you can add a sprinkle of cinnamon or nutmeg to enhance the flavor.
Now, let’s make the crumble topping. In another bowl, combine oats, flour, brown sugar, and butter. Use your fingers to mix everything together until you get a crumbly texture. This is where the magic happens-the buttery, sweet topping will complement the fruit beautifully!
Once your crumble is ready, it’s time to assemble your Mock Apple Crisp. Spread the fruit evenly in a 9×13-inch baking dish. Then, sprinkle the crumble topping generously over the fruit. Make sure to cover the fruit completely for that delightful crunch in every bite.
Place the baking dish in the preheated oven and let it bake for about 30-35 minutes. During this time, the topping will turn golden brown, and your kitchen will be filled with the most heavenly aroma. You’ll know it’s ready when the fruit bubbles around the edges.
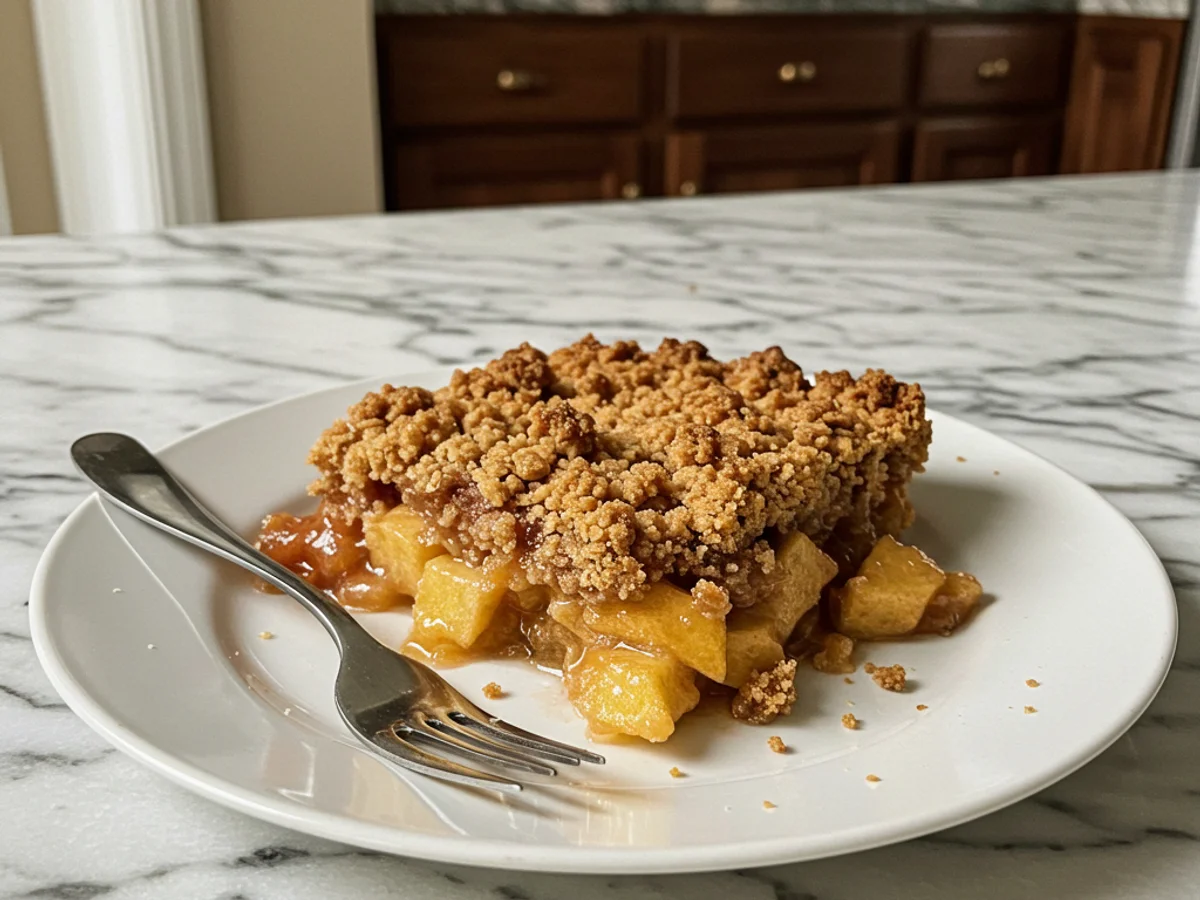
Finally, remove the Mock Apple Crisp from the oven and let it cool slightly before serving. This dish is best enjoyed warm, perhaps with a scoop of vanilla ice cream melting into the crisp. It’s a comforting dessert that’s excellent for any occasion!
Tips for Success
If you want to achieve the excellent Mock Apple Crisp, I’ve gathered some invaluable tips from my kitchen experiences. Each time I make this delightful dessert, I discover little nuances that elevate the dish. Here’s what I’ve learned:
- Choose the right fruit: While you can use canned peaches or pears, I love using tart green apples for a more authentic flavor. The combination of sweet and tart mimics real apple crisp beautifully.
- Don’t skimp on spices: A pinch of cinnamon and nutmeg turns this dish into a fragrant delight. Trust me, the aroma wafting through your kitchen will be irresistible!
- Preheat your oven: Always preheat your oven for even baking. This ensures that your Mock Apple Crisp gets that lovely golden-brown topping.
- Customize your topping: Feel free to mix in chopped nuts or oats to your topping. This adds a delightful crunch and depth to the flavor.
- Let it rest: After baking, let your Mock Apple Crisp sit for about 10-15 minutes. This allows the juices to settle and makes for easier serving.
- Serve warm with ice cream: A scoop of vanilla ice cream on top creates a heavenly contrast with the warm crisp. It’s the ultimate indulgence!
By following these tips, you’ll be well on your way to making a Mock Apple Crisp that will impress everyone at the table. Happy baking!
Equipment Needed
When it comes to making my beloved Mock Apple Crisp, having the right equipment on hand can make all the difference. Over the years, I’ve gathered a few essential tools that ensure my dessert turns out perfectly every time. Here’s what you’ll need:
- Mixing Bowls: A set of various sizes is ideal for mixing the fruit and crunchy topping. If you don’t have a large bowl, any deep dish will work.
- Measuring Cups and Spoons: Precision is key! Accurate measurements of sugar, cinnamon, and oats will enhance your Mock Apple Crisp flavor.
- Baking Dish: A 9×13-inch baking dish is excellent for this recipe. However, any oven-safe dish will do if you’re in a pinch.
- Knife and Cutting Board: These are essential for slicing your fruit. A sharp knife ensures clean cuts, enhancing the presentation of your Mock Apple Crisp.
- Spatula or Spoon: Use this for mixing the topping ingredients and spreading them evenly over the fruit. A silicone spatula is my favorite for scraping every last bit!
- Oven Mitts: Safety first! Protect your hands when you take your tasty Mock Apple Crisp out of the oven.
With these essential tools, you’ll be well on your way to crafting a delightful dessert that brings the warmth and coziness of home to your table. Let’s get baking!
Variations
As I’ve experimented with my Mock Apple Crisp over the years, I’ve discovered a variety of delightful twists that keep this dessert fresh and exciting. Each variation brings its own unique charm, making it a versatile dish that can cater to different tastes and dietary needs. Here are some of my favorite adaptations:
- Fruit Swap: While the classic Mock Apple Crisp uses zucchini to mimic apples, you can mix it up by adding other fruits. Try pairing the zucchini with peaches or berries for a delightful summer twist.
- Flavor Infusions: Enhance the flavor profile by incorporating spices like cardamom or ginger. A pinch of these spices can elevate the taste of your Mock Apple Crisp, giving it a warm, cozy aroma.
- Gluten-Free Option: If you’re looking for a gluten-free version, just substitute the flour in the topping with almond flour or a gluten-free all-purpose blend. This will still yield a tasty crisp without compromising on texture.
- Nutty Crunch: For those who love a bit of crunch, consider adding chopped nuts such as walnuts or pecans into the topping. This not only adds texture but also infuses a rich nutty flavor that complements the sweetness of the dish.
- Sweetness Level: Adjust the sweetness to your liking by using maple syrup or honey instead of sugar. These natural sweeteners can provide a more complex flavor profile, making your Mock Apple Crisp even more enjoyable.
- Dairy-Free Twist: To make this dish dairy-free, just use coconut oil or vegan butter in place of regular butter. This will keep the crisp buttery while adhering to a dairy-free lifestyle.
With these variations, you can personalize your Mock Apple Crisp for any occasion or preference. I love how each adaptation tells a different story, and it’s always exciting to see what new flavor combinations emerge from this beloved dish!
Print

Mock Apple Crisp: Discover the Ultimate Dessert Delight!
- Prep Time: 20 minutes
- Cook Time: 35 minutes
- Total Time: 55 minutes
- Yield: 8 1x
- Category: Dessert
- Cuisine: American
Description
A delicious and comforting Mock Apple Crisp made with tender pears and a crunchy oat topping, perfect for fall gatherings or cozy evenings at home.
Ingredients
- 4 cups peeled and sliced pears
- 1 tablespoon lemon juice
- 1 teaspoon cinnamon
- 1/2 cup brown sugar
- 1 cup rolled oats
- 1/2 cup all-purpose flour
- 1/2 cup softened butter
- 1/4 cup granulated sugar
- 1/2 teaspoon salt
Instructions
- Preheat your oven to 350°F (175°C).
- In a large bowl, toss the sliced pears with lemon juice, cinnamon, and brown sugar until evenly coated.
- Spread the pear mixture evenly in a greased 9×13 inch baking dish.
- In another bowl, combine the rolled oats, flour, softened butter, granulated sugar, and salt. Mix until crumbly.
- Sprinkle the oat mixture over the pears in the baking dish.
- Bake in the preheated oven for 30-35 minutes, or until the topping is golden brown and the pears are tender.
- Remove from the oven and allow to cool slightly before serving.
- Serve warm with ice cream or whipped cream if desired.
Notes
- For added flavor, consider adding a pinch of nutmeg or a handful of chopped nuts to the topping.
- This dish can be made ahead of time and reheated before serving.
- Substitute apples for pears if you prefer a traditional apple crisp.
Nutrition
- Serving Size: 1 serving
- Calories: 270
- Sugar: 18g
- Sodium: 180mg
- Fat: 10g
- Saturated Fat: 6g
- Carbohydrates: 42g
- Fiber: 3g
- Protein: 3g
- Cholesterol: 30mg


