I remember the first time I made an Old-Fashioned Homemade Apple Crisp. It wasn’t some grand culinary experiment, honestly, it was an attempt to use up a ridiculous amount of apples my neighbor dropped off. I had a vague memory of my aunt making something similar, the kitchen smelling like cinnamon and pure joy. My first try? Let’s just say it was less “crisp” and more “soggy apple soup.” But the idea stuck. That warmth, that sweet-tart apple hug, it’s what makes this dish special, comforting, and truly a piece of my heart.
My second attempt at Old-Fashioned Homemade Apple Crisp involved me forgetting to peel half the apples. My husband, bless his heart, politely asked if it was “rustic” or if I just got distracted by our cat trying to scale the curtains. Oops! I just laughed, picked out the rogue peels, and learned that sometimes, a little imperfection adds character. It still tasted good, though, to be real.

Ingredients for Your Old-Fashioned Homemade Apple Crisp
- Granny Smith Apples: These are my go-to for this crisp. Their tartness cuts through the sweetness beautifully. Honestly, I’ve tried sweeter varieties, but they just turn to mush. We need some structure here, folks!
- Granulated Sugar: Just enough to sweeten the apples without making them cloyingly so. I once accidentally dumped in too much, and it was like eating a sugar bomb. Less is more, sometimes.
- All-Purpose Flour: This helps thicken the apple juices, creating that lovely saucy bottom. I’ve used cornstarch in a pinch, and it works, kinda, but flour gives it a more homey feel.
- Lemon Juice: A little splash brightens everything up and keeps those apples from browning too quickly. Don’t skip it! It’s like a secret weapon for fresh flavor.
- Rolled Oats: The star of the crumble! They give that lovely chew and texture that makes this dessert well, crisp. Quick oats work if you’re desperate, but the texture isn’t quite the same.
- Brown Sugar (packed): Gives the crumble a molasses-rich sweetness and a wonderful caramel note. Don’t even think about just using white sugar here, it won’t have the same depth.
- Cold Unsalted Butter: This is non-negotiable for a truly flaky, crumbly topping. I cut it into cubes and use my fingertips to rub it into the dry ingredients. Warm butter makes a paste, not a crumble. Oops, I learned that the hard way.
- Ground Cinnamon: The classic apple spice! The smell alone makes me feel like I’m wrapped in a warm blanket. Add a little extra if you’re like me and this dish needs that spice kick.
- Ground Nutmeg: Just a tiny pinch, it adds a subtle warmth and complexity that really rounds out the cinnamon. Freshly grated is  ,`chef’s kiss`, but pre-ground works fine.
Instructions for Making Your Old-Fashioned Homemade Apple Crisp
- Prep the Apples:
- First things first, get those apples ready! I usually peel, core, and slice my Granny Smiths into about 1/4-inch thick pieces. Honestly, this is where I usually get distracted by a podcast and start making some slices thicker than others. Don’t worry, it adds character! Toss them into a large bowl with the granulated sugar, a tablespoon of flour, and that lemon juice. Give it a good stir, making sure every apple slice gets a little love. You want them coated, ready for their sweet adventure.
- Whip Up the Crumble Topping:
- While those apples are chilling, it’s time for the star of the show: the crumble! In a separate medium bowl, combine your rolled oats, the remaining flour, brown sugar, cinnamon, and nutmeg. Give it a whisk to make sure everything is evenly distributed. Now, for the butter. Take that cold, cubed butter and use your fingertips to rub it into the dry ingredients. You’re aiming for a coarse, crumbly mixture some pieces will be pea-sized, others a bit larger. If your hands are warm, it can get a bit messy, but this classic dessert is worth it!
- Assemble Your Apple Crisp:
- Grab a 9×13 inch baking dish. I didn’t expect that it needs to be greased, but a quick spray or rub with butter makes cleanup so much easier. Pour your apple mixture into the prepared dish, spreading it out evenly. It’ll look like a mountain of apples, but trust me, they’ll cook down. Next, sprinkle that glorious crumble topping all over the apples. Try to get an even layer, but if there are a few bare spots, who cares? It’s homemade, not a magazine cover!
- Bake the Old-Fashioned Homemade Apple Crisp:
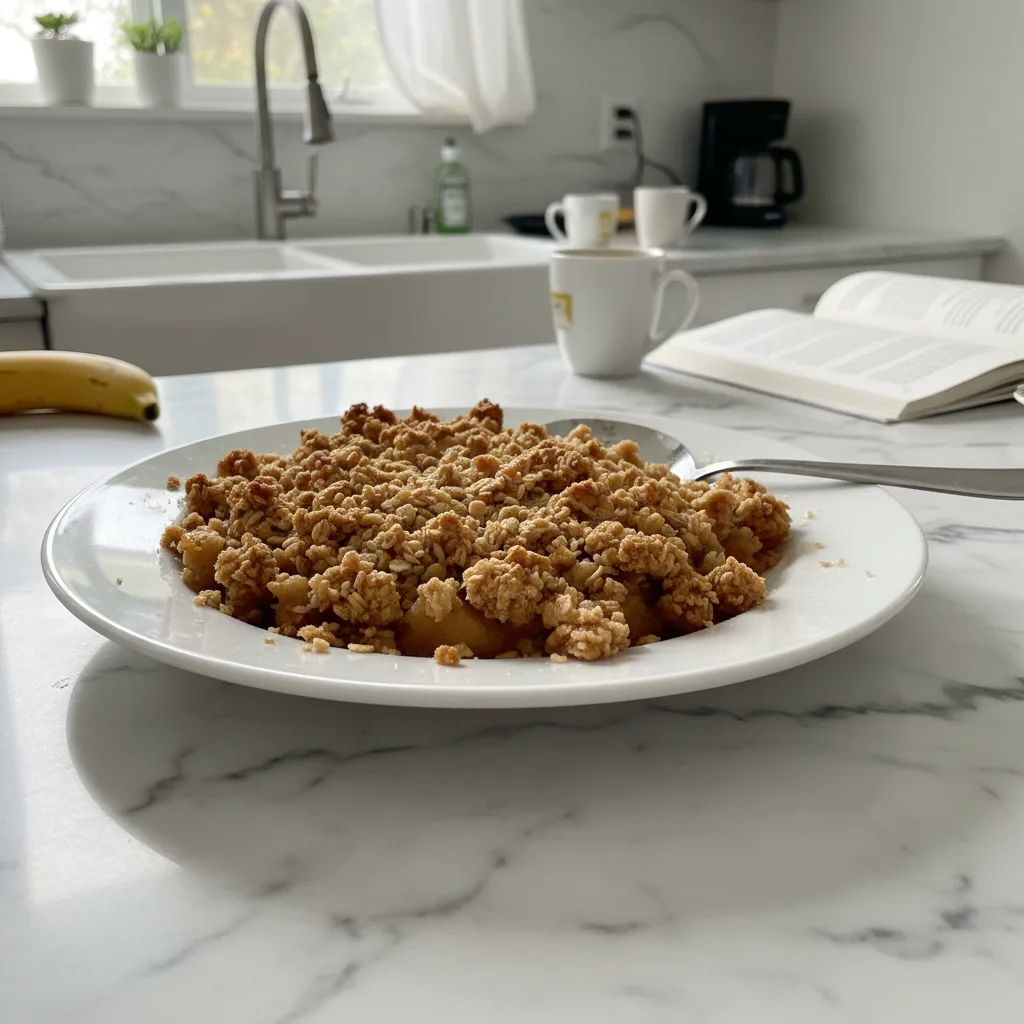
- Pop that dish into a preheated oven at 375°F (190°C). This is where the magic happens! I usually bake it for about 40-50 minutes. You’ll know it’s ready when the topping is a beautiful golden brown and the apple filling is bubbling up around the edges. Honestly, the smell filling your kitchen is half the reward. It’s like a warm hug, signaling that something wonderful is about to emerge. Don’t open the oven too much, or it’ll take longer!
- Check for Doneness:
- To be sure your crisp is cooked through, you can gently insert a knife into the center of the apples. They should be tender, not crunchy. If they’re still a bit firm, just let it bake for another 5-10 minutes. Sometimes my oven runs a little hot, sometimes a little cool, so I always trust my instincts and that knife test. This step is crucial for that perfect apple texture, not too soft, not too hard.
- Cool (If You Can Wait!) and Serve:
- Once it’s out of the oven, resist the urge to dig in immediately! Let this delightful dish cool on a wire rack for at least 15-20 minutes. This lets the filling set up a bit, preventing it from being too runny. I know, it’s hard to wait with that amazing aroma, but it’s worth it, I promise! Serve it warm, maybe with a scoop of vanilla ice cream or a dollop of whipped cream. Pure bliss, hon.
There was this one time I was making this for a potluck and my dog, bless his furry heart, somehow knocked over the entire bowl of prepped apples. Apples everywhere! I just stood there, flour on my nose, butter on my hands, and a dog looking guilty. Had to start over, but hey, that’s kitchen chaos for you. It made the final dessert taste even sweeter in the end, a testament to culinary resilience!
Old-Fashioned Homemade Apple Crisp Storage Tips
Okay, so you’ve got leftover Old-Fashioned Homemade Apple Crisp? Lucky you! Once it’s completely cooled (and I mean completely, or you’ll get condensation), cover it tightly with plastic wrap or foil. It’ll keep beautifully on the counter for a day or two, but honestly, I prefer it in the fridge for up to 3-4 days. I microwaved it once, and the sauce separated so don’t do that, lol. A quick reheat in a preheated oven (around 300°F/150°C) for 15-20 minutes really brings back that crisp topping. Freezing? I haven’t had the best luck with the texture of the apples after thawing, but the crumble holds up okay if you don’t mind a slightly softer filling.

Ingredient Substitutions for Old-Fashioned Homemade Apple Crisp
I’ve tried a few swaps in my journey with this classic crisp, and here’s the lowdown. For apples, a mix of Granny Smith and Honeycrisp or Braeburn works wonders if you want a sweeter, more complex flavor. Honestly, I tried all Fuji once, and it was just too sweet for me. For the crumble, if you’re out of oats, you can use a mix of flour and chopped nuts for a different texture it worked, kinda, but wasn’t the same classic feel. You can also swap out the cinnamon and nutmeg for apple pie spice if you have it on hand. I once used cardamom, and it was surprisingly good, but a bit of a departure from the “old-fashioned” vibe.
Serving Suggestions
How do you make this apple crisp even better? Warm, with a big scoop of good vanilla bean ice cream that slowly melts into the warm apples and crisp topping. Oh, my heart! Honestly, a dollop of fresh whipped cream is also heavenly. For a breakfast-ish vibe, a spoonful of plain Greek yogurt adds a nice tang. And for a truly comforting evening, this dish paired with a strong cup of black tea or a spiced chai, maybe a rom-com on the couch? Yes, please. It’s the kind of dish that just makes you want to curl up and feel hugged.
Cultural Backstory of Old-Fashioned Homemade Apple Crisp
The Old-Fashioned Homemade Apple Crisp has such a homey feel, doesn’t it? Crisps and crumbles popped up in popularity during World War II rationing in Britain, when ingredients for traditional pies were scarce. It was an ingenious way to make a delicious dessert with fewer resources. My grandmother, who grew up during that time, always made something similar, though she called it “apple brown Betty.” It’s funny how these recipes get passed down, evolving slightly but always carrying that same spirit of comfort and resourcefulness. For me, discovering this history made my own attempts at this comforting dessert feel even more connected to a legacy of simple, heartwarming food.
Making this apple crisp always brings a smile to my face. It reminds me of simpler times, of learning in the kitchen, and of the sheer joy of creating something truly comforting. It might not be perfect every time sometimes the apples are a little too soft, or the crumble a bit too dark but it’s always made with love. I hope you give it a try and find your own sweet memories in every bite. Let me know how your version turns out!

Frequently Asked Questions about Old-Fashioned Homemade Apple Crisp
- → Can I use other types of apples for this Old-Fashioned Homemade Apple Crisp?
Absolutely! While I swear by Granny Smiths for their tartness and texture, you can mix in Honeycrisp or Braeburn for a sweeter, more complex flavor. I once used a mix of whatever was in the fridge, and it worked, though some apples got softer than others.
- → What if I don’t have fresh lemon juice for this Old-Fashioned Homemade Apple Crisp?
You can skip it if you absolutely must, but it really brightens the flavors and helps prevent browning. In a pinch, a tiny splash of apple cider vinegar could work, but honestly, fresh lemon is the way to go for the best flavor.
- → My crumble topping for the Old-Fashioned Homemade Apple Crisp isn’t very crispy. What went wrong?
This usually means your butter might have been too warm, or you overmixed it, creating more of a dough than a crumble. Make sure your butter is super cold and work quickly with your fingertips. I’ve had this happen when I got distracted!
- → How long does Old-Fashioned Homemade Apple Crisp last as leftovers?
Once cooled, it’s good for a day or two on the counter, or 3-4 days in the fridge, tightly covered. Reheating in the oven brings back the best texture, microwaving can make it a bit sad, I’ve found.
- → Can I add nuts to the Old-Fashioned Homemade Apple Crisp topping?
You can absolutely add chopped pecans or walnuts to the crumble topping for extra crunch and flavor. I love doing this sometimes when I want a bit more texture, it adds a lovely dimension to the dessert.

Rustic Old-Fashioned Homemade Apple Crisp
- Prep Time: 20 Minutes
- Cook Time: 45 Minutes
- Total Time: 1 Hour 5 Minutes
- Yield: 8 Servings 1x
- Category: High Proteins Meals
Description
Whip up a rustic Old-Fashioned Homemade Apple Crisp. This recipe brings warm spices and tender apples, just like grandma made. Simple, comforting, and so easy!
Ingredients
- Crisp Apple Filling:
- 6–8 medium Granny Smith apples (about 2.5 lbs), peeled, cored, and sliced 1/4-inch thick
- 1/2 cup granulated sugar
- 1 tbsp all-purpose flour
- 1 tbsp fresh lemon juice
- Sweet Crumble Topping:
- 1 cup rolled oats (not instant)
- 1/2 cup all-purpose flour
- 1/2 cup packed light brown sugar
- 1/2 cup cold unsalted butter, cubed
- 1/2 tsp ground cinnamon
- 1/4 tsp ground nutmeg
- Flavor Boosters:
- 1/2 tsp ground cinnamon (extra for apples)
- Pinch ground nutmeg (extra for apples)
- Serving Suggestions:
- Vanilla bean ice cream
- Fresh whipped cream
- Plain Greek yogurt
Instructions
- Prep the Apples:: First things first, get those apples ready! I usually peel, core, and slice my Granny Smiths into about 1/4-inch thick pieces. Honestly, this is where I usually get distracted by a podcast and start making some slices thicker than others. Don’t worry, it adds character! Toss them into a large bowl with the granulated sugar, a tablespoon of flour, and that lemon juice. Give it a good stir, making sure every apple slice gets a little love. You want them coated, ready for their sweet adventure.
- Whip Up the Crumble Topping:: While those apples are chilling, it’s time for the star of the show: the crumble! In a separate medium bowl, combine your rolled oats, the remaining flour, brown sugar, cinnamon, and nutmeg. Give it a whisk to make sure everything is evenly distributed. Now, for the butter. Take that cold, cubed butter and use your fingertips to rub it into the dry ingredients. You’re aiming for a coarse, crumbly mixture – some pieces will be pea-sized, others a bit larger. If your hands are warm, it can get a bit messy, but this classic dessert is worth it!
- Assemble Your Apple Crisp:: Grab a 9×13 inch baking dish. I didn’t expect that it needs to be greased, but a quick spray or rub with butter makes cleanup so much easier. Pour your apple mixture into the prepared dish, spreading it out evenly. It’ll look like a mountain of apples, but trust me, they’ll cook down. Next, sprinkle that glorious crumble topping all over the apples. Try to get an even layer, but if there are a few bare spots, who cares? It’s homemade, not a magazine cover!
- Bake the Old-Fashioned Homemade Apple Crisp:: Pop that dish into a preheated oven at 375°F (190°C). This is where the magic happens! I usually bake it for about 40-50 minutes. You’ll know it’s ready when the topping is a beautiful golden brown and the apple filling is bubbling up around the edges. Honestly, the smell filling your kitchen is half the reward. It’s like a warm hug, signaling that something wonderful is about to emerge. Don’t open the oven too much, or it’ll take longer!
- Check for Doneness:: To be sure your crisp is cooked through, you can gently insert a knife into the center of the apples. They should be tender, not crunchy. If they’re still a bit firm, just let it bake for another 5-10 minutes. Sometimes my oven runs a little hot, sometimes a little cool, so I always trust my instincts and that knife test. This step is crucial for that perfect apple texture, not too soft, not too hard.
- Cool (If You Can Wait!) and Serve:: Once it’s out of the oven, resist the urge to dig in immediately! Let this delightful dish cool on a wire rack for at least 15-20 minutes. This lets the filling set up a bit, preventing it from being too runny. I know, it’s hard to wait with that amazing aroma, but it’s worth it, I promise! Serve it warm, maybe with a scoop of vanilla ice cream or a dollop of whipped cream. Pure bliss, hon.


