Honestly, I remember my first candy apple at the county fair like it was yesterday sticky, impossibly shiny, and a little bit magical. That vivid red, the satisfying crack when you bit into it… pure childhood bliss! Fast forward to now, and my kitchen has become a testing ground for recreating those nostalgic moments, but with a twist. I started dreaming of something even more whimsical, something that screams ‘celebration’ and ‘pure fun.’ That’s where these Rainbow Candy Apples came into being. They’re a vibrant explosion of color, a sweet crunch, and just make me happy. Every time I make them, the kitchen fills with that sweet, sugary scent, and I can’t help but smile.
My first attempt at Rainbow Candy Apples was, shall we say, a learning experience. I got a little too excited with the food coloring, and the syrup ended up looking more like murky swamp water than a vibrant rainbow. And the candy thermometer? Yeah, I thought I could eyeball it. Big mistake! The syrup seized up on me, and I had a sticky, sugary mess stuck to the bottom of my pan. Honestly, it was a disaster, but hey, that’s how we learn, right? Now, I know the crucial steps, and trust me, they make all the difference.

Ingredients for Rainbow Candy Apples
- Small Apples (like Fuji or Gala): You need a firm, crisp apple that holds up to the hot candy. I swear by smaller ones, they’re just easier to eat and dip. Don’t use anything mushy, please!
- Granulated Sugar: This is the backbone of our candy coating. Don’t skimp on quality here, it really makes a difference in the clarity and crunch of your Rainbow Candy Apples.
- Light Corn Syrup: This little gem prevents crystallization, giving you that smooth, glassy finish. I tried maple syrup once, and it just didn’t work the texture was all wrong, kinda grainy.
- Water: Just plain old water, but it’s essential for dissolving the sugar and creating the syrup base.
- Gel Food Coloring (various rainbow colors): Gel colors are where it’s at for vibrant hues. Liquid food coloring just won’t give you that intense, beautiful rainbow effect. I always go for the concentrated stuff.
- Vanilla Extract: A splash of vanilla rounds out the sweetness and adds a lovely depth of flavor. Honestly, it brightens everything up!
- Rainbow Sprinkles or Edible Glitter: Because what are Rainbow Candy Apples without a little sparkle? This is where you can get super creative and make them truly yours.
- Candy Apple Sticks or Wooden Skewers: You need something sturdy to hold onto. I’ve had skewers break mid-dip, and it’s not fun. Invest in good ones!
How to Make Rainbow Candy Apples
- Prep Your Apples:
- First things first, grab your apples and give them a good wash to remove any waxy coating. I usually scrub them with a little warm water and vinegar, then dry them completely. This is so important, hon, because any moisture will mess with your candy. Then, firmly insert a candy stick into the stem end of each apple. I always make sure it’s snug, I learned that the hard way when an apple plopped right into the hot syrup!
- Start the Candy Syrup:
- In a heavy-bottomed saucepan, combine your granulated sugar, light corn syrup, and water. Stir gently over medium heat until the sugar dissolves. Don’t stir too vigorously once it starts boiling, that’s a rookie mistake I used to make! Just let it do its thing. You’ll see the mixture go from cloudy to clear, and that’s your cue that the sugar is fully dissolved. This step is crucial for perfect Rainbow Candy Apples.
- Bring to Temperature:
- Attach a candy thermometer to the side of the pan, making sure it doesn’t touch the bottom. Bring the syrup to a boil without stirring. We’re aiming for 300°F (150°C), also known as the hard crack stage. This takes patience, so don’t rush it! I always get a little anxious watching the temperature climb, but trust the thermometer. If you pull it off too early, your candy will be sticky, not crunchy.
- Add Color & Flavor:
- Once the syrup hits 300°F, immediately remove it from the heat. Carefully stir in your desired gel food coloring for each batch and the vanilla extract. Be quick but gentle. I usually divide the syrup into smaller, heat-proof bowls if I’m doing multiple colors for a true rainbow effect. The smell of the vanilla hitting the hot syrup is just lovely!
- Dip Your Rainbow Candy Apples:
- Working quickly, tilt the bowl of syrup and dip each apple, swirling it to coat completely. Let any excess drip off back into the bowl. This part can get a little messy, but it’s so satisfying to see the vibrant color coat the apple! I sometimes tap the stick gently on the side of the bowl to get rid of drips. Don’t worry if it’s not absolutely perfect, a little character is good!
- Decorate & Cool:
- Immediately after dipping, if you’re using sprinkles, roll or sprinkle them onto the coated apples. Then, place the Rainbow Candy Apples on a piece of parchment paper or a silicone baking mat to cool and harden completely. This takes about 20-30 minutes, sometimes longer in humid weather. Resist the urge to touch them until they’re totally firm! They’ll look so shiny and inviting.
Making these Rainbow Candy Apples always feels like a little kitchen party. There’s the vibrant colors, the sweet scent, and the satisfying crunch when they finally cool. One time, my niece helped me, and she got sprinkles absolutely everywhere on the floor, in her hair, even on the dog! It was chaos, but honestly, those were some of the happiest, most delicious candy apples we’ve ever made. The joy of creating something so visually stunning and tasty is just wonderful.
Storage Tips for Rainbow Candy Apples
Here’s the honest truth about storing Rainbow Candy Apples: they’re best enjoyed within a day or two. I learned the hard way that the fridge is NOT their friend. I once put a batch in the refrigerator, thinking I was preserving them, and the candy coating got super sticky and started to weep. So don’t do that lol! Instead, store them at room temperature in a cool, dry place, ideally individually wrapped in cellophane bags to prevent them from sticking to each other or collecting dust. They can last up to 2-3 days this way, but the apples inside will start to soften after that. The candy coating itself holds up well, but the apple’s crispness diminishes over time. For the freshest crunch, eat them soon after they’ve set!

Rainbow Candy Apples: Ingredient Substitutions
I’ve experimented with a few swaps over the years, and here’s what I’ve found. For the apples, while Fuji and Gala are my favorites, any firm, small apple will work. Granny Smith apples, for example, add a lovely tart contrast to the sweet candy, which I tried once, and it worked… kinda, for a different flavor profile. As for the corn syrup, I’ve heard of people using golden syrup or even honey, but I haven’t had consistent success with those for that perfect hard crack stage. The texture can get a bit off, honestly. For food coloring, gel is truly the way to go for vibrant Rainbow Candy Apples. Liquid colors just dilute the syrup too much and give a pastel, rather than bold, look. Feel free to swap rainbow sprinkles for edible glitter, chopped nuts, or even crushed freeze-dried fruit for a different look and texture!
Serving Suggestions for Rainbow Candy Apples
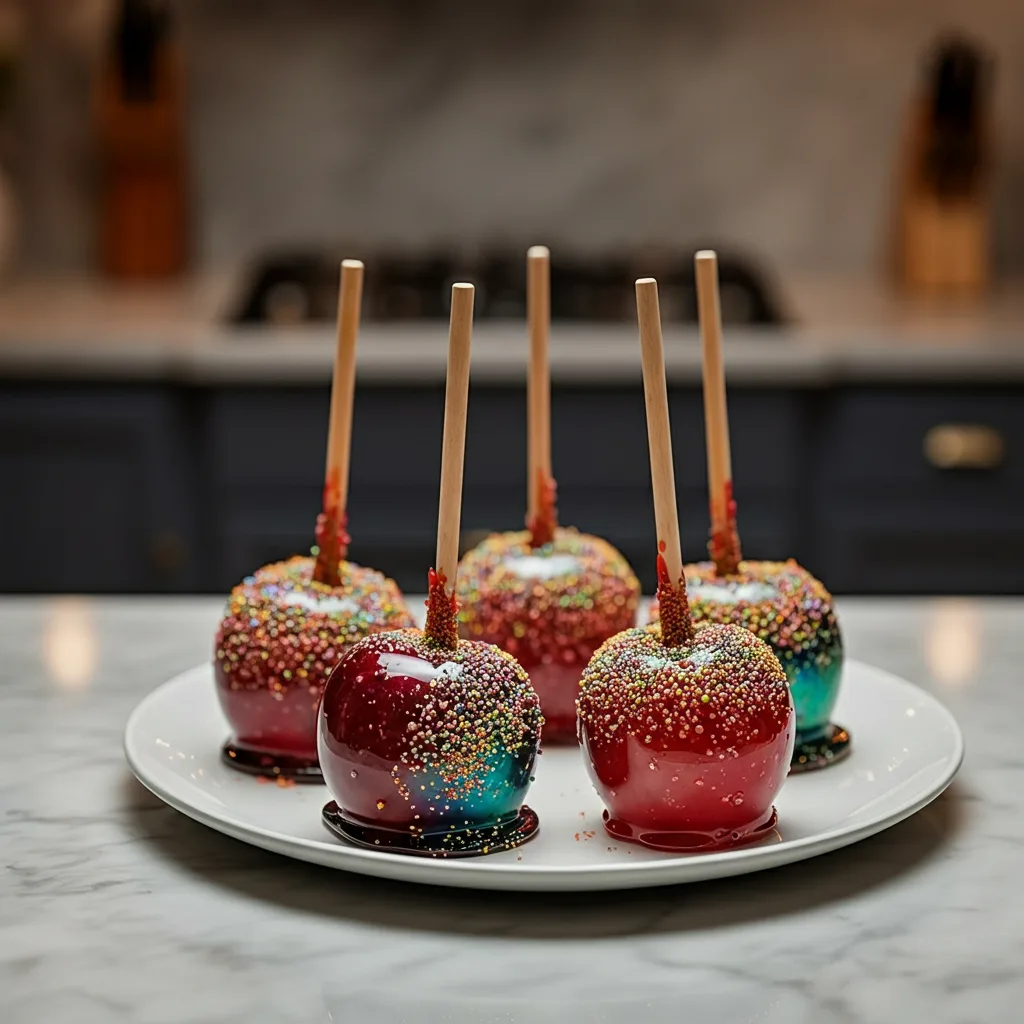
These Rainbow Candy Apples are practically a party on a stick, so serving them is all about presentation! I love arranging them upright on a pretty white platter for a stunning centerpiece at birthdays or festive gatherings. For a more casual vibe, you can wrap each one individually in a clear cellophane bag with a cute ribbon they make fantastic party favors or gifts! Pair them with a simple glass of milk or, for the grown-ups, a crisp sparkling cider. They’re sweet, so a refreshing drink cuts through that richness beautifully. Imagine these at a summer picnic or a Halloween bash they just scream fun and joy. Honestly, these are a dessert that creates memories.
The Story Behind Rainbow Candy Apples
Candy apples have this wonderful, timeless appeal, often linked to carnivals, fairs, and festivals. The story goes that they were invented by a candy maker named William Kolb in Newark, New Jersey, back in 1908. He was experimenting with cinnamon candy for Christmas and dipped an apple in the leftover mixture and voilà! A classic was born. For me, these Rainbow Candy Apples are a modern twist on that tradition, bringing even more color and cheer. My own connection goes back to those annual fair visits with my grandparents, the smell of popcorn and sugar in the air, and that feeling of pure wonder. Creating a rainbow version feels like a little homage to that joy, bringing a burst of happiness to my kitchen and to anyone who tries them.
There’s something truly special about seeing a batch of these Rainbow Candy Apples all lined up, shimmering and colorful. It’s a bit of work, a little bit of kitchen chaos, but the result is always worth it. They bring out the kid in everyone, me included! I hope you give them a try and create your own sweet memories. Don’t be afraid to get a little sticky, that’s half the fun, right? Please share your colorful creations with me I’d love to see what you come up with!

Frequently Asked Questions About Rainbow Candy Apples
- → Why are my Rainbow Candy Apples sticky?
Usually, sticky candy apples mean the syrup didn’t reach a high enough temperature (300°F) or there’s too much humidity in the air. I’ve had that happen, and it’s frustrating! Make sure your thermometer is accurate, and try to make them on a dry day.
- → Can I use different apples for Rainbow Candy Apples?
Absolutely! I’ve used Granny Smiths for a tart contrast, and they work great. Just ensure they’re small, firm varieties. Stay away from soft, mealy apples, they won’t hold up well to the hot syrup or give you that satisfying crunch.
- → How do I get such vibrant colors for my Rainbow Candy Apples?
The secret is gel food coloring! It’s super concentrated, so you need less of it, which means it won’t thin out your candy syrup. Liquid colors just don’t pack the same punch, and I always end up with muted colors if I try them.
- → Can I make Rainbow Candy Apples ahead of time?
You can! They’re best within 24-48 hours. I usually make them the day before an event. Remember, store them at room temperature, individually wrapped. I once made them too far in advance, and the apples started getting a bit soft, losing their crispness.
- → What if my candy syrup for Rainbow Candy Apples seizes up?
Oh, the dreaded seize! This often happens if you stir the syrup too much once it starts boiling, or if a sugar crystal gets introduced. If it seizes, honestly, it’s best to start over. It’s an oops moment, but we learn, right? Just remember, no stirring!

Rainbow Candy Apples: A Glimmer of Childhood Joy
- Prep Time: 30 Minutes
- Cook Time: 20 Minutes
- Total Time: 50 Minutes
- Yield: 8 Servings 1x
- Category: Low Carbs Meals
Description
Rainbow Candy Apples bring vibrant color and sweet crunch. Relive childhood memories with this fun, easy recipe, perfect for parties or a delightful treat.
Ingredients
- Crisp Apple Base:
- 8 small apples (like Fuji or Gala), washed and thoroughly dried
- 8 candy apple sticks or sturdy wooden skewers
- Vibrant Candy Coating:
- 3 cups granulated sugar
- 1 cup light corn syrup
- 1 cup water
- 1 teaspoon vanilla extract
- Gel food coloring (various rainbow colors, e.g., red, orange, yellow, green, blue, purple)
- Sparkly Finishing Touches:
- Rainbow sprinkles or edible glitter (optional, but highly recommended!)
Instructions
- Prep Your Apples:: First things first, grab your apples and give them a good wash to remove any waxy coating. I usually scrub them with a little warm water and vinegar, then dry them *completely*. This is so important, hon, because any moisture will mess with your candy. Then, firmly insert a candy stick into the stem end of each apple. I always make sure it’s snug, I learned that the hard way when an apple plopped right into the hot syrup!
- Start the Candy Syrup:: In a heavy-bottomed saucepan, combine your granulated sugar, light corn syrup, and water. Stir gently over medium heat until the sugar dissolves. Don’t stir too vigorously once it starts boiling, that’s a rookie mistake I used to make! Just let it do its thing. You’ll see the mixture go from cloudy to clear, and that’s your cue that the sugar is fully dissolved. This step is crucial for perfect Rainbow Candy Apples.
- Bring to Temperature:: Attach a candy thermometer to the side of the pan, making sure it doesn’t touch the bottom. Bring the syrup to a boil without stirring. We’re aiming for 300°F (150°C), also known as the hard crack stage. This takes patience, so don’t rush it! I always get a little anxious watching the temperature climb, but trust the thermometer. If you pull it off too early, your candy will be sticky, not crunchy.
- Add Color & Flavor:: Once the syrup hits 300°F, immediately remove it from the heat. Carefully stir in your desired gel food coloring for each batch and the vanilla extract. Be quick but gentle. I usually divide the syrup into smaller, heat-proof bowls if I’m doing multiple colors for a true rainbow effect. The smell of the vanilla hitting the hot syrup is just lovely!
- Dip Your Rainbow Candy Apples:: Working quickly, tilt the bowl of syrup and dip each apple, swirling it to coat completely. Let any excess drip off back into the bowl. This part can get a little messy, but it’s so satisfying to see the vibrant color coat the apple! I sometimes tap the stick gently on the side of the bowl to get rid of drips. Don’t worry if it’s not absolutely perfect, a little character is good!
- Decorate & Cool:: Immediately after dipping, if you’re using sprinkles, roll or sprinkle them onto the coated apples. Then, place the Rainbow Candy Apples on a piece of parchment paper or a silicone baking mat to cool and harden completely. This takes about 20-30 minutes, sometimes longer in humid weather. Resist the urge to touch them until they’re totally firm! They’ll look so shiny and inviting.


